How to Tie Off a Stitch in Embroidery: A Beginner's Guide
How to Tie Off a Stitch in Embroidery: A Beginner's Guide
How to Tie Off a Stitch in Embroidery: A Beginner's Guide
Frequently Asked Questions (FAQs)
How to tie the end of a stitch?
To tie off a stitch, you can use a double-threaded or single-threaded method. For double, tie three knots and tighten against the fabric. For single, loop the thread, pull tight, then trim excess.
How do you lock off a stitch?
When hand sewing, leave a 6-inch thread to work with. Insert the needle under the nearest stitch, pull through, and pass it through the loop. Pull tight to create a secure knot.
How do you tie off a button on a stitch?
To tie off a button, push the needle through the fabric and make three or four stitches to secure the thread. Tie the thread off and cut the excess with scissors.
How do you run off a stitch?
If you get a stitch while running, slow down, walk, and take deep breaths. Stretch your arms overhead, lean forward, or stretch the affected side. Stay hydrated by drinking at least 64 ounces of water a day.
What is the ideal thread length for hand-sewing?
When hand-sewing, aim for a thread length of around 100 yards. This provides ample length for comfortable knotting and precision.
How do you finish a machine stitch?
To finish a machine stitch, sew until you’re near the edge of the fabric. Then, press the reverse button to backstitch over your existing stitches. Return to forward stitching, and finish with the needle raised.
How do you prepare threads for embroidery?
Before embroidering, cut a 50-70cm thread length, then separate and snip two strands, each with six smaller strands. For linen, prepare fabric by soaking in hot and cold water, then ironing.
Can you use a machine stitch on felt?
Yes, you can use a machine stitch on felt. It’s versatile and suitable for whichever method you prefer. Straight stitch is best for machine sewing felt, and you can use a zig-zag stitch or tricot stitch if you like.
What are the best tools for cutting fabric?
Oh, the irony! You want to cut fabric, not cut corners. Well, you’ve got options: shears, scissors, snips, rotary cutters, and even fabric-cutting machines. Time to get snippy!
Starting a Thread With a Temporary Knot
Surprisingly enough, the best way to start a thread is with a knot — but it's not a permanent fixture in the back of your embroidery. Rather, using a temporary knot makes it easy to start your stitching without risk of pulling the thread through, all the while securing it in place and keeping your work tidy.
There are two basic temporary knots used to start embroidery. These are the away knot and the waste knot. Both versions start with a knot at the end of the embroidery thread. An away knot works with virtually all embroidery stitches, while a waste knot is best worked with a stitch that has the potential to cover the tail as you stitch, securing it in place. Satin stitch and cross stitch are two good examples, as both of these stitches cross the tail of the knot on the backside of the work.
- Away Knot: An away knot is worked 3 to 5 inches away (hence its name) from the area where the embroidery begins. The knot is clipped after working the embroidery, and then you thread your needle with the tail and weave it through the stitches on the backside of the fabric in the same manner as you weave the tail when ending a thread. Note that you will be wasting a few inches of your embroidery thread, so you may want a different option if you are using expensive threads. You also need to be careful not to cross your threads with the tail of the away knot while working your embroidery.
- Waste Knot: A waste knot is placed on the front side of the fabric, drawing out its tail on the backside to work over. As you work towards the knot you are covering and locking the tail of the knot in place. Once it is secured, you trim the knot away.
All of this said, if you do use plain old knots to start and end your embroidery, the embroidery police will not come after you. It's okay to use the method that you're most comfortable with. Just consider how a piece will be used and how those knots might end up looking from the front.
Machine Stitching Methods
Machine stitching success relies on practice and familiarity with your sewing machine. Here are tips to help you conquer this technique:
- Practice is key: Before starting a project, warm up on scrap fabric. This lets you get a feel for the machine and boosts your control over stitching.
- Find the reverse button: All modern sewing machines have a reverse button, vital for securing your stitches. Know where it’s and how to use it.
- Backstitching brilliance: Engaging the reverse button makes the machine stitch backward, creating strong backstitches. Adjust stitch length for added strength where needed.
- Complete with forward stitching: After making 3-5 backstitches, release the reverse button and stitch forward to secure those backstitches, preventing them from loosening.
Extra tips to enhance your stitching journey:
- Stitch with boldness: When beginning a new project, select fabrics that are beginner-friendly. As your skills grow, you can experiment with different fabric types.
- Safety remains a priority: Always adhere to sewing safety guidelines, like using the handwheel for needle control and maintaining thread length when cutting.
- Test with practice runs: Before your final project, experiment with various fabrics and threads to understand how they work with your machine, allowing you to adapt your techniques.
- Discover stitch varieties: Explore the stitch patterns and lengths your machine offers to add interest and texture to your sewing projects.
To Knot or Not
When I first started learning embroidery a few years ago, I primarily turned to books to teach myself how to stitch. Most authors whose books I thoroughly enjoyed frowned heavily on the practice of using knots. But then again, others saw nothing wrong with it and told you to just go ahead and secure your threads with knots if that’s what your heart desired. After all, when all is said and done, no one looks at the back of embroidery, right? Who’s to know or care?
The Case For Knots
The truth is, it really depends on what you’re embroidering and what purpose the final piece will serve. Generally speaking, knots are less secure than the other methods I’m about to show you. They come undone easier, and if your piece is going to be washed repeatedly, you run the risk of having your beautiful stitches come undone.
They also add unnecessary bulk, and if you like the back of your embroidery clean, they make everything look messier. However. Sometimes a knot is just easier and makes sense. Sometimes you want to go a little faster, and sometimes you might get a little lazier. I’ll be the first to admit that I do that 😉
If you’re just practicing your stitches on a fabric scrap, or you know your piece will stay in the hoop and the back will be finished with another piece of fabric, then I really can’t blame you for wanting to use knots. I think they’re perfectly acceptable in certain cases, especially if you’re framing your final work.
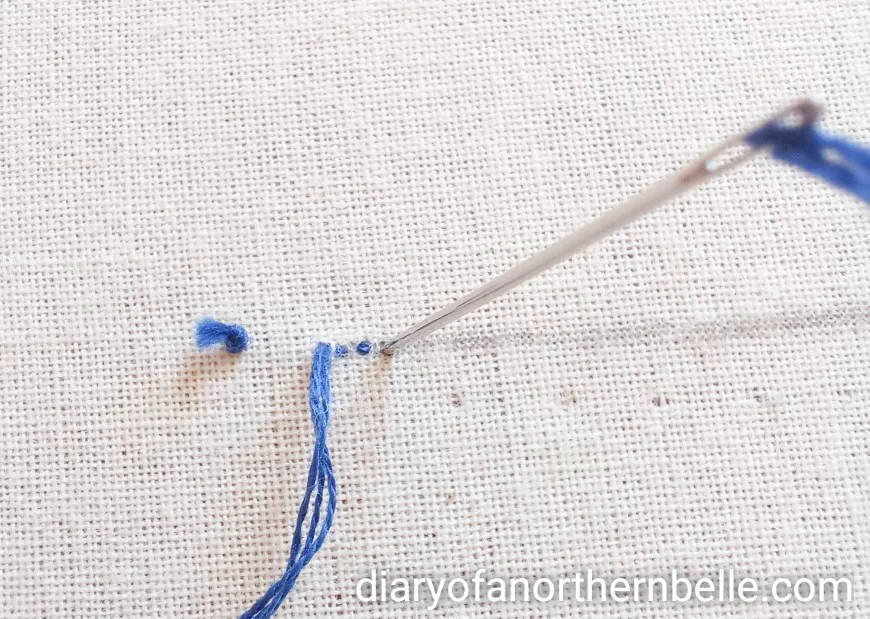
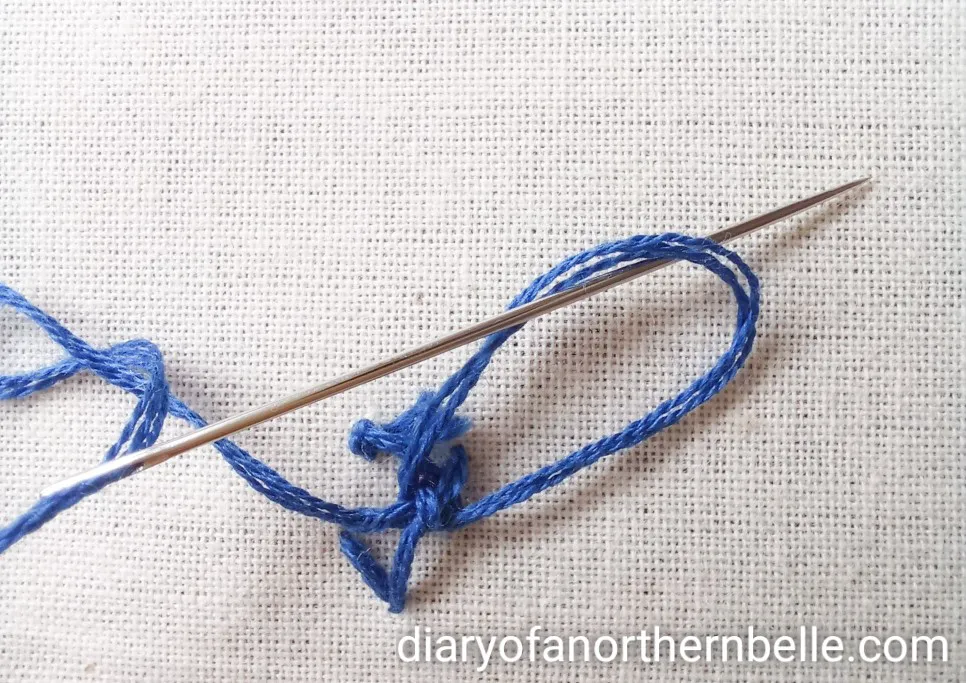
How to Start With a Good Old-Fashioned Knot:
Begin by gathering the materials you will need for embroidery – you can find more information on that in this post. Prepare a piece of fabric and mount it in your embroidery hoop. Then, thread an embroidery needle. I used 3 strands of navy Anchor cotton floss for this tutorial.
Leave a tail of 3”-4” hanging from the eye of the needle (the eye is the hole where you thread).
Form a knot at the end of your main length of floss (not the tail). Pull to tighten, and snip off any excess thread.

Tegs:
Search
Recent Posts
-
Learn to Fill Stitch Like a Pro with This Easy-to-Follow Tutorial
Apr 14 2025
-
Master the Running Stitch: Explore Elegant Hand Embroidery Designs
Apr 16 2025
-
Lazy Daisy Embroidery Stitch: A Step-by-Step Guide to Floral Beauty
Apr 16 2025
-
Embroidered Knit Look: Mastering the Stitch that Mimics Knit
Apr 17 2025
Subscribe to Updates
Get the latest posts and fashion insights directly in your inbox.