Master the Fill Stitch in Embroidery: A Step-by-Step Guide
Learn to Fill Stitch Like a Pro with This Easy-to-Follow Tutorial
Learn to Fill Stitch Like a Pro with This Easy-to-Follow Tutorial
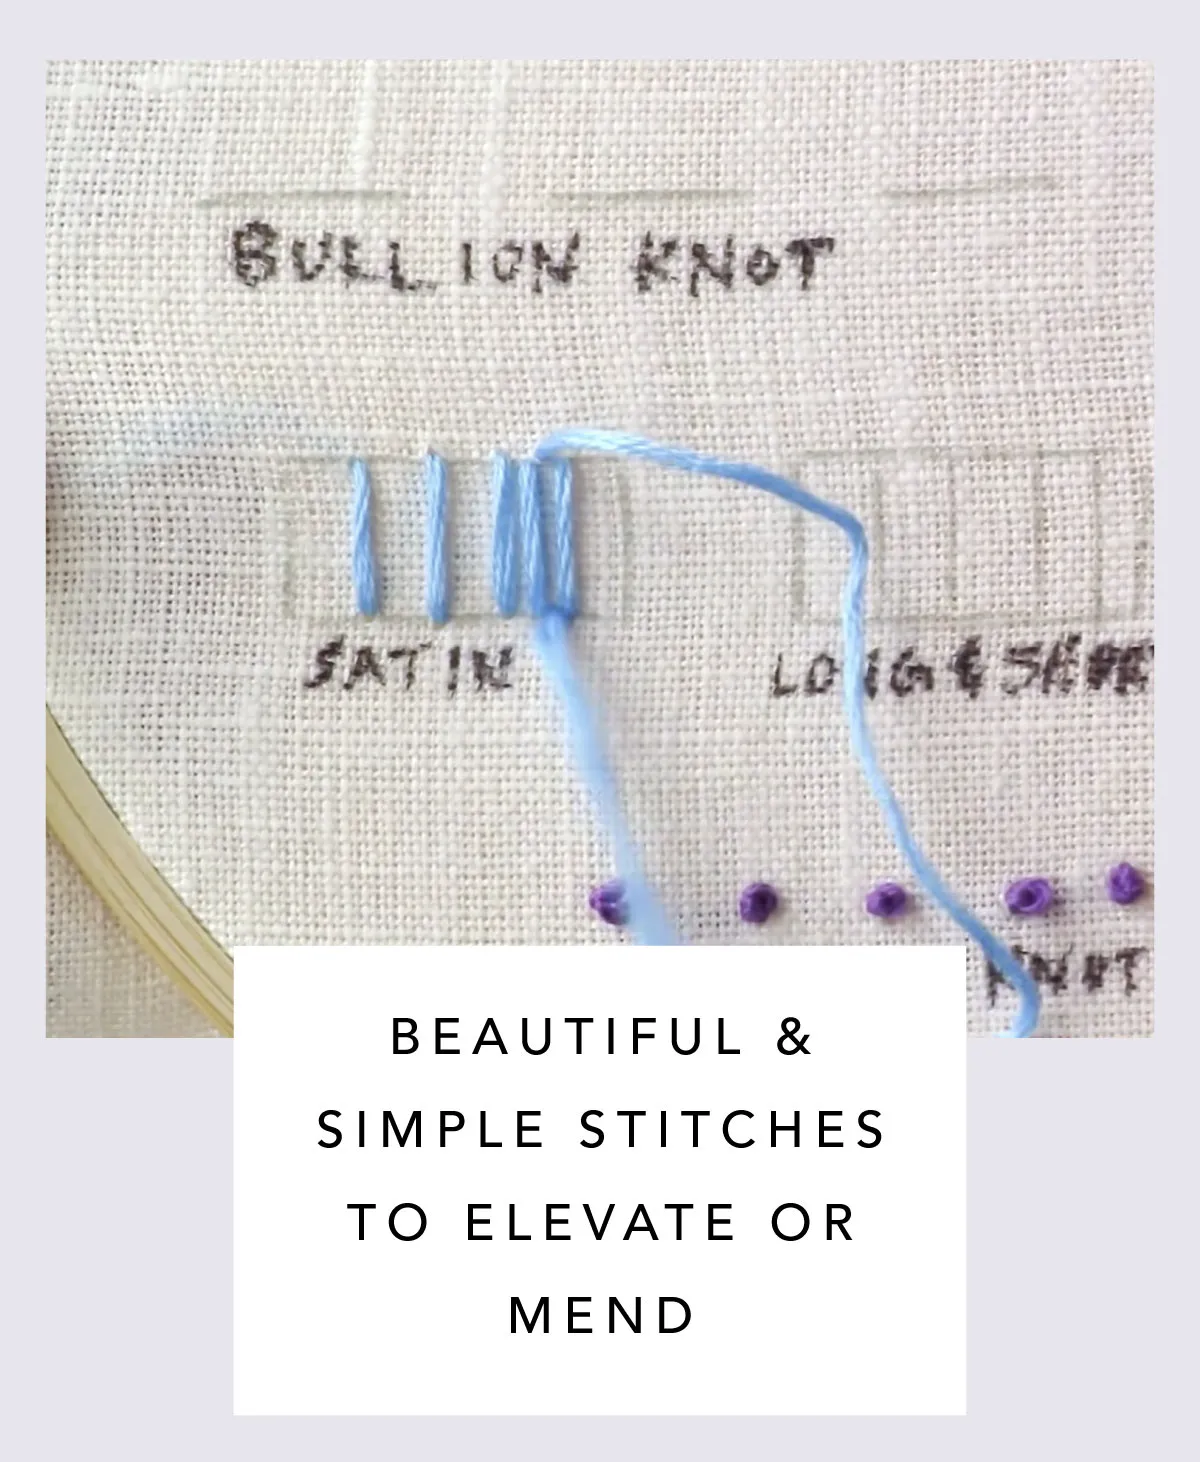
Knots As Embroidery Fill Stitches
Feelin’ extra? Add texture to your embroidery using these knot stitches.
- French Knot Stitch– This is often used as an individual stitch, but when stitched closely together as filler, it creates an attractive, nubby texture for your embroidery. French Knot Stitch is made by wrapping the thread around a needle twice and inserting the needle close to where it came out. The wrapped thread is then pulled tightly, leaving a small bump.
- Danish Knot– This is a simple, stand-alone knot that can be used as a filing or decoration. To make a Danish Knot, you’ll use three points and wrap your thread around itself as you go. The most important thing is that you don’t tug too hard on your thread, or your shape will get distorted.
- Colonial Knot– Can’t make a French knot? Try a Colonial knot instead. It’s very similar to a French Knot, but instead of just wrapping the thread around twice, you make a figure 8 around the needle.
Satin stitches, split satin stitches and fill stitches made to look like a satin stitch.
Most embroidery typefaces are comprised of satin stitches that vary in width based on the shape of the letter form. However, sometimes the letterform is either too wide or too narrow for the satin stitch to be effective. When the letterform is too wide for a satin stitch, they will either choose a fill stitch or a split satin stitch. When it’s too narrow, they might digitize that part with a running stitch.
Split satin stitch
Professional digitizer, Matt Denison, explains why he likes a split satin stitch on areas of letters that get too wide for a simple satin stitch.
If a satin [stitch] is desired – even when the column is wide – you could use a “split satin” and activate it at any width you prefer. For instance this letter “I” is a half inch wide satin so i set a “split” on any stitch wider than 10mm. I also have it set to split at a distance of 8mm between stitches that way its not a visible consistent split line right down the satin. This way it staggers every other stitch and the end result still looks more like a solid satin.
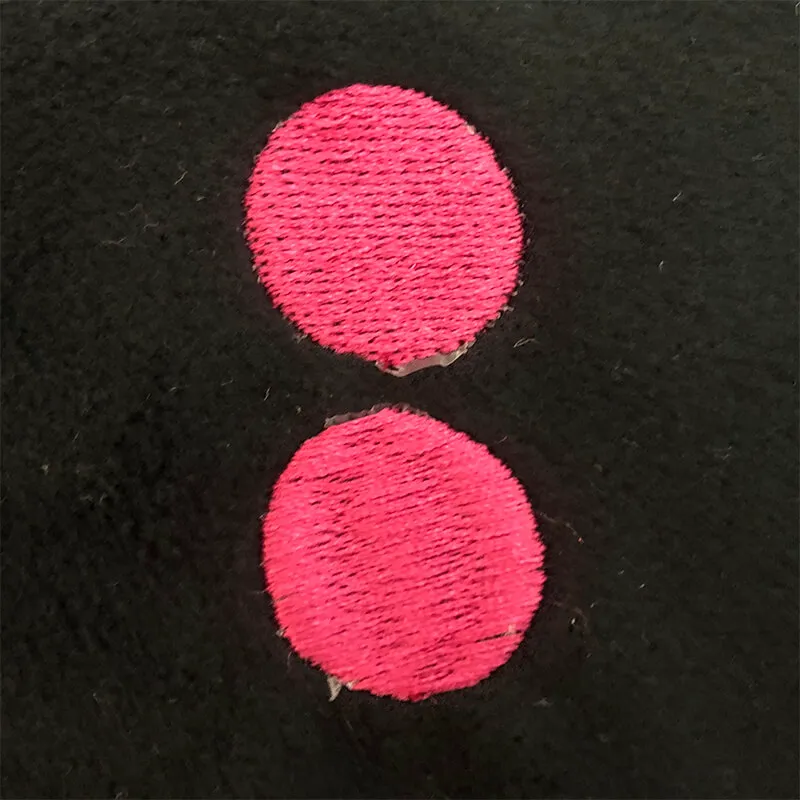
Fill stitch that looks like a satin stitch
Another digitizing trick that Matt uses to create the look of a satin stitch without having the stitches get too wide is to use a fill pattern in the column with a very wide stitch length. This technique can keep the column of stitches sitting higher, more like a satin does. In the example, below, the purple horns are set at a stitch length of 5.2mm.
The horns pictured above are automotive interior panels. Matt didn’t want to use a wide satin stitch that could risk snagging and pulling out over time from wear and tear. He used a fill pattern but with a wide stitch length to help give the “lift” and pop that a satin would, while keeping it more stable for the long run.
Another example of a fill stitch that looks like a satin is the forget-me-nots designs from Meringue Designs. This is one of my favorite embroidery designs that I have used again and again, especially on pillows. Had she digitized the flowers as purely satin fills, they would easily get snagged.
Fill stitch
Fill stitch is type of embroidery stitch that is intended to cover an entire area. The goal of a fill stitch is usually to fill an area with stitches so that the fabric can not be seen through the embroidered area.
One very useful type of fill stitch is an underlay. Underlay stitching is a preliminary fill stitch intended to tack down all the fabric in the design area prior to stitching out the final fill stitch. It helps to prevent puckering and improves coverage in the embroidered area. Most digitizers will integrate underlays within their embroidery designs, especially under large areas of fill.
How to Work Satin Stitch in Hand Embroidery
Updated on 06/29/20Project Overview- Skill Level: Beginner
Basic satin stitch is a fill stitch covering small areas with smooth, close stitches that lay flat on the fabric. It's sometimes referred to as a flat satin stitch to differentiate it from other members of the satin stitch family. Other members include the long and short satin stitch, padded satin stitch, outlined satin stitch, and shaded satin stitch.
Traditionally satin stitch fills in an area without an outline around it, the stitching forming smooth shapes and even lines. Evenweave fabric can make this tricky at times, as the spaces designed for stitches create a "stepped" effect with your satin stitch. When working this stitch to create curves, adjust the placement of the stitches incrementally, and know that some shapes require that you take a stitch in a different way than you might expect. For example, when stitching the end of an oval, the ends are flat. But that's what makes the oval look right.
While satin stitch is usually smooth, it is fun to embellish with other stitches. For example, you might add a bit of couching in a contrast color to some longer stitches on a filled shape. Tacking down the satin stitch helps prevent snagging as well as jazzing up the look.
The more you work this stitch, the better you'll get at eyeing how to get the shapes you want. Until then, practice: take a few stitches and see if they look right. If they don't, pull them out and adjust them.

Tegs:
Search
Recent Posts
-
Learn How to Fill in a Circle with Embroidery: A Guide to Creating Stunning Circular Designs
Apr 25 2025
-
Master Embroidery Pattern Filling: Essential Techniques and Tips
May 3 2025
-
How to Tie Off a Stitch in Embroidery: A Beginner's Guide
Apr 14 2025
-
Learn the basics of cluster stitch knitting, a technique that adds a beautiful and unique texture to your knitted projects.
Apr 14 2025
Subscribe to Updates
Get the latest posts and fashion insights directly in your inbox.