Remove Embroidery from a Backpack: Easy and Effective Methods
How to Remove Embroidery from a Backpack: A Simple Guide
How to Remove Embroidery from a Backpack: A Simple Guide
Why would you want to remove embroidery?
You would want to remove embroidery from a backpack for several reasons.
The embroidered logo no longer represents your interests or brand, or you want to sell the backpack and prefer it to be blank.
Whatever the reason, the methods described below will help you effectively remove without damaging the material.
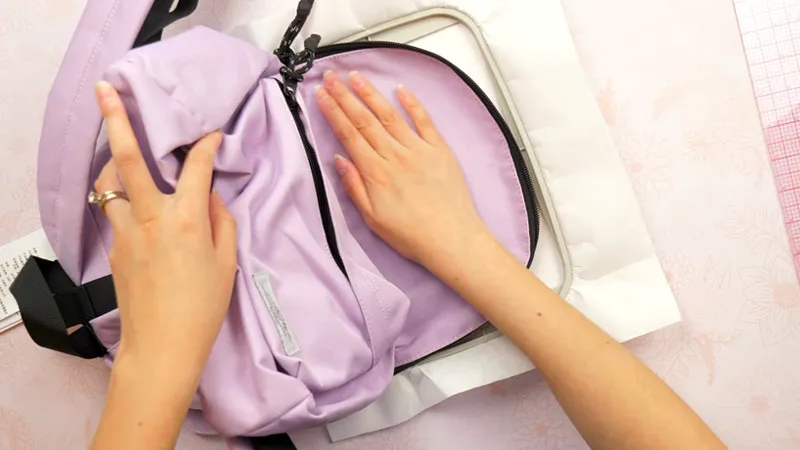
Method 1: Unstitching the embroidery
Tools required:
- Seam ripper or small embroidery scissors
- Tweezers
- Small, sharp scissors
- Seam sealant (optional)
Step-by-step process:
- Assess the embroidery: Examine the embroidery closely to determine its structure. Look for threads that pass under the fabric and tie off on the back.
- Begin unstitching: Use the seam ripper or small embroidery scissors to cut the stitches along the outline of the design gently. Be careful not to cut the backpack material.
- Remove excess threads: Once you have unstitched the embroidery, use tweezers or small scissors to remove any remaining loose threads.
- Clean and finish: If desired, apply a seam sealant to prevent fraying and secure the remaining threads.
Method 2: Using a seam ripper
Tools required:
- Seam ripper
- Tweezers
- Small, sharp scissors
Step-by-step process:
- Identify the stitching: Locate the stitches that secure the embroidery to the backpack. These stitches may be visible or hidden.
- Use the seam ripper: Insert the sharp point beneath the stitches and gently push it against the thread to cut it. Move along the stitching, repeating this process until the embroidery is entirely detached.
- Remove loose threads: After removing the embroidery, use tweezers or small scissors to eliminate any loose threads.
- Tidy up: If necessary, trim any remaining excess threads and clean the area.
Method 3: Using an embroidery removal gel
Tools required:
- Embroidery removal gel
- Clean cloth
- Cotton swabs
- Mild detergent
Step-by-step process:
How to Remove Printed Embroidery from Backpack?
How do you remove a monogram from a backpack? Well, removing printed embroidery from a backpack is not that easy but if you can follow proper and careful steps, you can successfully remove the printed embroidery. Let’s do that.
Well, we will use 2 methods here.
Method – 1: Using Nail Polish Remover
Removing embroidery monograms from backpacks is certainly a daunting task. However, to remove the printed embroidery monogram from a backpack, you require some necessary tools.
What you require:
- Nail polish remover
- Cotton wool
- Piece of soft cloth
- Piece of wood
Step – 1: First, what you need to do is place the piece of wood on a plain table or floor. Make sure the wood is placed directly behind the printed embroidery design. Putting the printed embroidery part in the exact place is important.
Step – 2: Now put the cotton wool just onto the printed embroidery design making sure it covers fully the design. You can reconfirm whether the cotton wool is still suitably placed or not by putting your hand on it. If it misplaces somehow, makes it right as it is told.
Step – 3: Again mark the printed embroidery design part that is just under the cotton wool and now pour about 20 – 30 ml of your nail polish remover onto the cotton towel. Remember, this amount of polish can soak the towel as well as the printed embroidery design beneath the cotton wool.
Step – 5: This time, you take another fresh cotton wool and let it soak with the nail polish remover or methylated spirit. Start rubbing gently and then rinse it hard on the printed embroidery design. After sometimes of rubbing, you will notice it disappearing. After about 30 minutes of rinsing, you can see the printed logo design on the backpack has cleared off nicely.
Method – 2: Using Hot Iron and Adhesive Paper
Removing printed embroidery from a backpack can be a delicate process, but it can be done with the help of a hot iron and adhesive paper. Here are the steps to follow:
What Tools Do You Require To Remove Embroidery?
If you intend to remove embroidery from your bag, there are some tools you must require. Besides those tools, you need to know how to remove embroidery from a backpack.
To remove embroidery, you will need the following tools:
- Seam ripper
- Small & sharp scissors
- Tweezers
- Thimble
- Needle
- Embroidery hoop
- And Magnifying glass
Let’s take a look at a glance at the tools and what they are used for –
- Seam ripper – a small tool with a pointed end and a sharp blade that is used to cut and remove stitches.
- Small & sharp scissors – for trimming any leftover threads.
- Tweezers – to remove any remaining threads or pieces of thread.
- Thimble – to protect your fingers from being poked by the needle.
- Needle – a sharp needle can be used to loosen and remove stitches.
- Embroidery hoop – to hold the fabric steady while you work.
- Magnifying glass – to help you see the stitches more clearly.
Remember to be careful while removing the embroidery, so as not to damage the fabric.
How to Remove Embroidery Using a Stitching Eraser
Removing embroidery using a stitching eraser is a simple process, but it requires some patience and attention to detail. Here are the steps you can follow:
Step – 1: Start by selecting the stitching eraser appropriate for the fabric you are working with. For example, use a fine-tip eraser for delicate fabrics like silk, and a heavier eraser for thicker fabrics like denim.
Step – 2: Locate the area of the embroidery that you want to remove. If possible, gently remove any loose threads or fabric around the area to make it easier to work with.
Step – 3: Hold the fabric taut with one hand, and carefully run the eraser along the stitches you want to remove with the other hand. Make sure to work slowly and carefully to avoid damaging the fabric.
Step – 4: Use a pair of tweezers or a needle to remove any remaining threads or fibers from the fabric.
Step – 5: Repeat the process until all the embroidery is removed.
Step – 6: Once you have removed the embroidery, use a lint roller or fabric shaver to remove any remaining fuzz or fibers from the fabric.
Step – 7: If necessary, wash the fabric to remove any remaining fibers or debris.
Remember to take your time and work carefully to avoid damaging the fabric. With a little practice, you should be able to remove embroidery using a stitching eraser with ease.


Tegs:
Search
Recent Posts
-
Alter Your Jeans: Learn to Take in the Waist by Hand
Apr 14 2025
-
Weave Care 101: Maintaining a Beautiful & Healthy Weave
Apr 15 2025
-
How to Remove Embroidery: Learn How to Take Off Embroidery Without Damage
Apr 25 2025
-
How to Take Quick Weave Out with Conditioner: Safe and Easy Hair Removal Techniques
Apr 25 2025
Subscribe to Updates
Get the latest posts and fashion insights directly in your inbox.