Sewing a Block Quilt: A Beginner's Guide to Patchwork Perfection
Mastering the Art of Block Quilting: A Comprehensive Tutorial
Mastering the Art of Block Quilting: A Comprehensive Tutorial
How To Make A Perfect Log Cabin Quilt Block
Learn how to make a perfect log cabin quilt block with this simple sew-along tutorial.
Making a quilt doesn’t have to be difficult, but it should be fun.
A log cabin quilt is a very traditional quilt made from a series of strip quilting blocks pieced together in a particular pattern.
It’s a pretty neat concept. One block, so many quilt options.
Some of these links are affiliate links. You can read my full disclosure HERE.
I love quilting. I love selecting the fabrics, figuring out where to place them on the block, and watching the pieces slowly come together to create something beautiful.
But let’s be honest, shall we? Making a quilt can seem very overwhelmingly intimidating. Especially as a beginner quilter/sewer.
We all want a finished quilt we love and can be proud of, right?
So let me walk you through how to make a log cabin quilt block so you have a quilt to love for years to come.
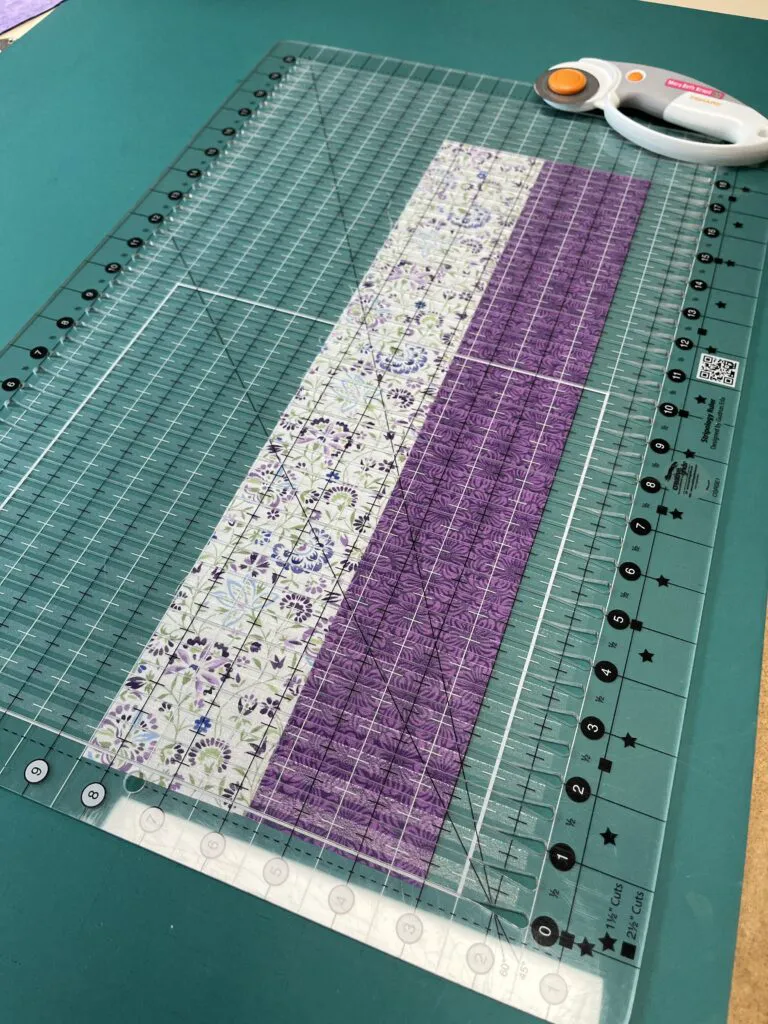
How to assemble a log cabin block
Again, if this gets confusing for you, print out the FREE resource guide I created for this particular quilt block. It will show you step by step which strip of fabric to add and when.
Working from LEFT to RIGHT:
- Start with your center fabric.
2. FIRST LIGHT then your FIRST DARK.
3. SECOND LIGHT then SECOND DARK.
4. THIRD LIGHT then THIRD DARK.
Place these in order (as listed above) from left to right. You’ll add each different colored strip TWO TIMES in the specified order. When you look at the log cabin block, you’ll notice that you have light-colored fabrics on one side and dark fabrics on the other.
Your fabrics are now ready so it’s time to start our block construction. If you have any difficulty putting your blocks together, refer to the cheat sheet pdf (above) or the video.
Understanding Block Quilt Basics
From my experience quilting, the flexibility of block designs is what draws many people to this style of quilt. You can get really creative with the blocks and mix up colors, textures, and patterns. At the same time, working with individual blocks makes the quilt assembly process straightforward compared to piecework quilts.
Before sewing a single stitch, it’s important to plan your quilt design on paper. Decide on the overall quilt size, number of blocks, block arrangement, and color scheme. Sketch out the layout and make any necessary fabric purchasing and cutting lists.
Some things to consider at the design stage include:
Proper planning results in a polished look and saves time in the long run versus winging the design. Feel free to modify as needed too. I’ve found it’s easier to rip out seams early on versus reworking a finished quilt.
Step #4 – Sewing Four-patch
Now you have 2 two-patch units. Arrange them the way you want your final block to look.
Flip the right over the left.
Align the seams where the seam allowances meet.
Because you pressed each one to the dark side, they will nest together nicely. This creates a “lock” at the intersection, making it easier to align the rows. You can feel it with your fingers when the two are locked together. If you want, you can place a pin at the seam. With small pieces like this, I feel confident stitching without using pins. But you do you.
Stitch using a 1/4 inch seam allowance.

Tegs:
Search
Recent Posts
-
Glass Craft Block Ideas: Inspiring Projects for Beginners and Experts
Apr 18 2025
-
Blocking Your Knitting: Achieve a Professional Finish with an Iron
Apr 25 2025
-
Unlock the Secrets to Blocking Your Crochet Blanket for a Stunning Result
Apr 25 2025
-
Descubre este completo bloc de papeles para tus proyectos de manualidades
Apr 29 2025
Subscribe to Updates
Get the latest posts and fashion insights directly in your inbox.