Easy Macrame Plant Hanger for Beginners: Step-by-Step Tutorial
Create a Stunning Macrame Plant Hanger: A Beginner's Guide
Create a Stunning Macrame Plant Hanger: A Beginner's Guide
Join our Community!
Enjoy my new X-Knot DIY Macrame Plant Hanger Tutorial. Scroll further down to find the written step-step-by instructions, cord measurements, and supply list!
Make Alternating Square Knots
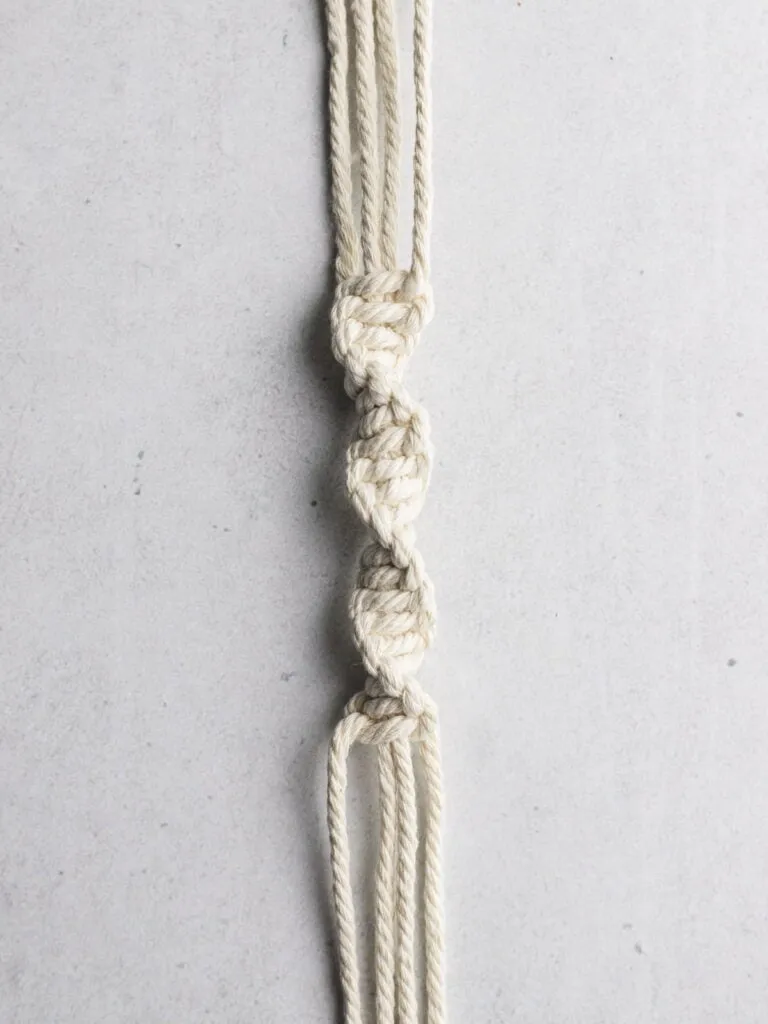
Now we’ll move on to the basket or “cradle” section at the bottom of the plant hanger. For this section, we’ll be making three rounds of alternating square knots.
Round 1: Move down 2 inches, and work a round of alternating square knots.
How to Make Alternating Square Knots
- Take cords 3 and 4 from the left group and cords 1 and 2 from the right group. Now you will have a new group of four cords.
- Reorganize the other two groups in the same way.
- Tie a square knot with each of the three new groups.
Round 2: Move down 2 inches (measured diagonally), and work another round of alternating square knots.
Round 3: Move down another 2 inches (measured diagonally), and work the third round of alternating square knots.
At this point, insert the plant pot into the basket section. The last round of alternating square knots should align with the bottom edge of the planter. If you’re using a larger or smaller pot than mine, you may need to adjust the spacing between the rounds of alternating square knots.
Hang the Macrame Planter
Now that the plant hanger is finished, it’s time to hang it up. You can hang your planter from the ceiling with a ceiling hook. Or, hang the planter on a wall-mounted plant hook.
Here are some tips for hanging plants:
- Use a stud finder to locate a joist (ceiling) or stud (wall). Make sure to screw the hook into a joist or stud.
- Choose a hook screw that is made to support the weight of your hanging plant.
- If you can’t find a suitable joist or stud, use a toggle screw anchor to keep the hook in the ceiling.
Use a Colorful Thread to Add Interest
Don't underestimate simple macrame patterns. However, if you want your macrame plant hanger to look less basic, consider adding a fun pop of color like Lia Griffith did here. This tutorial is simple and easy to follow with clear pictures and instructions. Easy DIY Macrame Plant Holder from Lia Griffith
03 of 15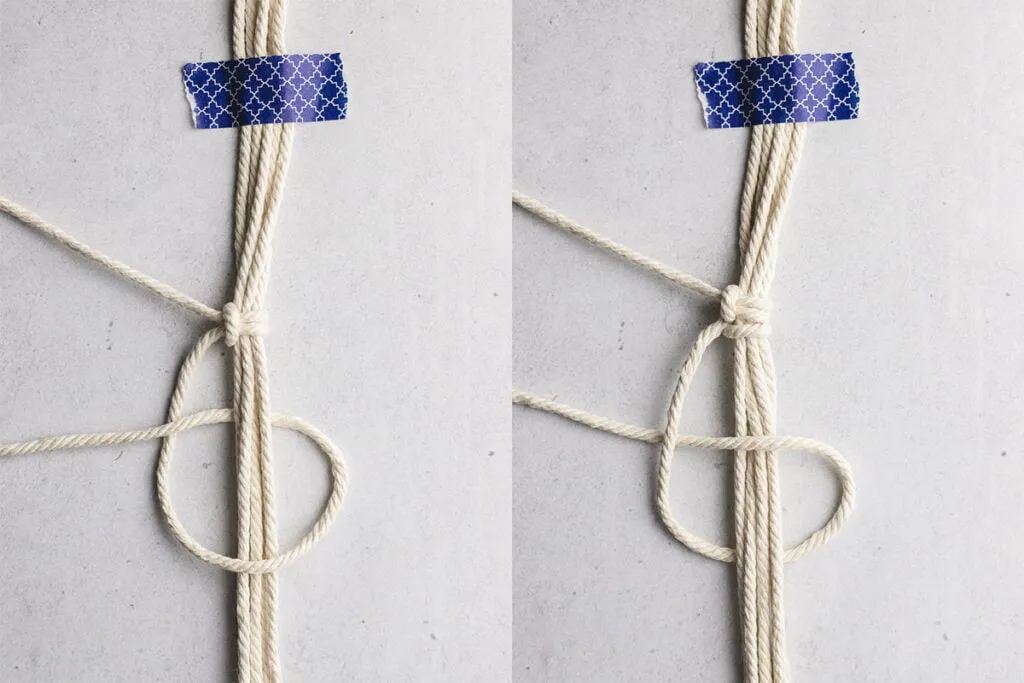

Tegs:
Search
Recent Posts
-
What Can You Make with Embroidery? A Guide to Creative Projects
Apr 14 2025
-
Create a Stunning Wall Hanging with This Easy Macrame Tutorial
Apr 14 2025
-
Learn How to Knit Bobbles: A Simple Guide with Pictures
Apr 14 2025
-
Embark on Your Embroidery Journey: A Beginner's Guide to Creating Beautiful Stitches
Apr 15 2025
Subscribe to Updates
Get the latest posts and fashion insights directly in your inbox.