Macrame Ring Wall Hanging: A Step-by-Step Guide
Create a Stunning Wall Hanging with This Easy Macrame Tutorial
Create a Stunning Wall Hanging with This Easy Macrame Tutorial
How to make a macrame angel
Yield: 1 macrame angelActive Time: 30 minutesTotal Time: 30 minutesDifficulty: easyEstimated Cost: -$20Learn how to make a pretty macrame angel with this simple, step-by-step tutorial that includes three different free macrame angel patterns.
Materials
- macrame yarn (I had several thicknesses and colors left in natural colored 2mm macrame cord, khaki 3mm macrame cord, and natural colored 4mm macrame cord)
- fabric stiffener
- wood beads (these 3/4-inch wooden beads are perfect for adding hair with macrame yarn since the holes are bigger)
- 2-inch macrame rings
Tools
- hot glue gun (if you add hair)
- sharp scissors
- comb
Instructions
- Cut your macrame pieces
cut 2 pieces of 2mm ivory macrame yarn at 10 inches
cut 2 pieces of 4mm natural macrame yarn at 8 inches
cut 10 pieces of 4mm natural macrame yarn at 10 inches
- Create the angel body
Take the ten 9-inch pieces to create the body of the macrame angel by tying them together in the center with one of the 10-inch 2mm pieces of yarn. Then fold them in half at the center where you just tied the pieces together.
- Add the angel head/wood bead
I like adding the wood bead/head before tying off the body shape to get a sense of proportion first. Simply insert the 2mm yarn ends through the wood bead.
- Tie off the angel dress
Now that you have an idea of proportions, you take the other 2mm piece of macrame yarn (or other thin twine) to tie off the waist of the angel dress. Trim the knot.
If you aren't new to macrame, you can use the Gathering Knot Method but I simply just knotted the piece of yarn in the back, which is fine and makes things easier. The wings will hide this knot in the end. - Add the basic wings
Take the two 8-inch 4mm macrame yarn pieces and fold them in half. Then, add them to the body shape with a Square Knot. This is exactly what you do repeatedly when making a macrame feather. For this macrame angel, you only do it once instead of stacking them repeatedly.
Simply place one piece folded in half behind the body of the angel. Then place the second piece folded in half in the opposite direction on top of the body.
After that thread each open end through the opposite loop and pull tight. - Unravel, comb, and stiffen the yarn (optional)
Use a comb and your hands to unravel the dress and wings of the angel. I placed the macrame angel on a dinner plate and sprayed it with fabric stiffener. Then I combed the wet yarn back into the angel shape and let it dry overnight, but that is optional.
- Trim the yarn
Once the fabric stiffener has dried, it is easy to trim the edges of the angel dress and wings with sharp scissors.Also, knot and trim the string for hanging the angel.
Voila, here is the simplest way of making a macrame angel without any frills and only one simple macrame knot.
How to make long narrow wall art using combed macrame yarn and embroidery floss
This post may contain affiliate links from which I will earn a commission at no extra cost to you. View my full disclosure policy.
Materials needed
- macrame yarn (I used THIS 4mm but you can use others too)
- colored or plain embroidery floss of your choosing
(color numbers I used: 407, 436, 977, 3779, 976, 3826, 402, 922, 21) - sharp scissors
- hair clips
- fabric stiffener or HERE
- styrofoam balls (I used 2.3 inch and 1.8 inch balls)
- skewer or drill bit to make holes into foam balls
- comb
- brush (I love THIS one for these types of projects)
- wood ring (I used a 3.7-inch wooden ring), a dowel rod or you could use a pretty towel bar like THIS, THIS, or THIS for example)
Video tutorial
Below I added my video tutorial. Use the triangle on the image to turn on the video. If you are on a cellphone or other device, turn it horizontally for better viewing. If for whatever reason it doesn’t play on my blog then you can also view it on my YouTube channel.
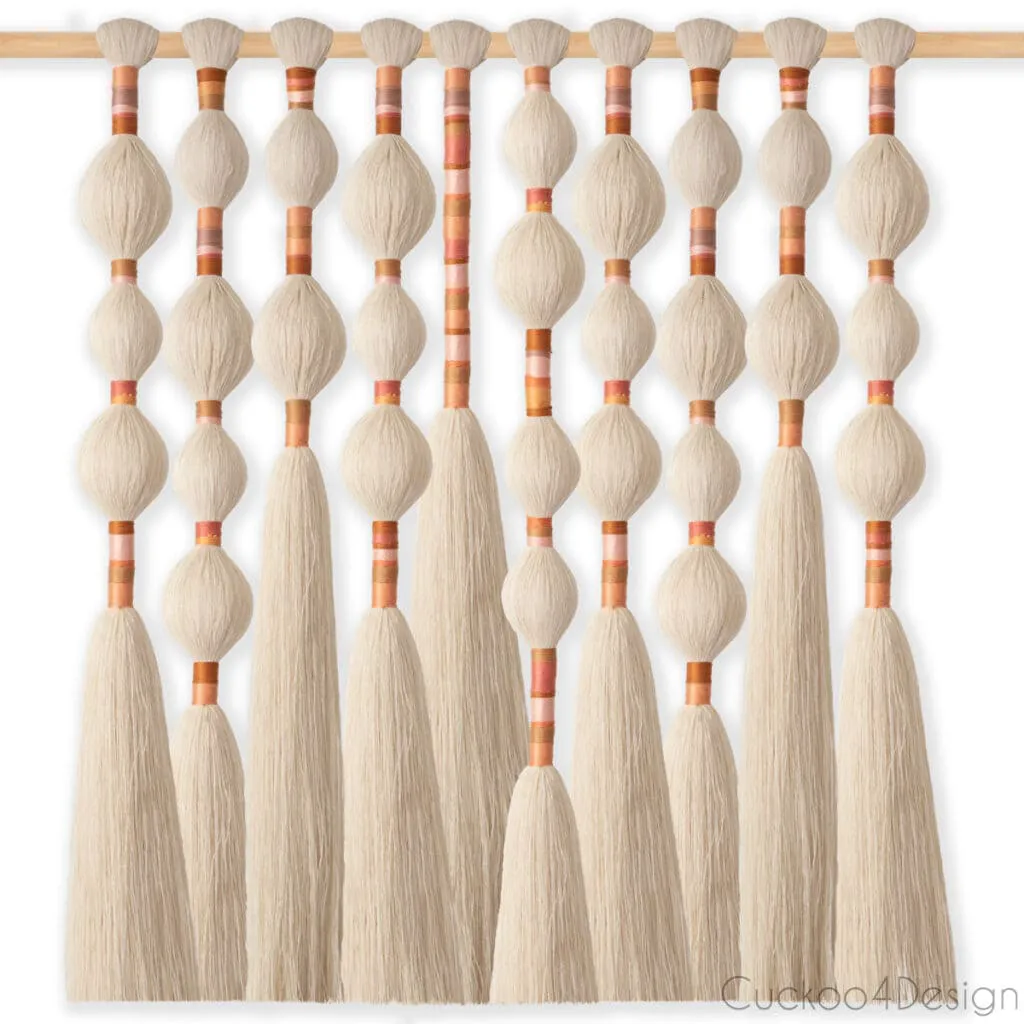
Step-by-step instructions for how to make this long narrow wall art with combed macrame yarn and embroidery floss
How to easily unravel and comb macrame yarn
Opening and combing macrame yarn is one of my favorites and I have done it so many times now that I developed a trusted method. I used opened macrame yarn for my giant macrame rope tassel garland, macrame light fixture, modern macrame wall hanging, macrame knot bracelet, and fringe earrings just to name a few. You might be wondering what it is about having the combed and straightened yarn but I love it. It is relaxing, almost like raking sand or combing my barbie’s hair when I was a kid. I know I’m odd. Don’t judge!
Where to buy similar wall hangings
And for those of you who don’t feel like making your own, below are some other versions for sale. I feel like I showed everyone how to make these and suddenly they are popping up all over the place on Etsy. (images take you to the source)
if you love knock-off projects, then also check out my custom acrylic tray using gold spikes and Anthropology lampshade knockoff.
And if you are wondering about the kitties and the yarn, well they are actually leaving it alone and haven’t even been interested once.
How to make a macrame ghost wall hanging
Yield: macrame ghostActive Time: 45 minutesTotal Time: 45 minutesDifficulty: easyEstimated Cost: -$15Learn how to make a cute and easy macrame ghost wall hanging with a metal hanger and macrame yarn. The perfect spooky touch for your home!
Materials
- metal hanger (usually from a dry cleaner)
- macrame yarn ( I used 2mm macrame yarn)
- black paper or black felt
- standard glue or hot glue
Tools
- metal snippers
- pliers
- scissors
- measuring tape
- comb or fur brush
Instructions
- Bend metal hanger to shape
Start by cutting the top part of the hanger off with metal snippers. After that bend the hanger into a straight line that lays flat. The most important thing for this macrame ghost is that the hanger lays flat.
Use a round shape to bend the hanger into the head shape of the ghost. I used a soy sauce bottle and bent the hanger in the center around the bottle.
Next are the arms, which I bent by hand. Snip the arms to length and then bend the ends inward. This is so the macrame cord can't fall off later.
I started by cutting 22 cords at 42 inches long and 29 cords at 20 inches long for the shorter cords. (in addition, you need an extra long cord for the left side of the arm but more details about that later)
Loop the macrame cords onto the metal hanger
It doesn't matter where you start looping on the macrame cords. I started with the ghost's head using the long macrame cords. In the below steps, I'm showing you how to attach the cords with a Lark’s Head Knot. You can see it even better in my video tutorial.
Fold the cord in half and lay the top loop onto the hanger. After that grab the cords from under the hanger and pull them through the loop. Then pull the cords tight. Keep repeating that with all the cords until the head of the ghost is filled. Cut more cord if needed and don't make the cord lineup too tight because you will need extra space when following up with the knot in the second row.
After that move on to the arms with the shorter cords the same way you just added the cords to the ghost head. You can secure one of the arms to your working surface with tape like I did if that helps.


Tegs:
Search
Recent Posts
Subscribe to Updates
Get the latest posts and fashion insights directly in your inbox.