Adorable Bunny Butt Crafts: A Fun and Easy DIY Project
Hop into Creativity: Adorable Bunny Butt Crafts for All Ages
Hop into Creativity: Adorable Bunny Butt Crafts for All Ages
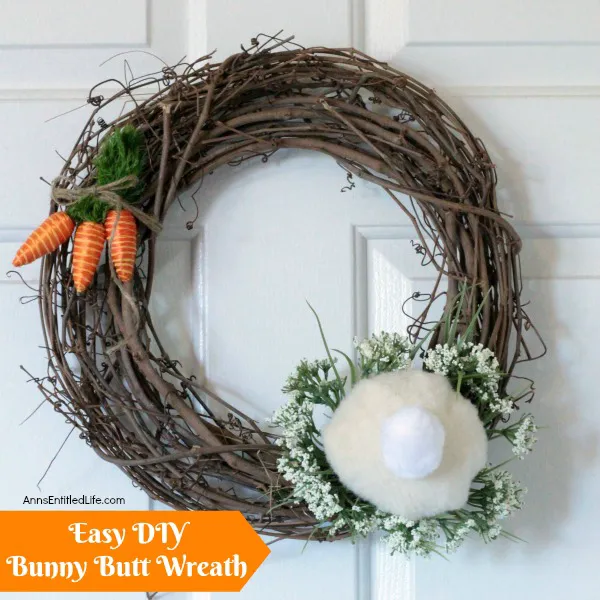
Easy DIY Bunny Butt Wreath
Please note: Posts may contain affiliate links or sponsored content. For more of our disclosure policy, click here. For more of our privacy and cookie policy, click here. As an Amazon Associate I earn from qualifying Amazon.com Services LLC purchases.
Easter bunny wreaths are adorable. If Easter is one of your favorite holidays and you are looking for an easy-to-make Easter bunny wreath, why not make the bunny bottom for your Easter wreath? This is a cute Easter craft that will look terrific on your front door.
Easter Candle holder decoration
For my Easter candle holder decoration, I wanted to give it a rustic farmhouse vibe, so I started by decorating the sides of the candle holder with small wooden bunnies.
I glued them around the holder, making sure to space them out evenly. Then, for the base, I added a bed of green artificial grass to create a natural look.
I finished it off by placing colorful plastic Easter eggs (which I found at the dollar store) around the grass, adding a fun, festive touch.
The whole project cost me around $10–$15, as most of the items came from the dollar store, and it took me about an hour to put everything together. It turned out to be the perfect touch for my Easter décor!
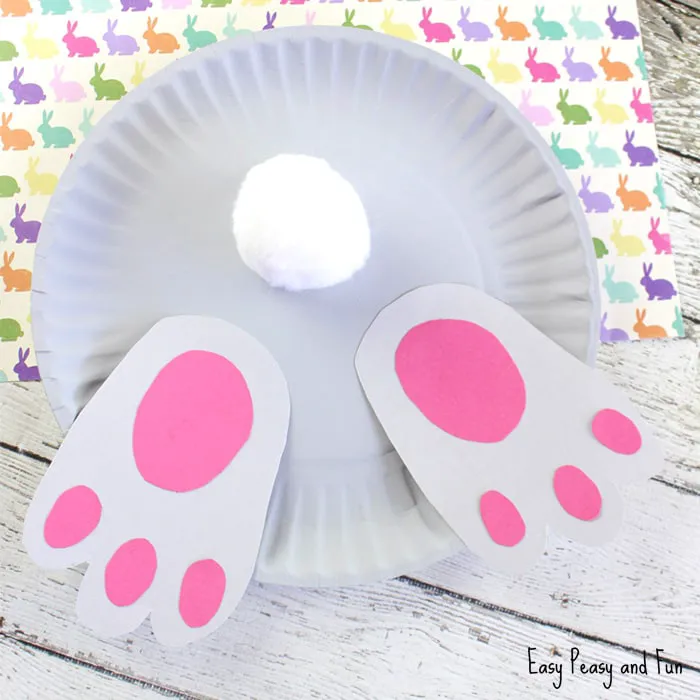
Let’s Make the Bunny But Paper Plate Craft
Paint the entire front of the paper plate with the grey colored paint. Set aside to dry.
Draw 2 bunny paws on the grey construction paper.
Cut out 2 large circles (3 inches in diameter) from the pink construction paper. Glue each circle in the middle of each paw.
Cut out 6 small oval shapes, about 1 inch long. Glue an oval shape on top of each bunny “toe.”
Apply glue to the back of each bunny paw and place towards the bottom of the paper plate, one on the left side and one on the left side. The toes should be faced down and outwards. Press down firmly for 10-15 seconds.
Apply glue to the middle of the plate and place the large fluffy pom pom on top. Press down firmly for 10-15 seconds.
Want instant access to all of our printable crafts, activities, and resources?
With thousands of crafts, activities, worksheets, coloring pages, and drawing tutorials to print, you will always have just the resource you need at your disposal. Perfect for parents and teachers alike!
DIY Wine Glass Bunny
To make these wine glass bunnies, start with white wine glasses and paint bunny faces using acrylic paints or markers.
Add a pink heart-shaped nose, whiskers, and eyes.
For the ears, you can use burlap fabric cut into bunny ear shapes, adding pink fabric for the inner part, and glue them to the rim or stems of the glasses.
Finish with a colorful ribbon bow.
Burlap fabric or pre-made ears can be purchased from craft stores like Michaels or Hobby Lobby.

Tegs:
Search
Recent Posts
Subscribe to Updates
Get the latest posts and fashion insights directly in your inbox.