Best Water-Based Varnish for Decoupage: Protect and Enhance Your Projects
Protect Your Decoupage Creations: Find the Perfect Water-Based Varnish
Protect Your Decoupage Creations: Find the Perfect Water-Based Varnish
Step 3) Applying the design on
This is the fun bit! The design can now be applied on top of the base layer. Our napkins tend to be 3 layered, that will need to be separated. Sometimes it can be a bit challenging because they are so thin, but with patience they will separate nicely.
Once we have the single layer with the design on, the specific part of the design will need to be cut out from the whole napkin. There are two techniques for this:
- we may use scissors, this will leave a sharp edge around the design, but can work quite precisely
- we may tear it by hand. The edges will look a lot more natural, and it will be easier to work it onto the craft project without visible edges, but we may risk tearing into the picture if not careful enough
"How To" FOUR (finishing)
If you have spent time and effort on producing a fine piece of découpage thus far, then in my view it also deserves a fine finish. The aim of varnishing is both to protect your work and to enhance its appearance. Before starting this final and important stage, you have one or two decisions to make. Firstly, which type of varnish to use: oil- or water-based. For light-coloured backgrounds use water/acrylic-based varnishes, which do not discolour. For dark backgrounds you could use an oil-based varnish: although it will yellow a little, this may not matter, and indeed it can add to the effect if you want an 'aged' appearance. There are distinct advantages in using a water-based product: quicker drying, no fumes, and brushes can be washed out in soap and water.
You also have to decide what sort of finish you want to achieve. Do you just want to protect, or do you want to obtain a really super-smooth finish which gives a deep warm glow to your piece? There is nothing wrong with the former, which can be completed with, say, 5 or 10 coats of varnish, and if you are happy with that, fine. If, however, you want your work to be finished to the high standard to which traditional decoupage aspires, then you may have to apply 30 or more coats to achieve this - the choice is yours.
The aim of varnishing is both to protect your work and to obtain a good finish. The application of coats of varnish fills in the areas between the design cut-outs, and the ultimate finish involves applying sufficient coats to bring up: the level of these areas so that the edges cannot be felt or seen.
Obviously, the varnish covers the cut-outs also, and to achieve a smooth surface the varnish must be wet sanded from these higher areas. Before sanding, however, at least 10 coats of varnish should be applied (more if the paper is thick) or you are likely to sand down to the cut-outs and spoil your work. If you do experience this, you may be able to rescue your piece by allowing it to dry, and then with coloured pencils colouring in where necessary.
Assuming all has gone well, after you have applied your first 10-15 coats of varnish, wet- sand (600 grit), wipe clean and allow to dry. A further 10-15 coats should be applied before the next sanding (again with 600 grit).
You should now have sunk your cut-outs, and on completion of this sanding you should have removed the 'shinnies' (i.e. areas of varnish lower than the surrounding surface and which appear shiny). A further light wet -sanding with 1200 grit wet & dry paper should now follow, which will smooth the surface further. Follow this by rubbing the surface lightly with '0000' grade wire wool, and any last small 'shinnies' will disappear.
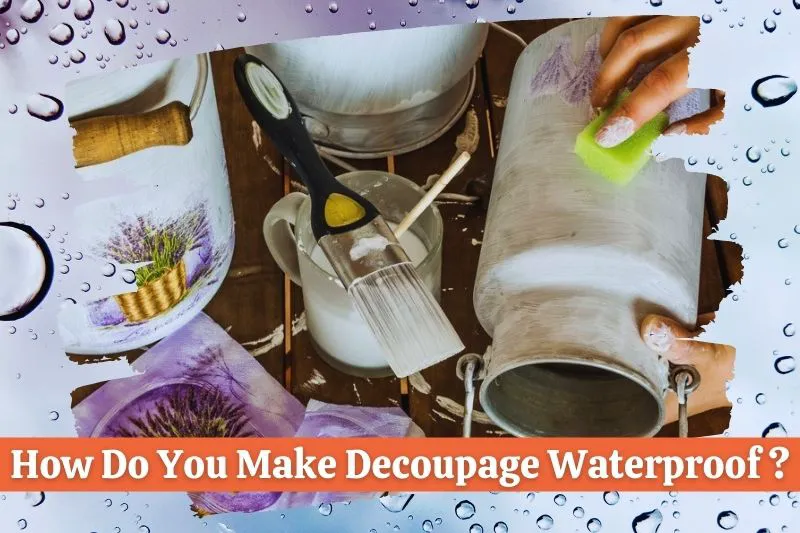
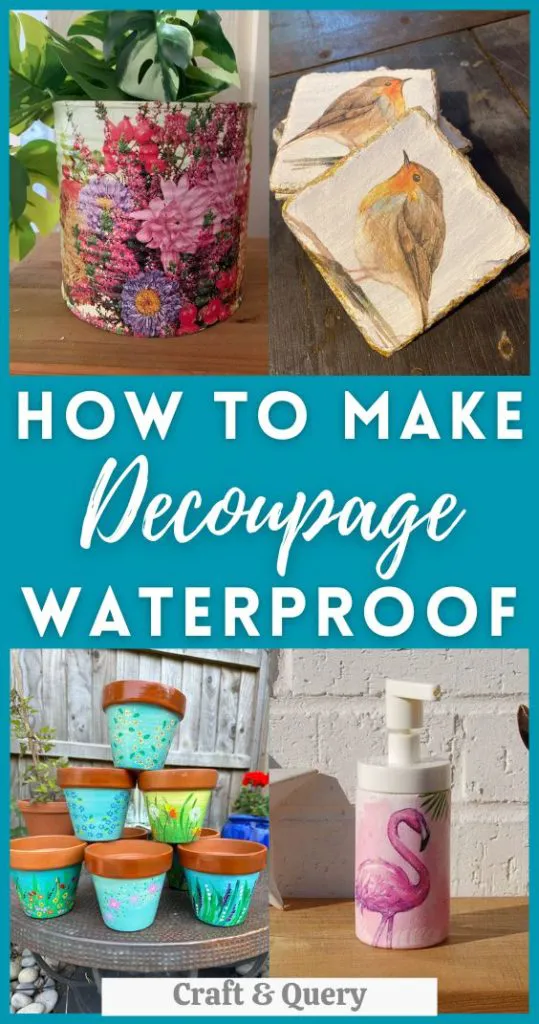
How Do You Make Decoupage Waterproof?
Affiliate Disclaimer: Craftknights.com is a participant in the Amazon Services LLC Associates Program, an affiliate advertising program designed to provide a means for sites to earn advertising fees by advertising and linking to Amazon.com. Craftknights.com also participates in affiliate programs with CJ, ShareASale, and other sites. Craftknights.com is compensated for referring traffic and business to these companies.
For some Decoupage projects, like a Coaster or a Flowerpot, you may want to waterproof your Decoupage. Normal Sealers don´t make your Decoupage waterproof but after reading this article you will know exactly what kind of sealer to use and how to use it to make you Decoupage projects waterproof.
So how do you make Decoupage waterproof? The short answer is, use Varnish to seal your Decoupage Project to make it waterproof. Varnish is a Sealer for wood but it can be applied to a lot of different materials. Varnish drys transparent and glossy.
Regular Decoupage glue or Mod Podge will seal your paper after applying it and it will make your paper a little water-resistant (so small drops or a little water won’t hurt it) but these sealers will not make your Decoupage waterproof.
So if you want to make your Decoupage waterproof then you will need another sealer.
Simply glue your paper to the surface and then add either Decoupage glue or Mod Podge on top of it, as you would normally do to make Decoupage.
After everything is dry simply add a Sealer to your decoupage to make it Waterproof. I usually use Gloss Varnish to make Decoupage Waterproof.
My favorite Varnish is from Liquitex (Amazon Link). You can apply it with a fine brush to your Decoupage. Varnish will dry transparent and you can apply multiple layers if you want to. You can also use spray-on varnish if you want to make sure that the varnish is applied very evenly.
Varnish is a sealer for wood but it can be applied to a lot of other materials, such as Terra cotta, stone, metal and more. But it can be a little harder to apply varnish to materials, that are not absorbent. So it might be a little tricky to apply to metal or stone.
I would also highly recommend using the gloss varnish and not matt varnish because matt varnish can lose its translucency after it is applied or if you apply multiple layers. Gloss varnish, on the other hand, will stay transparent even if you are adding several layers.
Can Decoupage Items Be Washed?
To wash Decoupage items you should seal your project using a waterproof or dishwasher-safe sealer to protect the surface from water. If you have used regular Decoupage glue or Mod Podge to seal, you should avoid washing it because using a lot of water will damage and soften the Decoupaged surface.
It’s not usually recommended to wash Decoupage items sealed with regular Decoupage glues or Mod Podge. Simply because they may have some water resistance to small amounts of water, but are not waterproof.
So if you want to wash, wipe, clean, or put your Decoupage items in the dishwasher. You need to seal your Decoupage items using a waterproof or dishwasher-safe sealer to give them extra protection from water damage.
The sealer that you choose to use to protect your Decoupage items from the water will depend on how you plan to clean or wash your items.
Mod Podge Dishwasher Safe is a good sealer and finish to use if you are planning to wash your Decoupaged items in the dishwasher. But if you are planning to wash your items using a cloth and water, there are many options available for waterproof Decoupage sealers.
These include Gloss Varnish, Enamel, Liquid Epoxy, Mod Podge Outdoor, and many other sealers that can provide a waterproof or highly water-resistant smooth wipeable surface.
However, when choosing the right sealer to use on your Decoupage items to wash and clean them. It’s a good idea to test your chosen Decoupage sealer on a scrap piece of your project before using it on the main surface. This will allow you to see how it holds up to cleaning using water once it has dried.

Tegs:
Search
Recent Posts
-
Hot Water Curl Weaving: Create Stunning Textures with This Unique Technique
Apr 13 2025
-
Cabarrus County Water and Sewer Authority: Your Reliable Source for Utilities
Apr 14 2025
-
Style Your Hair with Freetress Water Wave Crochet Hair: A Review
Apr 15 2025
-
Fix That Sewer Smell: Causes and Solutions for Your Sink Drainage
Apr 16 2025
Subscribe to Updates
Get the latest posts and fashion insights directly in your inbox.