Wooden Sewing Box: Organize Your Supplies in Style and Functionality
Wooden Sewing Box: Keep Your Sewing Essentials Organized and Accessible in a Stylish Box
Wooden Sewing Box: Keep Your Sewing Essentials Organized and Accessible in a Stylish Box
Styles of Vintage Sewing Boxes
Long before you could run to a store and rely on the fast fashion industry to provide you with any article of clothing you could imagine, people had to make and mend the clothes they owned. This meant that people were familiar with both hand and machine sewing, and every household amassed a collection of sewing notions that helped them maintain their outfits. Over the years, the cases these items were held in have evolved, and many beautiful, earthy, and decorative boxes became popular during the 20th century.
- Antique Sewing Machine Table Values Revealed
Wicker Sewing Boxes
Undoubtedly, the most common type of vintage sewing box was made out of wicker. Cheap to make, wicker sewing boxes picked up speed in the post-war period, and you could find little picnic basket sewing boxes in homes across the United States by the 1960s. Your parents or grandparents probably have their own straw basket filled to the brim with trim, threads, needles, and more. Thanks to mass-manufacturing, most of these boxes weren't marked, meaning that the easiest way to identify them is based on their characteristics:
- Painted or not - While you could find painted wicker sewing baskets, many of these vintage examples were untreated with paint or stains.
- Fabric coverings - Not all of them were covered in fabric, but for a time, the lids and sides of these boxes were covered in cheap cotton prints.
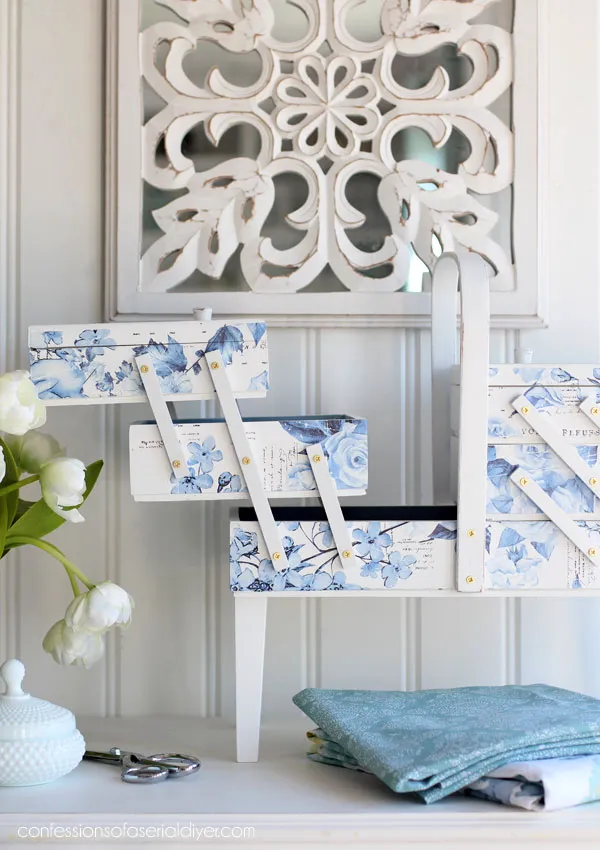
Standing Sewing Boxes
Another popular style that emerged in the 1950s/1960s was the wooden sewing boxes that were built to be freestanding. Some of these resembled picnic baskets in that they opened with two hinged doors on the top, while the accordion style (with layered shelves that used external hinges to store more stuff in a compact space) was useful for serious sewers that needed a lot of space.
Chinese Sewing Boxes
Step 11: It All Hinges on This Moment
Don't permanently install any of these fittings, as they'll get in the way later on. If your hinges will allow removal at a later date, install them now. If not, you may want to mock some hinges up with electrical tape.
N.B. Before you begin making your box, do this exercise with pieces of cardboard that correspond to your IDEAL dimensions. Once you have your boxes ready to go, however, repeat the exercise using the EXACT MEASUREMENTS of your real boxes.
Instead, I took the tried and true method of trial and error. I cut out some pieces of paper on a 1:1 scale with the side of my boxes, cut some thin strips, and got out the thumbtacks. The trick to this step is to decide where you want the pins on which the arms rotate, and then to figure out the ideal length of those arms. Here's how I did it:
1. Pick a line on which the pins will sit. These two lines (one per box) have to be parallel to each other, and to the edge of the box. I chose to put the lines 30mm from the edge of the box, so they were 60mm apart in total.
3. Now, making sure not to slip, swing the top piece backwards using the dividers to simulate the arm. If the overlap that you see between the front of the top tier and the back of the bottom tier is too small, then reduce t he distance between the divider points. If it is too big, increase the distance.
Keep adjusting the distance between the divider points until you're happy, but make sure that one leg of the dividers is always on the point you first selected. By some freak of luck, 100mm was perfect for this setup.
4. Once you've determined the length of the arm, measure the distance between the divider legs and record it. Also make sure you mark the final point on which the legs of the dividers rested. This point is B.
5. Take 2 strips of cardboard and draw 2 points on each, with the distance you recorded between them. These will be your cardboard arms.
6. Pick a nice number, I used 40mm. Measure this distance along the lines from A and B. mark those points. The points are now C and D, as in the pictures.
7. Put a thumbtack through A,B,C and D from behind. Then put the two arms onto the thumbtacks, one between A and B, the other between C and D.
You can now transfer these measurements to some scrap to make sure they still work on wood, or if you trust yourself more than I do, you can put them straight onto your final piece.
Step 1: Starters
(all measurements in MILLIMETRES)
I used a board 13mm thick so.
For bottom drawer
i. Base 300 x 150
ii. Ends 150 x 100 (x2)
iii. Front and back 300 x 113 (x2)
This makes the bottom drawer quite tall. You may want to reduce the height a bit.
For other drawers
i. Base 150 x 150 (x4)
ii. Ends 150 x 50 (x8)
iii. Fronts and backs 150 x 63 (x8)
For tops
176 x 150 (x2)
You'll also need knobs for the top (x2), handles for the sides, and 12 support arms.
Beginner tip (alternatively, Learn from my mistakes) -
Depending on what finish you've decided on, and what wood you've chosen, you might want to be careful to ensure the grain is going the same way on all pieces. My wife decided she wanted it painted, so it wasn't really an issue, but for more prominent grains and varnished finishes, it certainly would be.
Step 8: Too Many Bottoms, Not Enough Tops.
The next piece of joinery attaches the lids and bases to the boxes you have made. Measure the thickness of the stock that you're using for both the lid and the wall. In my case, they're the same - 12mm.
The crucial figures are these ones:
A - half of the WALL stock's thickness (6mm)
B - half of the LID stock's thickness (6mm)
C - the WALL thickness (12mm)
D - one third of the LID thickness (4mm)
On each wall piece that will receive a side of a lid/base, rout a groove (A) wide and (D) away from the top edge of the wall. Repeat this on every wall piece, then do a test fit to make sure that all the grooves line up. If they don't, slowly adjust the router and re-rout until they do match up.
The next step is to rout the lid channels. Route a groove (C) deep, (D) away from each edge of the lid (i.e. in the very middle).
Do this to all four edges of each panel that you're mounting. Once that is done, select which side of each panel will be the bottom. Mark this side clearly. To do this, I had to remove the bearing from my piloted slot cutter bit, I used the remaining bearing stub as the pilot instead.
The next step is to remove the BOTTOM edge of each of these grooves. You want to take (A) off the bottom lip the entire way around the panels. This will leave you, in essence, with three differently sized rectangles of wood, one on top of the other. The smallest in the middle, the largest on the top, and the medium sized one on the bottom. The attractive paint image should clarify the route I took to remove this lip.
If none of that made sense, the pictures should help a bit.


Tegs:
Search
Recent Posts
-
Vintage Sears Kenmore Sewing Machine in a Cabinet: A Collector's Treasure
May 11 2025
-
Owl Sewing Pattern: Bring a Touch of Wisdom and Whimsy to Your Sewing Projects
Apr 14 2025
-
Sewing Machine Needles: Understanding Sizes and Choosing the Right One
Apr 14 2025
-
Sew Leather Like a Pro: The Best Sewing Machines for Leatherwork
Apr 14 2025
Subscribe to Updates
Get the latest posts and fashion insights directly in your inbox.