Macrame Feather Template: Easy Patterns for Beginners and Beyond
Create Stunning Macrame Feathers: Free Templates & Tutorials
Create Stunning Macrame Feathers: Free Templates & Tutorials
DIY Macrame Feathers: Video Tutorial
- Macrame cording, I used 5mm in three different colors
- Very sharp scissors, I used these for detail clean up after trimming with these scissors
- Pet brush or comb, I found that the comb worked better
- Fabric stiffener
- Felt sheets
- Spray adhesive
- Gloves
- Dropcloth
- Dowel or stick, if hanging on the wall
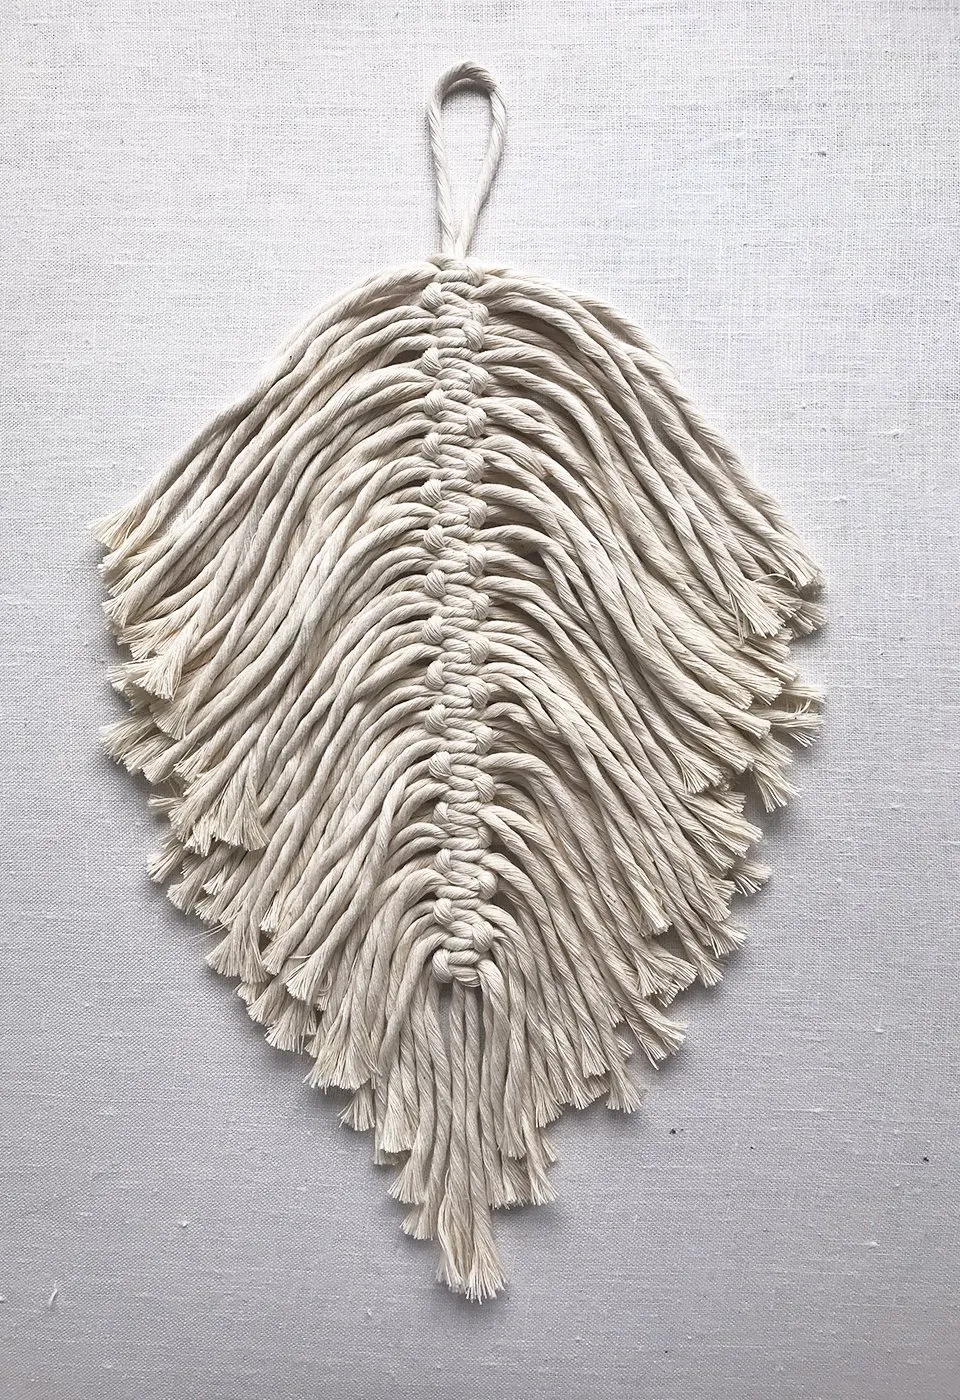
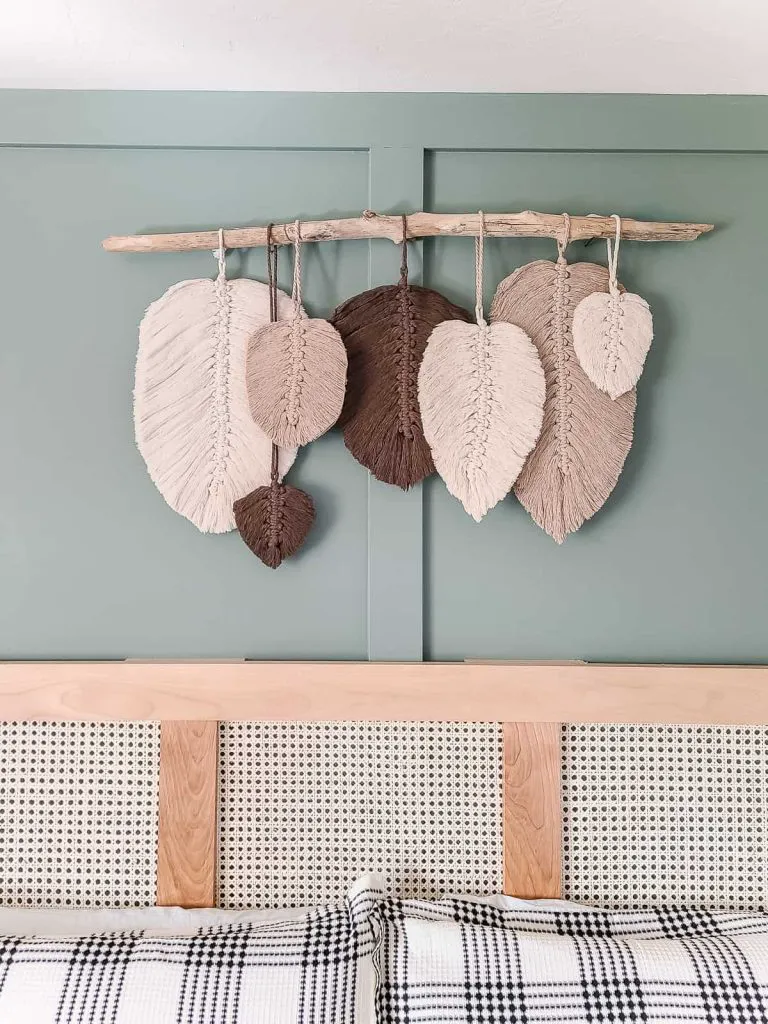
I made several different sizes of macrame feathers, so for each one, my centerpiece was a different length.
For the photos, I’m showing you how to make one of the larger macrame feathers. So my centerpiece is much longer than if I was making a smaller feather.
Lay the centerpiece down on a flat surface and fold it in half as shown.
Knot it at the top with a simple overhead knot. Leave enough excess above the knot for a piece of macrame cording to fit through. This is how your macrame feathers will hang.
FAQs about DIY Macrame Feathers
What size macrame cord should I use for macrame feathers?
I used 5mm macrame cording for our feathers. That is just what they had in stock at my local craft store.
You can totally use something smaller too. 2mm and 3mm would work well.
The only difference you’ll find with a smaller cord is that the middle part of the feather will be more or less thick/wide as you change the size of your cording.
The unraveled sides of your feather will also be a little less thick and fluffy with a small cord.
This could be a good thing though! As you’ll see in the step-by-step tutorial below mine require quite a bit of work to stiffen and lay flat because the sides were so thick and fluffy.
What kind of scissors do I need to use?
Fabric scissors, sewing scissors, or craft scissors will be your best type of scissors to use. Whatever you use, they need to be SHARP.
Fabric or sewing scissors are sharper than normal everyday scissors that you have laying around the house. The sharper the scissors the less the macrame will move when you cut it.
This makes a world of difference when you are trying to get a nice crisp line for the edges of your macrame feathers.
These scissors worked great for cutting through the cording.
These small detail craft scissors worked well for cleaning up the edges after trimming.
How do you unravel macrame cords?
Unraveling the macrame cording is one of the most frustrating steps of this tutorial. It was pretty time-consuming, so be patient.
I found that it works best to use a comb, rather than a pet hair brush. Work your way from the end of the string to the middle of the feather. You should be able to unravel several pieces at one time.
How do I stiffen the feathers?
Fabric stiffener is the best way to stiffen macrame cording once unraveled. You could also try hairspray as an alternative.
Depending on the size of your macrame feathers and the thickness of your cording, you may be able to get away with using only fabric stiffener to get the edges of the feather to lay flat.
Because mine were thicker, I also attached felt sheets with spray adhesive to the backside of the feathers after I had used fabric stiffener.
Step 8. Attach a felt sheet to the back of each feather.
As mentioned above, my feathers were pretty thick so the fabric stiffener wasn’t enough to get them to lay flat when they hung on the wall.
To reinforce them further I added felt sheets to the backside of each feather attached with spray adhesive.
I found felt sheets that matched the color of each feather at the craft store.
Lay each feather flat over the sheet of felt and trace it roughly. Cut out the feather tracing from the felt, going inside of the tracing slightly. You want the piece of felt to be a little smaller than your feather so it is not seen.
You may need to go back afterward and make the felt piece smaller after you cut it out.
Next, take the feathers and the cut felt pieces outside and protect your surface. I used a drop cloth.
Spray adhesive can be a huge mess, so it is best to wear gloves. Trust me on this one. I’ve learned from experience that this stuff is super hard to get off your hands!
Shake the bottle of spray adhesive well. Spray it on the felt sheet and then press it into place on the back of the feather.
Let them dry for 2 hours before moving.
DIY Macrame Feathers
- 5mm single twist cotton string
- fabric stiffener
- sharp fabric shears
- cat brush
- ruler
For a medium sized feather, cut:
- 1 32" strand for the sprine
- 10-12 14" strands for the top
- 8-10 12" strands for the middle
- 6-8 10" strands for the bottom
Fold the 32" strand in half. Take one of the 14" strands, fold it in half and tuck it under the spine.
Take another 14" strand, fold it in half and insert it into the loop of the top horizontal strand. Pull it through and lay it horizontally, on top of the opposing strand.
Now pull the bottom strands all the way through the top loop. This is your knot!
Pull both sides tightly. On the next row, you'll alternate the starting side. So if you laid the horizontal strand from left to right the first time, you'll lay the horizontal strand from right to left next.

Tegs:
Search
Recent Posts
-
Printable Macrame Feather Template: Create a Stunning Leaf Design
Apr 22 2025
-
Add Texture & Charm: Create a Large Round Macrame Wall Hanging
Apr 13 2025
-
Descubre el mundo del macramé con entrepiezas y crea pulseras originales.
Apr 14 2025
-
Dye Your Macrame Cord: A Guide to Achieve Unique Colors
Apr 14 2025
Subscribe to Updates
Get the latest posts and fashion insights directly in your inbox.