DIY Macrame Cat Hammock: Step-by-Step Tutorial
Make a Cozy Macrame Cat Hammock: Easy Tutorial
Make a Cozy Macrame Cat Hammock: Easy Tutorial
How to Make Your Own Macrame Cat Hammock
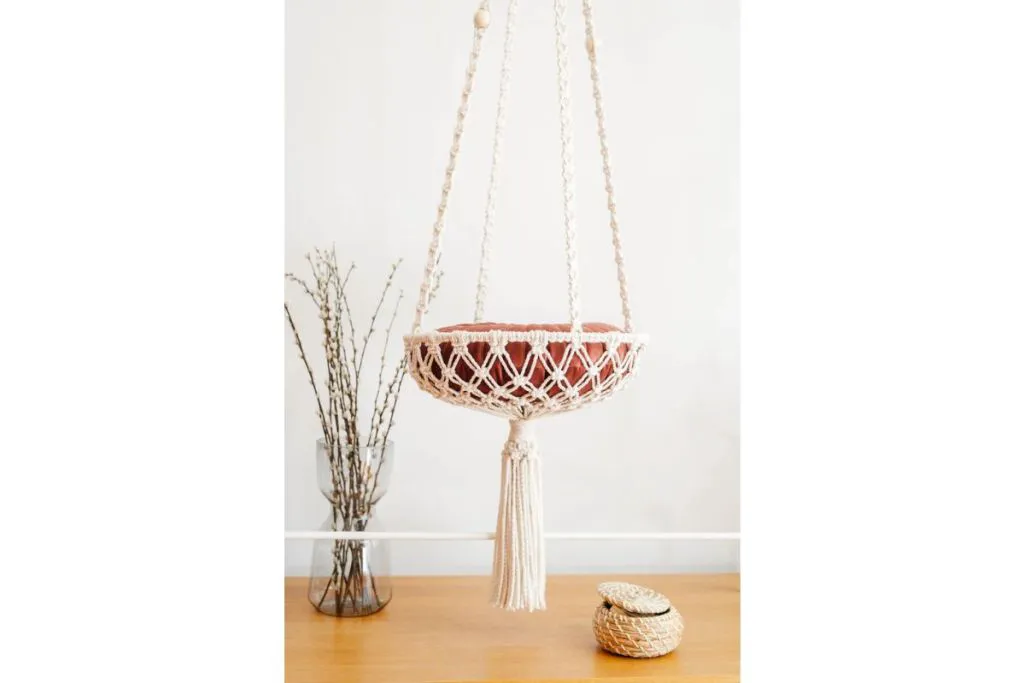
Create a haven for your feline companion with a charming macrame cat hammock, inspired by My French Twist’s comprehensive tutorial. This DIY endeavor is perfect for craft enthusiasts, as it breaks down the process into simple, knot-by-knot steps. To get started, gather a wooden drapery rod, cotton clothesline, and a plush throw pillow. The end result is a unique, handmade piece that injects personality into your home decor while providing a cozy retreat for your cat to indulge in.
With clear instructions and basic macrame techniques, even newcomers can master this project and revel in the satisfaction of creating something special – a delightful cat hammock that’s sure to bring joy.
DIY macrame hammock PDF patterns and tutorials
No need to spend more time looking for your next macrame hammock project; we’ve lined up some of the best downloadable patterns and tutorials to get you started.
Boho Macrame Hanging Chair Tutorial by RelaxHammockLux
Hanging macrame chairs are one of the most popular variations of your classic macrame hammock, and this video tutorial on Etsy will show you how you can make one yourself.
Suitable for beginners, this video tutorial features English subtitles and covers all the steps required to put your DIY macrame hammock chair together, along with handy tips: how to sew a cushion, hang your finished piece, choose the best cord, and more.
If you’re unsure what macrame materials to purchase to recreate this project, this seller suggests this macrame cord and these large hoops. You can also check out our macrame essentials guide if you want alternatives!
This macrame hanging chair will look lovely both indoors and outdoors. Our only advice is to keep the weather in mind if you’re inclined to display your piece in the garden or near the pool!
DIY Macrame Swing Pattern by Macramefulya
This macrame hanging chair video tutorial is a Bestseller on Etsy and perfect for advanced crafters looking for ambitious macrame projects.
Before getting into this macrame hammock pattern, we advise having some know-how of essential knots: square knot, spiral knot, wrap knot, lark’s head knot, and double half hitch knot.
That said, you might want to start with a less elaborate project if you’re still testing the macrame waters. Nevertheless, this seller includes links to free video tutorials on the knots used for this macrame hammock chair, so you’ll have access to every technique.
Also, be sure to go over the supply list for this project; this piece incorporates more detail than standard hammocks, such as beads and chains. The only downside of this tutorial is that it’s subtitled in many languages, so instructions can get a little lost in translation at times.
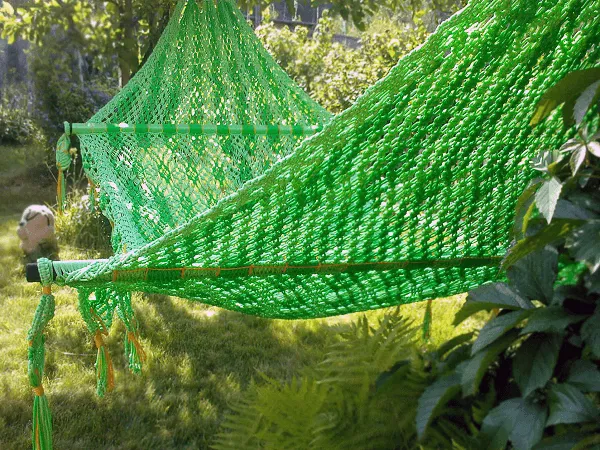
Macrame Hammock Pattern by Felt Magnet
Macrame Hammock Materials
Skill Level
To make this hammock you will, first of all, need a basic understanding of macrame knots. Knots used are the reverse double half hitch (or reverse lark’s head knot), half hitches, marling knot, and collecting knot.
So if you are a beginner you can check out our guide on how to tie the knots.
How To Get Started On Your Macrame Hammock
Watch the video below for an overview of how the macrame hammock is made. It is mesmerizing to watch how it is done and gives some great inspiration, especially if you are unsure about making the hammock.
So, now it is time to get stuck in and make the hammock, you can go ahead and open the link for in-depth step by step instructions on how to complete the hammock.
See the full instructions here
square knots
You now have 24 Lark’s Head Knots tied onto the pole and 48 individual cords hanging. To follow the instructions correctly, you need to understand the following key. While knotting, try to keep each horizontal row even, and always go from left to right. To make a proper Square Knot, see the tutorial here.
- Start with 1st cord: 12K(starting with 1st individual cord from the left, tie 12 Square Knots)
- Start with 3rd cord: 11K (starting with 3rd individual cord from the left, tie 11 Square Knots)
- Start with 5th cord: 4K – S8 – 4K
- Start with 7th cord: 3K – S12 – 3K
- Start with 9th cord: 2K – S16 – 2K
- Start with 11th cord: 1K – S8 – 1K – S8 – 1K
- Start with 9th cord: 2K – S16 – 2K
- Start with 7th cord: 3K – S12 – 3K
- Start with 5th cord: 4K – S8 – 4K
- Start with 3rd cord: 5K – S4 – 5K
- Start with 1st cord: 12K
- (Begin this row about 4″ lower than the previous row.) Start with 5th cord: 1K – S2 – 1K – S2 – 1K – S2 – 1K – S2 – 1K – S2 – 1K – S2 – 1K
- (Begin this row about 3″ lower than the previous row.) Start with 2nd cord: 1K – S2 – 1K – S2 – 1K – S2 – 1K – S2 – 1K – S2 – 1K – S2 – 1K – S2
- (Begin this row about 3″ lower than the previous row.) Start with 1st cord: 12K
- (Begin this row about 3″ lower than the previous row.) Start with 3rd cord: 11K

Tegs:
Search
Recent Posts
-
Add Texture & Charm: Create a Large Round Macrame Wall Hanging
Apr 13 2025
-
Descubre el mundo del macramé con entrepiezas y crea pulseras originales.
Apr 14 2025
-
Dye Your Macrame Cord: A Guide to Achieve Unique Colors
Apr 14 2025
-
Create Adorable Macrame Dolls: A Step-by-Step Guide to Making Knotted Dolls with Personality
Apr 14 2025
Subscribe to Updates
Get the latest posts and fashion insights directly in your inbox.