Sewing with Style: A Guide to Adding Long Fringe Trim to Your Projects
Add a Touch of Elegance: Sewing with Long Fringe Trim for a Dramatic Finish
Add a Touch of Elegance: Sewing with Long Fringe Trim for a Dramatic Finish
Key Takeaways
- Select cotton fringe for its versatility and durability, ensuring it matches the quilt’s character and desired aesthetic, including considerations for length, width, color, texture, and pattern.
- Prepare the fringe by cutting it to the accurate length, overestimating to allow for adjustments, and applying liquid seam sealant to the ends to prevent fraying.
- Attach the fringe to the quilt by pinning it around the edge, sewing with a consistent seam allowance, snipping into the fringe every few inches for a fuller effect, and overlapping the ends for a seamless finish.
- Care for the fringed quilt by washing it infrequently in a laundry bag on a delicate, cold cycle, laying it flat to dry, storing it in a cool, dry place, and rolling it in towels to remove excess moisture, while regularly inspecting and repairing as necessary.
Adding fringe trim to your quilts can significantly enhance their character. This detail introduces a unique and vintage vibe, setting off clean lines. It is relatively wash-friendly, making your creations stand out with added sophistication.
Enhancing Quilt Character
Adding fringe trim to your quilt isn’t just about a unique finish; it’s about infusing vintage aesthetics that elevate your creation’s unique character.
Think of it as the cherry on top, giving your Isola quilt that personalized touch.
This decorative element doesn’t just complement; it transforms, turning a simple blanket into a statement of quilt embellishment with delightful vintage vibes.
Vintage Vibes and Unique Details
Continuing from enhancing quilt character, let’s dive into the charm of vintage inspiration.
Adding fringe trim to your quilt binding isn’t just about the timeless elegance it brings; it’s a creative embellishment that injects unique character.
Imagine the vintage vibes and unique details dancing along the edges, turning a simple quilt into a masterpiece of quilting enhancement.
Wash Friendliness
Continuing from the charm of vintage accents, let’s talk fringe care. You’ll love that it’s not high-maintenance.
- Wash sparingly to maintain its pizzazz.
- Handle with care—think delicate cold cycles.
- Choose your detergent like a sommelier selects wine—wisely.
Bullion fringes
Bullion fringes are made of cord rather than yarn. You can make quick bullion fringes with a cord by this method.
To make this trim cut out a strip of interfacing the length and width of the trim you want. I have used a card sheet, but interfacing is the right thing. Wrap the cord around.
Place a 1/4 -1/2 inch ribbon along the top edge, and with a very small stitch length stitch the ribbon and the cord together.
Cut out the lower edge of the cord. From the inside, cut out the interfacing piece closely near the stitch you have made. You have your fringe ready.
Layered fringes
This fringe involves making knots in intervals in layers of fringes.
Make brush fringes that are about 4 inches – 8 inches long. Cut the edges evenly, as explained. Separate the strands of the thread of fringes and divide the fringe threads into two. Hold the fringes half from one loop and the next half from the adjacent loop.
With a single strand of thread, make a knot 3/4 – 1″ down in the middle of the two loops. Continue doing the same with all the loops. You can make many layers like this for the fringes.
If you are making three layers, finish the second layer and then continue making knots in the center of the knots in the second layer.
When you have finished, trim the fringe evenly at the bottom
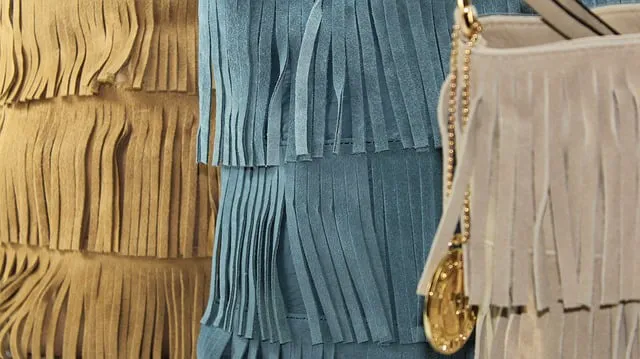
Fringe Trim for Quilts: Selecting the Perfect Type
Fringe trim adds a special charm to quilts. When selecting the perfect type, consider various factors such as fringe length, width, color, texture, and pattern.
Cotton fringe is a top pick due to its durability and ease of washing. This type of fringe is known to withstand the test of time and use, making it an excellent choice for quilts.
On the other hand, delicate fringes may not be as durable and could potentially fray or become damaged over time.
Durability and Availability
Zeroing in on the perfect fringe type for your quilt is a great start. When it comes to durability, source fringes that offer both longevity and practicality. This means they should be able to withstand daily use and still maintain their appearance.
In summary, prioritize durability and practicality when choosing fringe, and don’t forget about wash-friendliness and aesthetic appeal. With the right care, your fringe can last a long time and continue to look great.
Avoiding Delicate Fringes
When eyeing delicate fringe, remember it’s a high-maintenance relationship. You might want to consider alternative fringe types that promise a longer, hassle-free bond.
Vintage-inspired fringe? Yes, but ensure it’s tough enough for the journey.
Dive into our fringe trim tutorial for savvy sewing fringe techniques. These techniques can transform handmade fringe into a masterpiece that laughs in the face of the washing machine.
How to make FRINGE TRIMS (7 types)
Fringes refer to an ornamental border of threads left loose from a raveled edge or looped threads, cords, beads, threads, or tassels attached from a separate strip, used as a fabric trim.
ToggleThe fringe has a decorative heading, usually about 3/4 inches, and the fringes’ length varies from 2 inches to 8 inches or even longer.
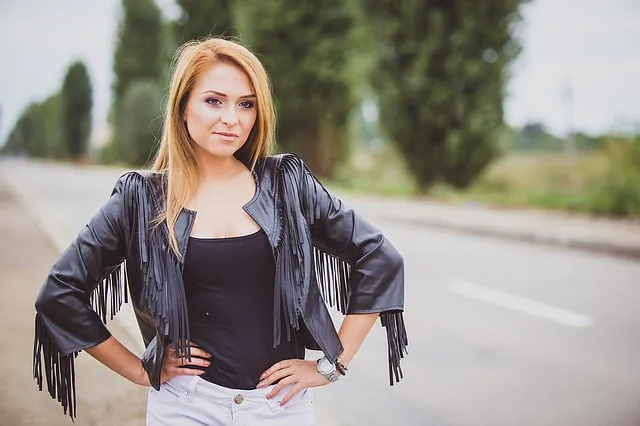
These fabric trims can be used on just about anything – your dance outfits, bandana scarf, skirts, shawls, wrap scarves, Kaftan side edges, or along the yokes on dresses or shirts or sleeve seams in jackets.
There are different types of fringes available in shops ready to be attached, but buying them is no fun when you can make them yourself. There is no one way to make these cute trims but nine. All of them are easy and doable, even for sewing beginners.

Tegs:
Search
Recent Posts
-
Achieve Long, Luscious Hair That Looks Like a Weave
Apr 16 2025
-
How Long Can You Keep a Weave in Your Hair? Maximize Weave Lifespan and Hair Health
Apr 17 2025
-
Create Your Own Bluey Long Dog: Crochet Pattern for a Fun & Cuddly Plush Toy
Apr 17 2025
-
A Step-by-Step Guide to Crocheting a Square Neck Top with Long Sleeves
Apr 18 2025
Subscribe to Updates
Get the latest posts and fashion insights directly in your inbox.