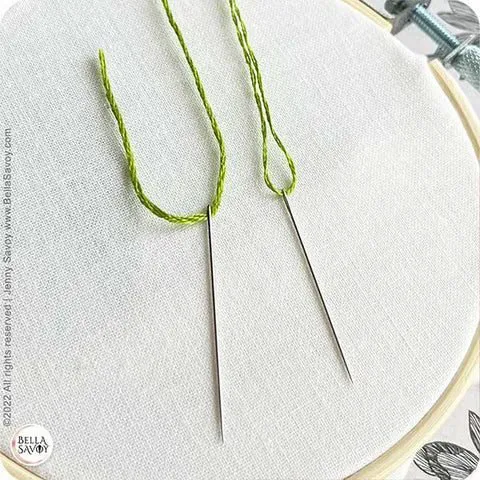
Threading a Weave Needle: A Simple Guide for Beginners
Mastering the Art of Threading a Weave Needle: A Step-by-Step Tutorial
Mastering the Art of Threading a Weave Needle: A Step-by-Step Tutorial
Wet the Thread
Dampen the thread with water to make it more pliable and easier to thread through the needle's eye. Wetting the thread offers several benefits. Firstly, it helps to prevent the thread from fraying, making it easier to guide through the needle's eye. Additionally, a damp thread is more manageable and less likely to knot, which can save valuable time during your sewing projects.
To ensure you are threading like a pro, here are some needle threading tips:
| Needle Threading Troubleshooting | Sewing Techniques |
|---|---|
| Use a needle threader for small needles | Hold the needle steady |
| Trim the thread end to a point | Use good lighting |
| Try a different needle if the eye is too small | Use a contrasting background |
Hold the Needle Properly
Hold onto the needle with your thumb and index finger, making sure it doesn't wobble. Proper hand positioning is crucial for threading efficiency. Position the needle between your thumb and index finger, allowing for precise control. Your grip should be firm but not too tight, as this can cause hand fatigue. Ensure that your hand is steady and your fingers are positioned close to the eye of the needle for better visibility and control.
When holding the needle, maintain a relaxed posture to prevent hand strain. Avoid gripping the needle too tightly, as this can lead to shaky hands and difficulty in threading. Keep your wrist straight and steady to provide a stable base for your hand movements. This will make it easier to guide the thread through the needle's eye with accuracy.
Properly holding the needle also involves finding a comfortable position for your hand. Experiment with different hand positions to see what works best for you. Some people find it helpful to rest their hand on a flat surface while threading, while others prefer to hold the needle in the air. Find a position that allows you to maintain control and precision while threading the needle.
Securing a Knot
- If you used a double-strand of thread, keep them together and wrap both strands around your finger.
Tip: To create friction that makes it easier to tie the knot, lick your thumb and middle finger or dip it in a little water before you wrap the thread.
- The thread should feel thicker between your fingers because you've wound it around itself.
Pinch the rolled thread between your fingers. Instead of letting the rolled thread slip off your fingers, keep your thumb and middle finger firmly pressed down on the thread.
Pull the thread tightly to create the knot. Keep your fingers clamped down on the thread while you use your other hand to pull the length of thread in the opposite direction. This will form the end of the thread into a knot. [11] X Research source
Variation: If you'd like to make a neater knot, especially if you're working with thick thread, you can insert the end of the thread through the loop that you wound around your finger. Loop it through another time and pull it to create a double overhand knot.
AdvertisementInsert the Thread Into the Needle
After wetting the thread, you can now proceed to insert it into the needle. This step may seem simple, but it can be quite challenging, especially for those new to sewing. However, with the right techniques, you can master this skill effortlessly.
Follow these steps to insert the thread into the needle like a pro:
- Hold the Needle Properly: Grasp the needle between your thumb and index finger, ensuring a steady grip. This will provide better control and precision when inserting the thread.
- Utilize Advanced Threading Methods: Consider using advanced threading techniques such as using a needle threader or applying a small amount of clear nail polish to the end of the thread to prevent fraying. These methods can make the threading process much easier and more efficient.
- Troubleshooting Tips: If you're facing challenges with threading, try placing a piece of white paper behind the needle to provide a contrasting background, making it easier to see the eye of the needle. Additionally, ensure that the thread is cut cleanly at a 45-degree angle to facilitate smooth insertion into the needle.


Tegs:
Search
Recent Posts
-
Mastering the Art of Hair Weaving: Needle and Thread Techniques
Jul 3 2025
-
Quality Embroidery Thread: Tips for Choosing the Right Thread for Your Projects
Apr 14 2025
-
Embroidery with Regular Thread: Discover the Beauty of Embroidery Using Regular Thread
Apr 14 2025
-
Sewing Thread Guide: Find the Best Brand for Your Needs and Projects
Apr 16 2025
Subscribe to Updates
Get the latest posts and fashion insights directly in your inbox.