How to Sew a Cheer Bow: Perfect Your Cheerleading Accessories
How to Sew a Cheer Bow: Create Show-Stopping Cheer Bows with Simple Techniques
How to Sew a Cheer Bow: Create Show-Stopping Cheer Bows with Simple Techniques
Step 15:
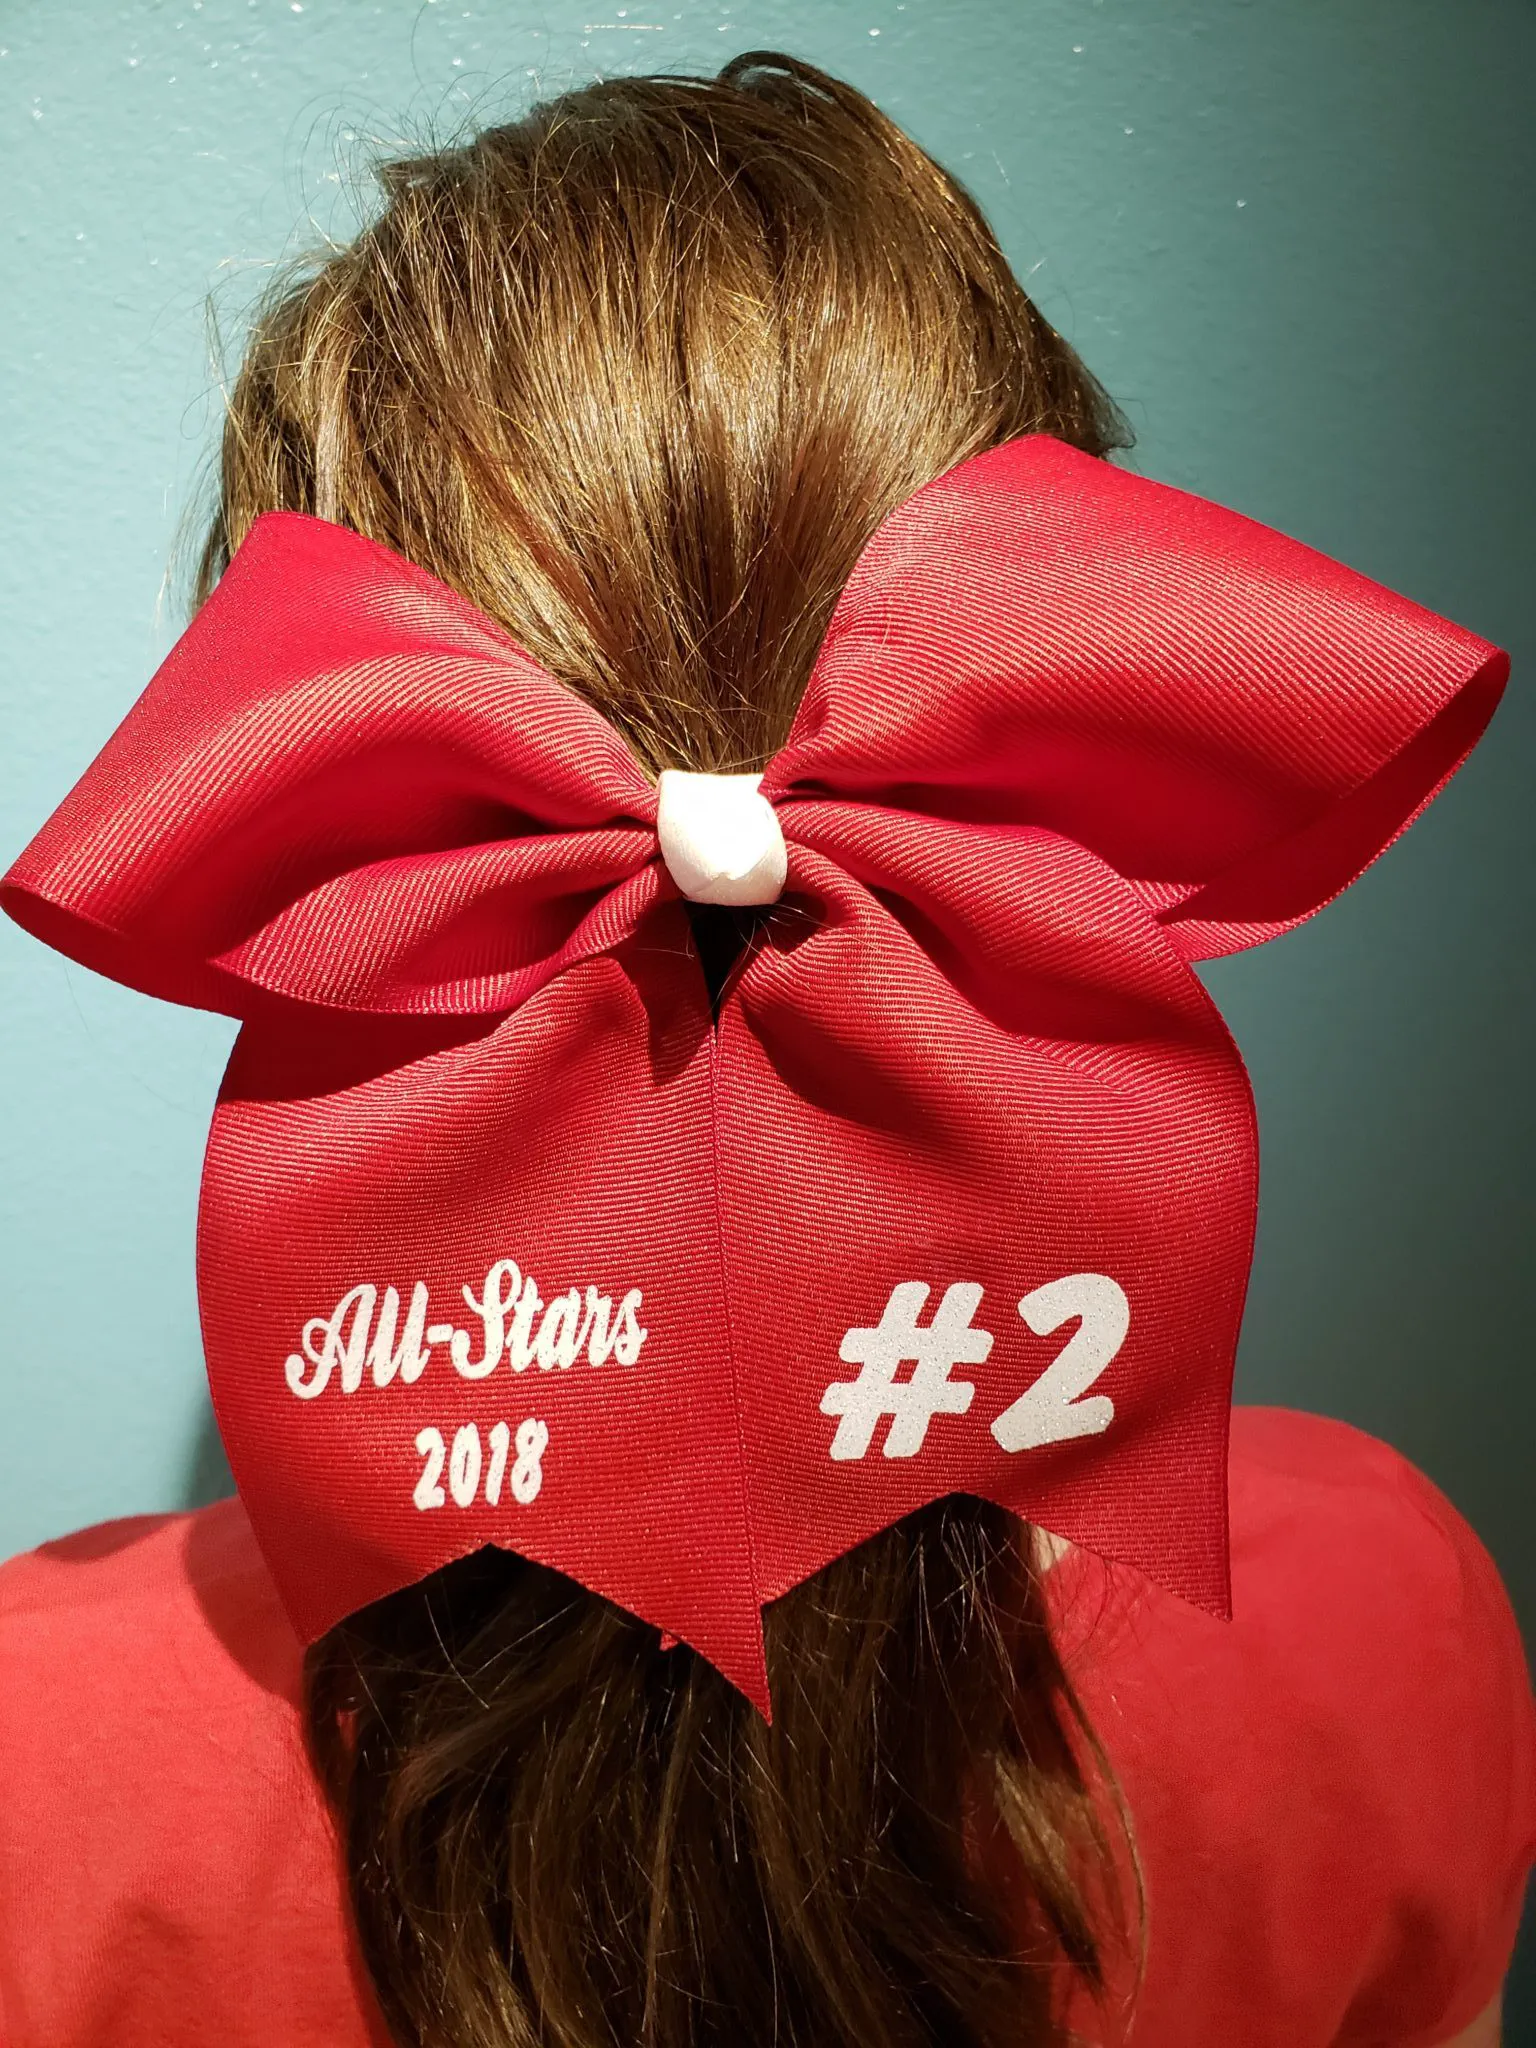
I like to put a dab of hot glue on the front of the bow and place my knot in the right place. This helps keep things in place and the knot wont move around. Next fold the ribbon edges on top of each other, taking care to cover the zip tie, and hot glue it in place. You can stiffen the bow now if you prefer a stiffer bow.
You now have a really cute cheer bow! You can add embroidery or decals to the tails to customize them or leave them plain, either way you have a way cool cheer bow that you didn’t have to drop serious cash on!
Did I mention these make cute gifts!!
I want to see your bows! Post pictures of your beautiful bows so we can all admire them and maybe get some inspiration!
If you like this article please be sure to share the love!
As always, Thanks!
Interested in more DIY Projects?
Check out these:
Start your Journey to Financial Freedom by learning how to create a Simple Monthly Budget
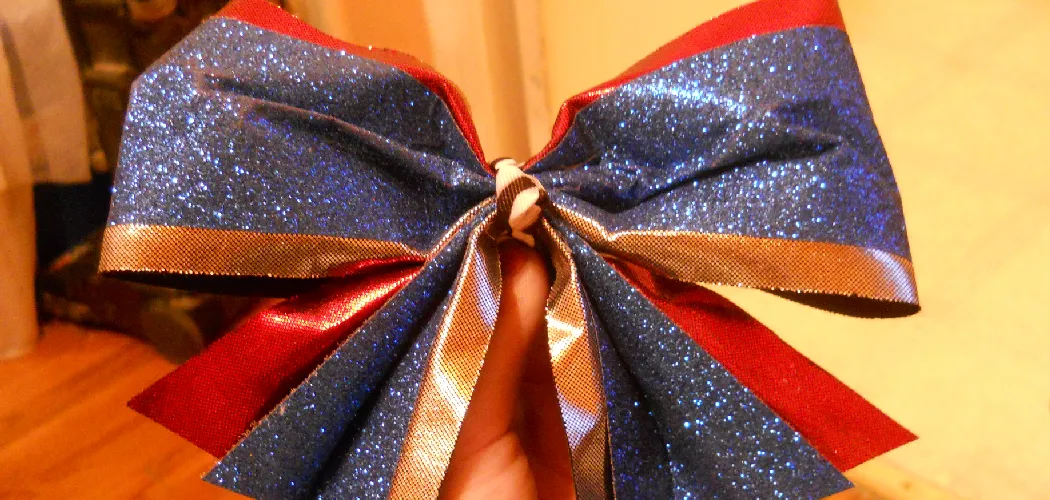
Step 11:
Open each ear of the bow to make sure they are even. I then make sure the tails are even as well. If anything needs to be adjusted, now is the time. You can pull on each side to move them around a bit. Once you are satisfied with the shape of the bow pull the zip tie as tight as you can & cut the excess off.
Note: Make sure the pony tail is in the back of the bow and the head of the zip tie is as well! I like to put he head of the zip tie more to bottom of the bow, towards the back always.
Step 9:
Using one hand fold the ribbon in half. (This first fold is your center for the bow.) Begin to fold the ribbon back and forth from this point, accordion style.
This is the most difficult step in my opinion and takes some practice, but since you taped the ribbon in step 8, it will be nothing to start your folds over until you get them just right
Precautions Need to Be Followed for Making a Cheer Bow Out of Ribbon:
1. First and foremost, it is important to choose the right type of ribbon for making a cheer bow. The recommended type of ribbon is grosgrain as it has a sturdier texture and holds its shape better.
Also Read: How to Decorate a Basket With Ribbon2. Always make sure to measure out the length of ribbon needed for the bow before cutting it. This will ensure that both ends of the bow are equal in size and that the final product looks symmetrical.
3. When cutting the ribbon, use sharp scissors to prevent fraying or uneven edges. It is also important to cut the ends of the ribbon at an angle to create a neat and professional look.
4. Before starting to assemble the bow, it is recommended to practice folding and shaping the ribbon beforehand. This will help in achieving a perfect shape and avoiding mistakes during the assembly process.
5. When using a hot glue gun to secure the folds of the ribbon, make sure to use it with caution and adult supervision if needed. Hot glue can cause burns, so it is important to handle it carefully.
6. Another important precaution is to always use a heat sealer or lighter to seal the ends of the ribbon once it is cut. This will prevent fraying and keep the bow looking neat.
7. While assembling the bow, make sure to double-check the placement of each fold before gluing it down. Once the glue dries, it is difficult to adjust or fix any mistakes.
8. It is also important to take breaks while making a cheer bow as repetitive motions can cause strain on the hands and wrists. Stretching or taking breaks will help prevent any discomfort or injuries.
Following these precautions will not only ensure a well-made cheer bow but also promote safety and minimize any potential accidents. Remember to always prioritize safety while crafting and have fun creating beautiful cheer bows!

Tegs: