How to Sew a Bib: Simple Steps for Baby Essentials
Sewing a Bib: A Beginner-Friendly Guide to Baby Gear
Sewing a Bib: A Beginner-Friendly Guide to Baby Gear
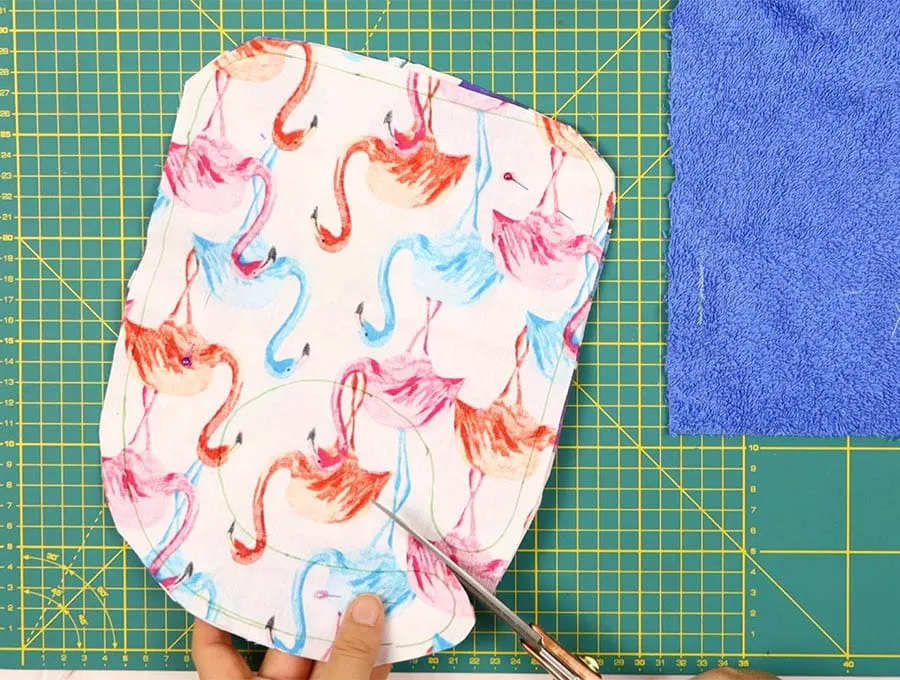
Step 4: Sew the Bib!
You'll be using a 1/4 inch seam allowance. I thankfully have a nice presser foot a 1/4 inch notch in it, so I just keep the edge of the fabric lined up with that.
Start at the bottom of the turning opening and sew all around the bib to the needle marking the top of the opening. Make sure to backstitch at the beginning and the end.
Around the neck of the bib, you'll need to go nice and slow and really manhandle the fabric to where it needs to be. I also left the needle in the fabric and raised the presser foot a couple times in tight spots. :D
I like to press the bib after I've sewn around the edges, but you don't have to!
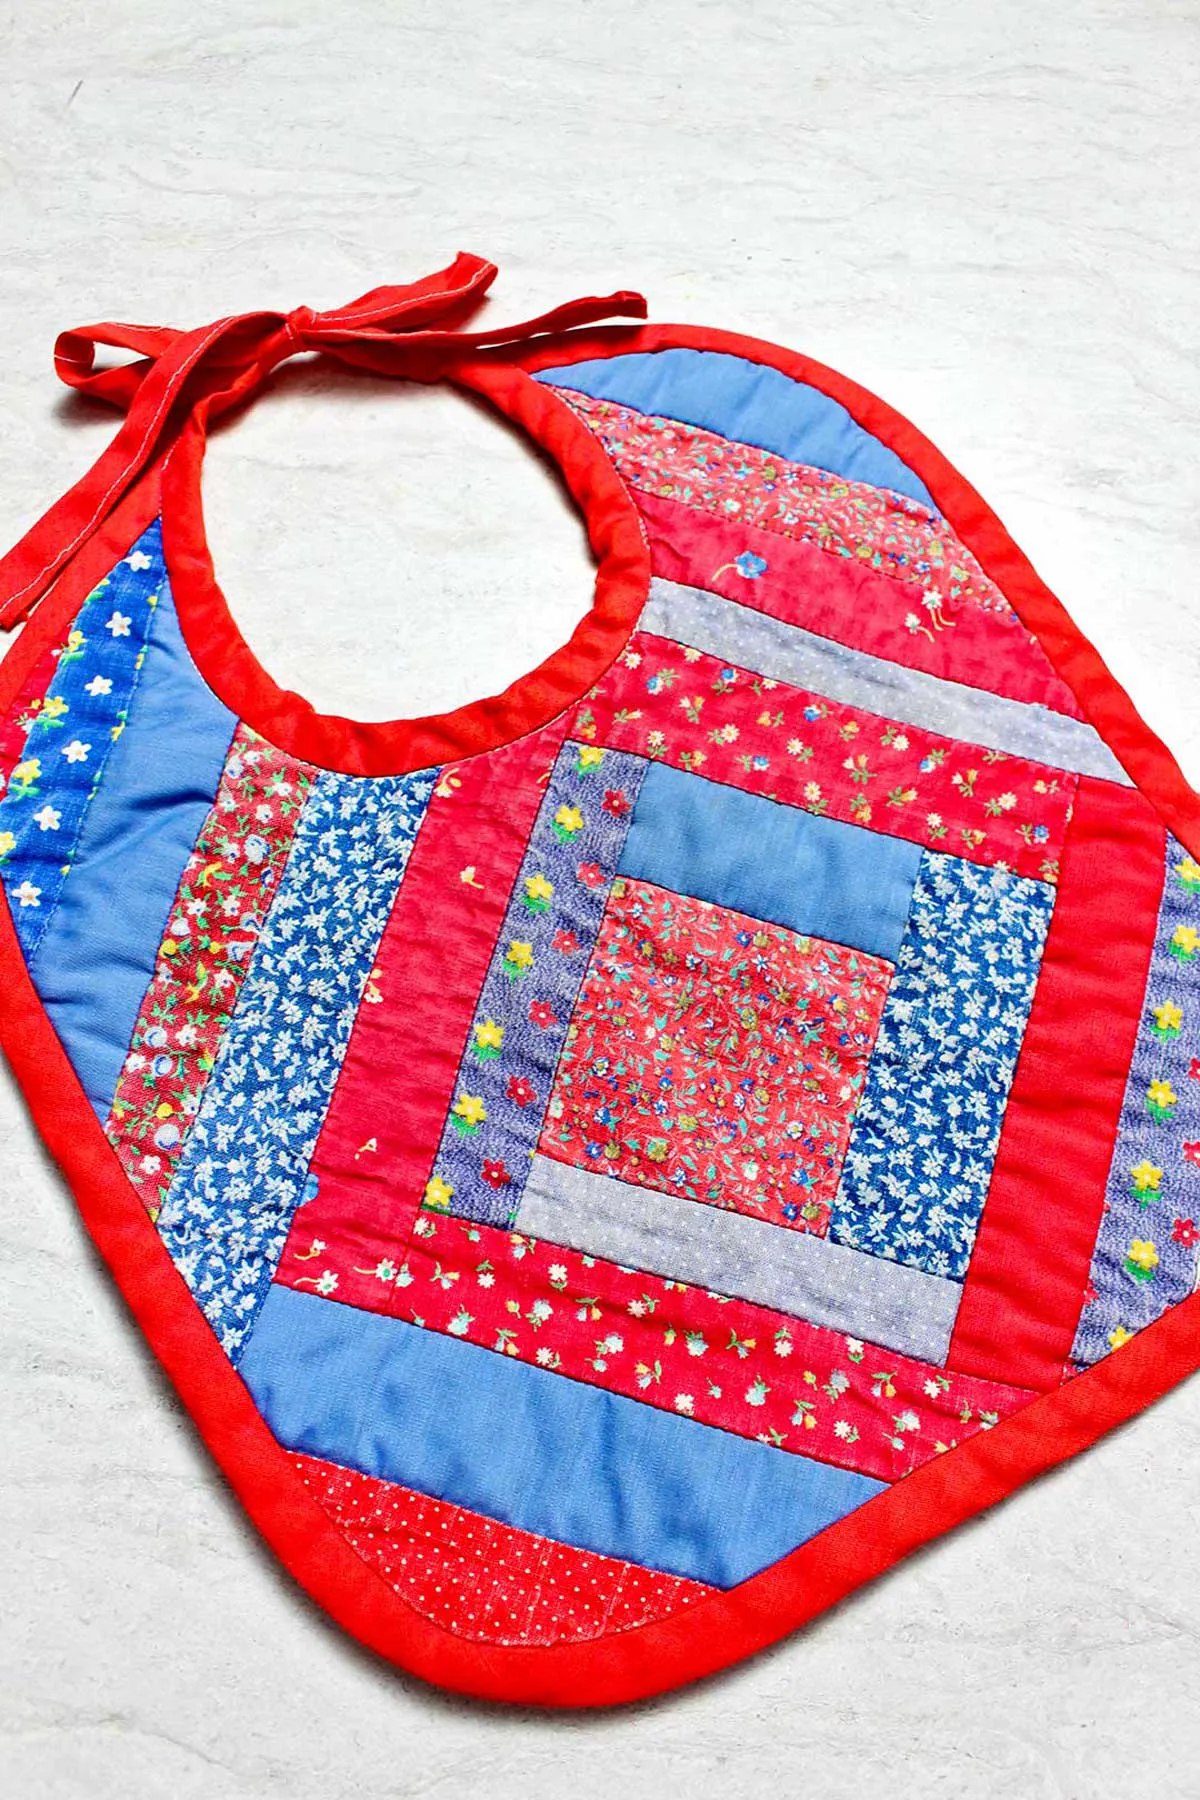
Vintage Inspired Project
This pattern was inspired by a vintage bib that belonged to my son who is now 35 years old!!
It was simple bib that held up over the test of time with a new baby, and I just loved the cute patterns of fabric.
Using that sweet first piece as a guide, I developed this free sewing pattern to make a gift for a friend’s baby and now want to share it with you. I hope this DIY baby bib provides as much good "drool-catching" use to the baby girl or boy in your life as it did for me!
How to Sew a baby bib
Watch the diy baby bib video first and then follow the written step by step instructions below.
Please enjoy and don’t forget to Like and SUBSCRIBE over on YouTube to be kept up to date with new videos as they come out.
Baby bib VIDEO TUTORIAL
INSTRUCTIONS:
STEP 1: Prepare the pattern
Print out the free baby bib pattern provided at 100%. Trim the excess paper
STEP 2: (optional) Piece together the front
Decide whether you want the bib in one piece of fabric of whether you want to piece a couple of different fabrics together to create the bib. If you are piecing fabric cut and stitch the fabric together using a ¼ inch (0.6cm) seam allowance, and press seams open before cutting the pattern.
STEP 3: Mark around the template
Place main fabric on top of the lining fabric, right sides facing and pin them together. Place the baby bib template on top of the main fabric, face down and mark around the pattern. Trim the excess fabric
STEP 4: Cut the fabrics
Cut two pieces for the front and back of the bib from the free pattern supplied 3/8″ from the edge of the pattern to allow for seam allowance.
Then cut the one piece of the terry cloth interfacing from the same pattern, this time do not add seam allowance. Terry cloth really is the best fabric to use, but you can use flannelette or a fairly thin sew-in batting or interfacing. For babies that tend to drool the terry cloth is the most absorbent and soft solution.
STEP 5: Layer the fabrics
Lay out the bib pieces on your worktop starting with the terry cloth (or alternative you have chosen, then lined up on top of it the front of the bib piece right side facing upward, then the back piece of the bib, wrong side facing upwards, on top of that.
Sewing Instructions for Your Baby Bib
Once you've printed both pages of the free bib pattern, cut the pattern out and tape the two pieces together.
Use the pattern now to cut one bib piece from each fabric that you've chosen.
If you'd prefer, you can find a printable copy of the whole tutorial by scrolling down to the "Print" button on the numbered instructions at the end of this post.
Monogram or design possibility
I chose to add a monogram to the plain denim piece. I used a “K” which was the first letter in the babies first name.
You could also use a design of some sort- like a heart, car, or flower.
To make the monogrammed piece, I ironed Wonder Under (a fusible web) on the wrong side, or back of the fabric. Next I drew the design on the fabric and cut it out.
Once this was finished, I pulled off the paper backing on the Wonder Under and ironed the monogram on the front of the denim bib piece of fabric. It works so well!
Follow the instructions on the Wonder Under for this step.
Place the two pieces together.
Place the two bib pieces together, edges matching, wrong sides together.
One of my bonus tips for those new to sewing - you can hold the first layer together with the second layer by zig-zag stitching the edges. The only purpose of this is just to hold the layers of fabric in place as you finish the edge, if you want!
Just to restate, at this point you want the right sides of the fabrics both facing out, so you can see those cute designs whenever reversed!
Finish edge with seam binding
We will use seam binding or bias tape to finish the edge of the bib. You'll want to choose a color that coordinates with your fabric.
Open the binding up and sandwich the edge of the bib inside the binding. Start on the neck edge and go all the way around the main part of the bib, ending again at the top of the bib on the other neck edge.
If it helps you, you can pin the seam binding on before sewing so you make sure you catch every layer of the bib and it stays secure as you sew.

Tegs: