Master the Art of Weaving in Ends: A Crochet Tutorial for Beginners
Perfect Your Crochet Finish: Techniques for Weaving in Ends
Perfect Your Crochet Finish: Techniques for Weaving in Ends
Step-by-step guide on weaving in ends
Source: nimble-needles.com
Weaving in ends is an essential part of finishing any crochet project, including granny squares. It helps to secure loose yarn strands and prevents them from unraveling over time. If you're wondering how to properly weave in ends in your crochet granny squares, you've come to the right place. In this step-by-step guide, we will walk you through the process of weaving in ends to ensure a neat and professional finish to your project.
Step 1: Gather your materials
Before you start, gather the materials you'll need: the finished granny square, a yarn needle, and a pair of scissors. The yarn needle should have a blunt end to prevent any accidents while weaving.
Step 2: Prepare the yarn needle
Thread the loose end of the yarn through the eye of the yarn needle. Make sure to leave a tail of a few inches to have enough length to work with.
Step 3: Identify the loose ends
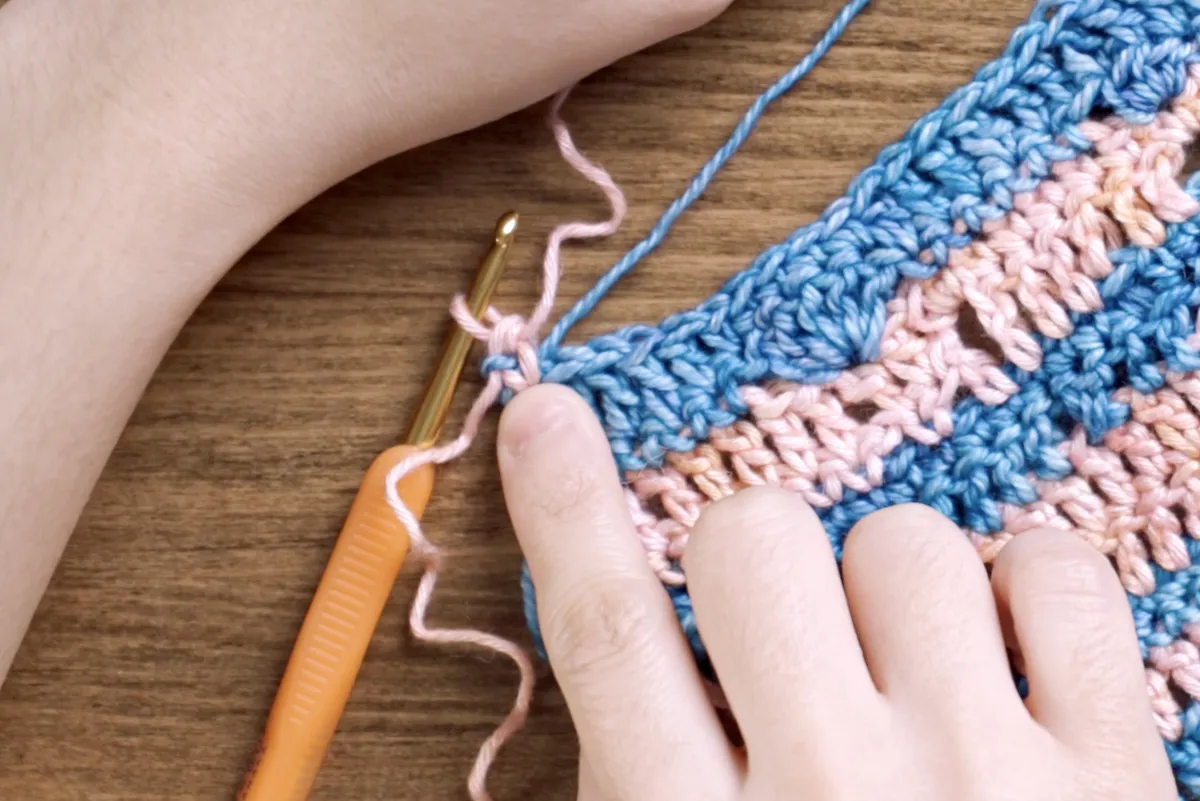
Step 4: Insert the needle
Starting with one loose end, insert the yarn needle under the stitches of the nearest row or round. Make sure to weave the needle through both the front and back loops to secure the end.
Step 5: Weave in the yarn
Carefully weave the yarn needle in and out of the stitches for about an inch, following the direction of the stitches. This will help to lock the yarn in place and prevent it from coming loose.
Step 6: Change direction
After weaving through the stitches for an inch, change the direction of the yarn needle and weave it back in the opposite direction, following the path of the previous stitches. This crossing motion helps to further secure the yarn.
Step 7: Trim the yarn
Once you've woven the loose end in and out of the stitches in both directions, cut the excess yarn tail, leaving a small tail of about half an inch. This remaining tail will blend in with the stitches and become virtually invisible.
Step 8: Repeat the process
Repeat steps 4 to 7 for any remaining loose ends in your granny square. Take your time to ensure that each end is woven in securely and neatly.
By following these step-by-step instructions, you can confidently weave in the ends of your crochet granny squares and achieve a professional and clean finish. Remember to weave the ends in different directions to prevent them from coming undone. With a little patience and practice, your granny squares will look flawless and ready to be assembled into your final project. Happy crocheting!
Notes
Some steps can also be done by simply holding the yarn tail alongside the working yarn, but this method can create bulkier, more noticeable stitches.
Do you have questions about weaving in ends in crochet? If you’re an All-Access School of SweetGeorgia member, join us in our Community Forums! One of the great perks of being an All-Access member is the opportunity to ask Charlotte questions about their articles and courses and connect with fellow members. We hope to see you there!
You’re also welcome to join us on the SweetGeorgia Yarns Discord server. Our community has discussion threads on knitting, spinning, weaving, crocheting, dyeing, and much more. Feel free to start a conversation, get inspiration from fellow SweetGeorgia Yarns members and ask any questions you may have.
Together, we share, learn, and grow as a community. We would be happy to have you join us!
Original publication: November 30th, 2021; Refreshed: March 15th, 2025
Looking for crochet pattern inspiration to test out your new weaving-in-ends skills? Learn more about our further crochet content plus download our free crochet pattern bundle!
Common Mistakes To Avoid
To achieve a professional finish, avoid these common mistakes when weaving in ends:
To achieve the best possible results when weaving in ends, consider these tips:
- Choose a weaving path - Follow the stitch pattern as closely as possible to create a seamless appearance.
- Use the right tools - Make sure you have the appropriate yarn needle, scissors, and crochet hook on hand.
- Block your work -Blocking your crochet project can help even out stitches and make weaving in ends easier.
- Consider yarn type - Some yarns, like slippery or smooth fibers, may require additional care when weaving in ends to ensure they stay secure.
Weaving in ends is an essential skill you need for any crochet project.
By selecting the right tools, following our step-by-step guide, and implementing various techniques, you can achieve a seamless, professional finish for your crochet projects.
Remember to avoid common mistakes listed above when weaving ends, and use our tips to enhance the overall appearance of your work.
When Do You Weave in the Ends?
Yarn tails are woven in at the end of the project before blocking. Weaving the ends in before blocking will make them stay more secure. The fibers will adhere to each other from the water and stretching of the fabric. The yarn end will also relax more from the blocking. So if you pulled it too tight initially, it will loosen up.
It is also recommended to weave in your ends before seaming. I, however, never adhere to this. I like to use Method #5 and then weave in my ends, especially for garments. I like to ensure the fit is good before I go into all the work to weave in the ends.

Tegs:
Search
Recent Posts
-
Hot Water Curl Weaving: Create Stunning Textures with This Unique Technique
Apr 13 2025
-
Black & Blonde Beauty: Exploring Sew-In Weave Styles & Techniques
Apr 13 2025
-
Unravel the Story Behind "Hair or Weave": A Deep Dive into the Song's Lyrics
Apr 14 2025
-
Fallout 4 Ballistic Weave: Crafting and Customization Guide
Apr 14 2025
Subscribe to Updates
Get the latest posts and fashion insights directly in your inbox.