Knit Fingerless Mittens: A Beginner's Guide
Warm and Stylish: Learn to Knit Fingerless Mittens with Ease
Warm and Stylish: Learn to Knit Fingerless Mittens with Ease
Finishing Touches
Once your fingerless gloves are knitted, it’s important to take the final steps to make sure they look polished and last a long time. These steps include closing any gaps, weaving in loose yarn ends, and blocking the gloves for a neat and professional appearance.
Closing Holes and Weaving In Ends
After knitting, you may notice small holes where the thumb joins the main body of the gloves. These holes are inevitable for all skill levels of knitters. It’s just the nature of knitting. Use a tapestry needle and a piece of matching yarn to close these gaps. The mattress stitch is perfect for this task as it creates an almost invisible seam. Work carefully in the areas where the thumb meets the hand to ensure there are no holes left.
Start with a secure knot to keep your ends in place. Use the needle to weave the yarn ends in and out of the inside stitches of the glove. This not only hides the ends but also prevents fraying. Trim any remaining yarn being careful not to cut too close to the knitted fabric.
Blocking for a Professional Finish
Blocking shapes the gloves to your desires and smoothes out any bumps. Begin by soaking your gloves in lukewarm water. You can do this by hand, but you may also use a gentle cycle on the washing machine. Just be sure to use cold water and a delicate setting if you choose the latter.
Your Recently Viewed Projects
Thanks for your comment. Don't forget to share!
I have made these but it took far longer than 2 hours because I had to fix the mistakes as I went. What I believe is the problem is that the pattern seems to have originally written to be made in the round and was incorrectly translated to be worked flat. There are no complicated adjustments just a few common sense ones.
After realizing the pattern is wrong, I spent 20 minutes adjusting and they are beautiful. I'm on a third pair. so quick and easy. worth the extra effort.
yes this pattern is badly written! however it doesn't need some of the complicated adjustments already given. Read increase rows as purl rows, increase a stitch by 'purling' into front and back of stitch. T work the thumb, knit 32 stitches (18 plus the 14 for thumb), turn andwork 14 stitches as given for thumb, when thumb is long enough (I did 6 rows of rib) cast off. Then rejoin wool to the 18 stitches on your left needle, knit to end. Continue with 36 stitches to end. Creates a perfect thumb.
diannenathan 53328 09
Thank you for your tips, they knit up easily and quickly
patsysdaycare 1158 687
no. you cannot k 2 rows in a row and have a st stitch!! pattern needs adjusted
Stay away from this pattern I am an expert knitter terrible info I would say no star
I admit I am not an expert knitter but there is something very wrong with this pattern. I tried it three times and that's it. In the time I played with this I could have crocheted a pair. I have made a lot doing that but though knitting a pair would e different. Different it was!!
Although the project says easy be aware if you are a beginner knitter as the instructions are very difficult to follow, it states no gauge and you need to measure the knitting rather than following fixed rows. There are rows where if you follow the pattern you would have 2 knit rows together and so you need a certain skill level to be able to predict what the project will look like before following it. Although I am a fairly advanced knitter it took me longer than 2 hours as I made a few mistakes and had to rewrite parts of the pattern whilst knitting. There are many more fingerless glove patterns on this site that are much more suitable for novice knitters.
#6. Log Cabin Fingerless Mitts Free Knitting Pattern
In Part 1 of this pattern, you’ll knit a pair of semi-traditional log cabin squares. No intarsia required! Then in Part 2, you’ll use a clever combination of joinery and miter techniques common to log cabin knitting to transform those squares into a unique pair of fingerless gloves with a neatly sculpted thumb gusset.
They’re highly addictive and a great way to use up small amounts of yarn. The pattern is written for three colors in a particular arrangement, but you may distribute the colors as you like. In order for them to be a mirrored set, the two log cabin squares are worked differently from each other — one in traditional fashion and one not — both with strategic live stitches to be joined in Part 2.
Sized for a hand about 7”-8” around, the pattern includes instructions for resizing them up or down, as well as other possible variations. It is highly adaptable and fun to play around with!
Uses worsted weight yarn
Designed by Karen Templar
- Get Log Cabin Mitts Free Knitting Pattern
- Get Brooklyn Tweed Shelter Yarn for this project
How to Knit Fingerless Gloves (in Two Hours)
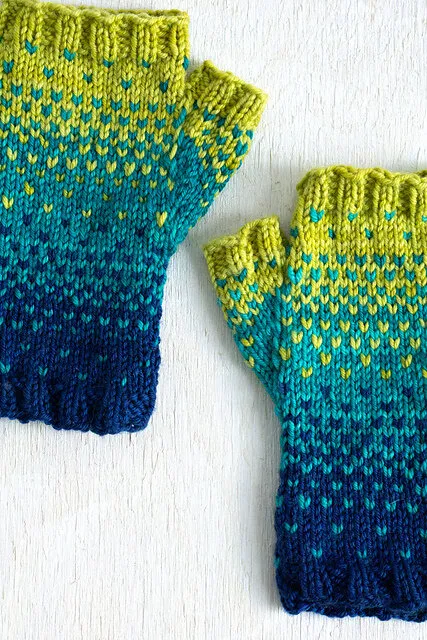
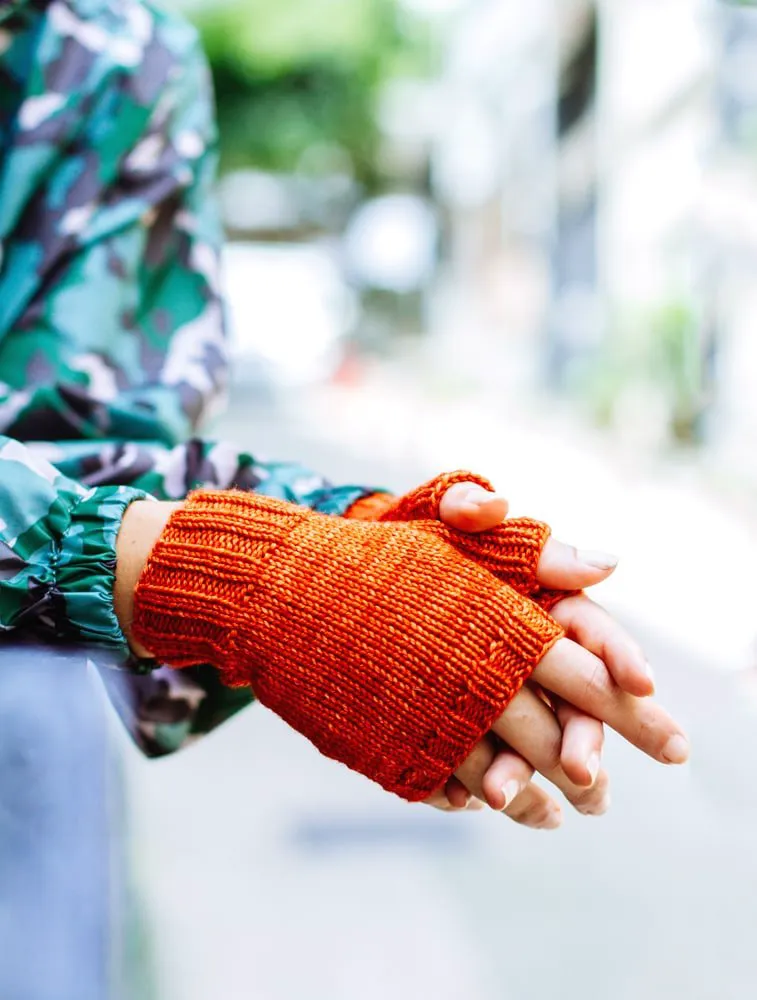
How to Knit Fingerless GlovesIf you've ever wondered how to knit a pair of fingerless mittens, this is the pattern for you. Courtesy of this free knitting pattern from Onix Terevinto, you'll be able to whip up a pair of your very own Two Hour Fingerless Gloves in a short amount of time.
Keep hands and wrists extra toasty while driving just by donning these stylish and colorful mitts. If you've got some extra yarn lying around, patterns for gloves like this one are a great stash buster and quick knit!
This is a great project for the cold months. You can knit these in a couple of hours, depending on your skill level I used worsted wool and straight knitting needles #6. You can adjust the pattern for circular needles. Make two. This size fits a regular size hand.
Knitting Needle Size 6 or 4 mm
Yarn Weight (4) Medium Weight/Worsted Weight and Aran (16-20 stitches to 4 inches)
Pattern
Cuff
CO 36 sts
(K2, p2), repeat for about 3 inches.
Palm
Row 1: (K9, m1), repeat ( ) across (40 sts)
Row 2: P all sts
Row 3: K all sts
Row 1: K18, kfb, k2, kfb, k18
Row 2: P all sts
Row 3: K all sts
Row 4: P all sts
Row 5: K18, kfb, k4, kfb, k18
Rows 6-8: Repeat rows 2-4
Row 9: K18, kfb, k6, kfb, k18
Rows 10-12: Repeat rows 2-4
Row 13: K18, kfb, k8, kfb, k18
Rows 14-16: Repeat rows 2-4
Row 17: K18, kfb, k10, kfb, k18
Row 18: P all sts
Row 19: K all sts
Working the Thumb
Row 20: K18 and slip those sts to a holding needle. K14 sts and leave them on the needle. Then slip the remaining 18 sts to the other holding needle.
The following rows will be knit from the 14 sts still on the needle.
Row 21: P all sts
Row 22: K all sts
Rows 23-26: (K2, p2), repeat ( ) across.
Bind off

Tegs:
Search
Recent Posts
-
Chunky Knit Blankets: The Ultimate Guide to Cozy Comfort
Apr 13 2025
-
Learn to Knit a Thumb on a Mitten: A Simple and Effective Tutorial
Apr 14 2025
-
Hand-Knitted Bliss: Weighted Blanket Chunky Knit for Ultimate Relaxation
Apr 14 2025
-
Master the SSK: A Comprehensive Guide to Knitting the Slip-Slip-Knit Stitch
Apr 14 2025
Subscribe to Updates
Get the latest posts and fashion insights directly in your inbox.