Elevate Your Crochet: Learn How to Incorporate Beads into Your Projects
Add a touch of sparkle to your crochet projects with beads! Learn different techniques and create stunning, unique designs.
Add a touch of sparkle to your crochet projects with beads! Learn different techniques and create stunning, unique designs.
How to Crochet with Beads
If you need a visual, the video above will do the trick. Don't forget to keep scrolling for some of our favorite bead crochet patterns!
- First, find your crochet jewelry or accessory pattern and take note of all the main materials - most bead crochet projects are made with crochet thread, but you can use regular yarn or even crochet with wire for a unique look! (The technique is the same!)
- Make sure your chosen beads have holes big enough to slip yarn, thread, or wire through - if you think you'll have trouble, a yarn needle should be helpful.
- Does your project also need any clasps, jump rings, or fastenings? Make sure you have those ready to go for instant satisfaction when you're done.
- Insert your crochet hook into the back loop of the stitch, yarn over and pull through.
- You'll then slide the bead up close to the loops, yarn over and pull through both loops. This holds the bead in place on the wrong side of your work.
Wanna save this for later?
Crochet Directly On Pre-String Beads
The second method is also fairly obvious. You purchase a strand of beads, like Mardi Gras beads perhaps and crochet right onto the strand.
Now, let’s take a look at the third method. This involves some preparation before you can begin crocheting.
It’s very simple. You just string the beads.
You can use a needle, a beading needle, dental floss or my favorite method: dip the end of the yarn in some melted candle wax and shape it into a needle as the wax dries.
Note that I like to do a different version of single crochet with this method. With a regular single crochet, the bead lands squarely in the back of the stitch. This could be used if you are working on the Wrong Side of your fabric, of course, but it isn’t quite as pretty when you’re working on the Right Side of your work.
Some words of caution with this method: Check your yarn or thread to ensure that you don’t have any manufacturer’s joins/knots. You don’t want to string a lot of beads and then discover that you can’t scoot them along because there’s a knot.
Also, only use this method if your yarn or thread can handle it. If you’re using a delicate yarn, for instance, you’re going to have to use a different method, like the last method below.
For this method, you remove the working loop from your hook and place a bead on the loop with a crochet hook that will fit through the hole in your bed.
I hope you enjoy these tutorials and you will soon have an opportunity to add some bling to your crochet projects!
Tunisian Crochet Stitch Library eBook
53 Tunisian Crochet Stitches with diagrams, instructions, video support and images.
Many of you have written to me to ask how you can help support CrochetKim. A Patreon account was suggested but I thought it would be better to provide ad-free PDF's of my patterns. You can, of course, view, print ,paste to a word processor, convert to PDF's, etc, on your own. This is just an extra feature so that people help out if they want. Thank you to all of you for your overwhelming support and kindness these many years. Enjoy!
How to choose the beading method for you:
First, you’ll want to think of the material you are using to make your crochet project. Are you using actual yarn, or are you using crochet thread? The real question is: How delicate is the fiber?
If you are using a yarn that is thinner you probably don’t want to pre-string your beads. The weight of the beads sliding back and forth, and the friction of pushing them down, will start to wear on the yarn and make it more liable to break.
If you’re not sure where you want the beads, adding them with the needle and thread after the fact will probably be your best option. (method #1)
If you are using a thinner or more delicate yarn/thread, you will most likely want to add the beads individually as you go. (method #2)
If you are using a crochet thread that has been mercerized (treated for durability) pre-stringing may be just the ticket! (method #3)
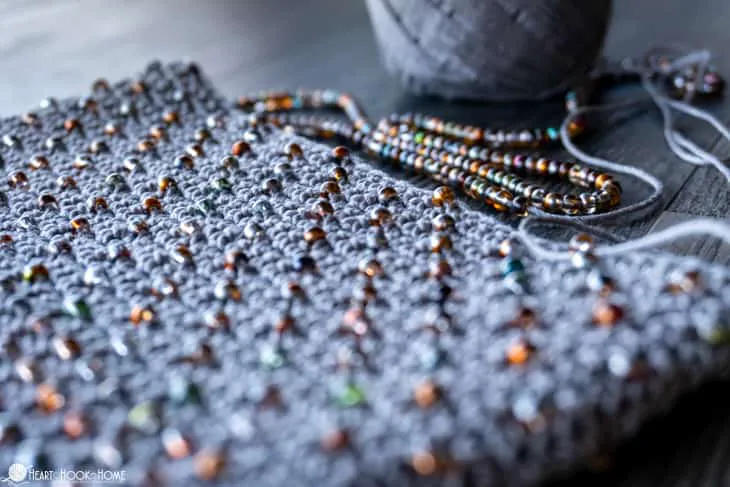
When you’re ready to start a new project with beads, I encourage you to try the Cross-Body Bead Bag pattern pictured in this post. It only requires single crochet and not much crochet thread!
My go-to combination for crocheting with beads is Curio #3 crochet thread (“Whisker” colorway pictured) with size 6/0 Seed Beads that are pre-strung using my Spin N Bead Jr. Bead Loader. (Side note: the cheapest I have found this little bead stringer is at this link – it really is worth the investment – especially if there’s a coupon!)
And now for the video tutorial showcasing each of these three main ways for adding beads to crochet. Find the Cross-Body Bead Bag purse pattern I’m working on in the video right here on Heart Hook Home. ♥
Method #1 starts at 1:00
Method #2 starts at 1:56
Pre-stringing the beads starts at 5:24
Pre-string method #1 starts at 9:50
Pre-string method #2 starts at 11:10
If you are new to beading, I hope you love this adventure! If you’re an old pro, be sure to share your own tips in the comments!


Tegs:
Search
Recent Posts
-
Zara Cream Crochet Dress: Embrace the Beauty of Crochet with this Stunning Dress
Apr 13 2025
-
Cozy Up Your Car: Crochet a Steering Wheel Cover with this Easy Pattern
Apr 13 2025
-
Make a Cozy Pot Holder with This Free Crochet Pattern
Apr 13 2025
-
Crochet a Cozy Scarf in a Day: Easy Pattern for Beginners, Perfect for Gift-Giving
Apr 13 2025
Subscribe to Updates
Get the latest posts and fashion insights directly in your inbox.