Crochet a Balloon Dog: Easy Step-by-Step Tutorial
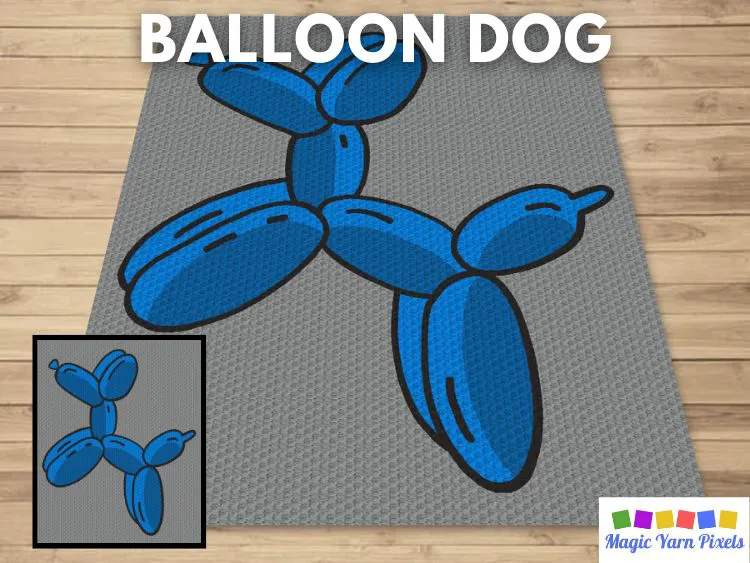
Learn to Crochet a Balloon Dog: Fun & Easy Guide
Learn to Crochet a Balloon Dog: Fun & Easy Guide
Video Tutorials & Other Resources For Balloon Dog Blanket
Not sure how to use the graph or written instructions? Below you have tutorials and video resources to help you with some of the techniques.
I have created a complete guide to C2C crochet that teaches you everything you need to know about this technique.
If you want to download the PDF version of my c2c guide, you will find it on Patreon when you join as a MagicYarnPixels Supporter.
You will also find a complete collection of helpful c2c tutorial videos on my other youtube channel.
If you are interested in Tapestry or Intarsia crochet, I have put together a playlist of helpful video tutorials from talented crocheters to get you started.
You will find the Tapestry crochet video tutorials in this playlist and the Intarsia crochet video tutorials in this playlist.
5 Additional Tips and Tricks
- When crocheting a balloon dog, it’s best to use two strands of yarn to make the finished product more durable.
- Use an extra-large crochet hook for more intricate stitches and larger pieces of work.
- If you plan on making multiple balloon dogs, try using different colors of yarn for each one for a unique look.
- When threading the yarn through the balloon knot, use a needle that is big enough so it doesn’t tear or break the balloon.
- Make sure you have plenty of patience when crocheting! It can take some time and practice to get it just right.
With a little practice and patience, you’ll make amazing balloon dogs in no time! Feel free to experiment with different colors and sizes of yarn for an even more creative look. Don’t forget to show off your finished project to friends and family – they will surely be impressed by your handiwork!
Step-By-Step Guide to Crocheting a Balloon Dog
Now that you have all the necessary materials and tools ready, it’s time to start crocheting! Here are the steps to follow:
Step 1: Start by creating a foundation chain with your chosen yarn and crochet hook. The number of chains you make will depend on how big or small you want your balloon dog to be; generally speaking, more chains means a bigger balloon dog.
Step 2: Once you have created your foundation chain, single crochet into each chain across until you reach the end of the row. When you reach the end of the row, turn your work and single crochet back across in the opposite direction until you reach the end of that row. Repeat this process until you have reached the desired length for your balloon dog’s body.
Step 3: Once you have reached the desired length for your balloon dog’s body, start decreasing at both ends of each row until only one stitch remains at both ends. This will create a tube shape which is perfect for making a balloon dog!
Step 4: Stuff your tube with polyfil stuffing until it has reached its desired shape and size. Make sure not to overstuff it as this could cause it to become misshapen or lumpy.
What You Need to Crochet a Balloon Dog
Before you start crocheting your own balloon dog, it’s important to have all the right materials and tools ready. Here’s what you’ll need:
• Yarn – You can use any type of yarn for crocheting a balloon dog. The type of yarn you choose will determine the size of your finished product.
• Crochet hook – The size of crochet hook you use will depend on the type of yarn you choose. Generally speaking, thicker yarns require larger hooks while thinner yarns require smaller hooks.
• Polyfil stuffing – This is used to give your balloon dog its shape and structure.
• Scissors – For cutting the yarn.
• Tapestry needle – This is used for weaving in ends and sewing pieces together.


Tegs:
Search
Recent Posts
-
Zara Cream Crochet Dress: Embrace the Beauty of Crochet with this Stunning Dress
Apr 13 2025
-
Cozy Up Your Car: Crochet a Steering Wheel Cover with this Easy Pattern
Apr 13 2025
-
Make a Cozy Pot Holder with This Free Crochet Pattern
Apr 13 2025
-
Crochet a Cozy Scarf in a Day: Easy Pattern for Beginners, Perfect for Gift-Giving
Apr 13 2025
Subscribe to Updates
Get the latest posts and fashion insights directly in your inbox.