Fastest Way to Remove Embroidery: A Step-by-Step Guide
Remove Embroidery Easily and Quickly: A Proven Method
Remove Embroidery Easily and Quickly: A Proven Method
Tools to Remove Embroidery from Shirts, Jackets, Hats, and More
Sometimes embroidery just needs to be removed. Like when I got married and changed my last name on my white coat. Or if you change jobs and need to remove a logo from a shirt.
And sometimes you just make mistakes when learning to use an embroidery machine.
One thing to remember is if you make a mistake in the middle of stitching and think it can be fixed, keep your fabric in your embroidery hoop while removing the embroidered area so you can then pick up embroidering where you left off. Rehooping is very difficult to get perfect results.
Now, I’ve tried many different ways to remove embroidery, and I’ll soon describe the three tools I like to use: a Stitch Eraser or Stitch Ripper, a seam ripper, or a household razor.
I also made a fun canvas test piece of embroidery to remove, put on a cheesy Hallmark Christmas movie, and timed how long it took to remove the canvas design as well as a design on a t-shirt.
How to Remove Embroidery | Best Ways
Removing embroidery can be tricky, but with the right methods, it becomes much easier. Here are the 3 best ways to remove machine embroidery without damaging your fabric:
- Using an Embroidery Eraser
- Using a Seam Ripper
- Using Embroidery Scissors
1. Using an Embroidery Eraser
- Turn the Fabric Inside Out – Turn your fabric inside out to access the stitches more easily.
- Place Fabric in a Hoop – Secure the fabric with an embroidery hoop to keep it tight while you remove stitches .
- Turn on the Embroidery Eraser – Gently run the embroidery eraser over the stitches, applying just enough pressure to cut the threads without damaging the fabric.
- Pull the Threads – Once the threads are cut, turn the fabric right side out and use tweezers to pull out the loose threads.
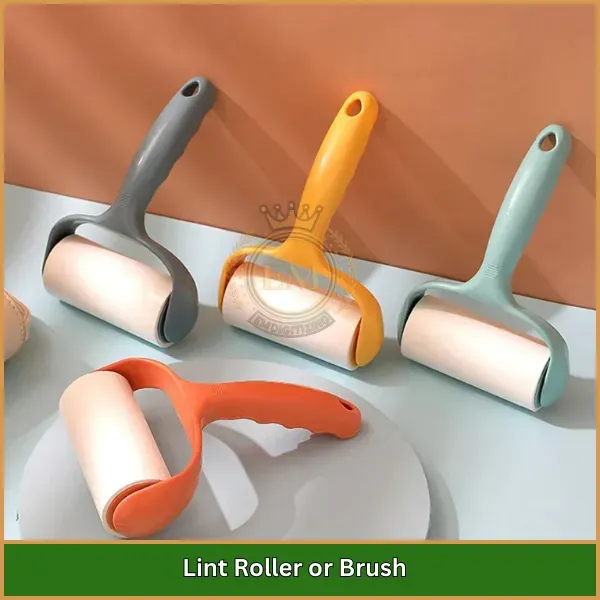
- Clean the Fabric – Use a lint roller or brush to remove any remaining thread or fuzz after the process.
2. Using a Seam Ripper
- Turn the Fabric Inside Out – Start by turning your fabric inside out to easily access and remove stitches from the back.
- Insert Seam Ripper Under Stitches – Slide the seam ripper under a few stitches and gently lift to cut them.
- Pull the Threads – Turn the fabric back to the front and use tweezers or your fingers to pull out the loosened threads.
- Repeat the Process – Keep cutting and pulling stitches until the whole design is removed.
- Clean the Fabric – Use a lint roller to remove any leftover threads or fuzz.
This method is the best way to remove embroidery carefully and effectively.
3. Using Embroidery Scissors
- Turn the Fabric Inside Out – Begin by flipping the fabric inside out so you can clearly see the stitches.
- Carefully Cut the Stitches – Use the sharp tip of your embroidery scissors to carefully cut a few stitches at a time without damaging the fabric.
- Pull Out Loose Threads – Turn the fabric right side out and gently pull out the loose threads with tweezers or your fingers.
- Continue Cutting and Pulling – Keep cutting and pulling threads until all the stitches have been removed.
- Clean the Area – After you’re done, use a lint roller to clean off any remaining thread or fuzz.
Alternatives Methods to Remove Embroidery
While the techniques mentioned above are effective for removing embroidery, you can explore a few alternative methods, depending on your specific situation and preferences.
Steam and Heat
If you’re dealing with stubborn stitches or adhesives used in machine embroidery, steam and heat can be your allies. Place a damp or press cloth over the embroidery and use a steam iron on the lowest heat setting.
The steam will soften the threads and make it easier to remove them. Be cautious not to overheat or scorch the fabric, especially if it’s delicate.
If you have a shirt and want to know how to remove patches from a shirt or any other garment with backing, then this method is best.
Freezing
For small embroidery patches or delicate fabrics, freezing can be a gentle method. Place the fabric in a sealable plastic bag and put it in the freezer for several hours or overnight.
The cold will make the threads brittle, allowing you to break or pick them off with minimal effort. This method is less aggressive and may be suitable for removing patches on delicate fabrics.
Art of Embroidery Removal: Fabric's Best Friend
Removing embroidery can be a challenging task that involves cutting and pulling out stitches without damaging the fabric, but with the right tools and techniques, it can be done quickly and efficiently.
The process can vary depending on whether you are dealing with machine embroidery or hand embroidery.
Using tools, such as a curved seam ripper, embroidery eraser, and small scissors, can make the process much smoother.
Different fabrics require different techniques and tools for safe and efficient embroidery removal.
Working slowly and carefully, and understanding the fabric you are working with, can help you avoid mistakes and damage to the fabric.
Whether you are dealing with machine or hand embroidery, understanding the embroidery removal process and using the right tools can save you time and frustration.

Tegs:
Search
Recent Posts
Subscribe to Updates
Get the latest posts and fashion insights directly in your inbox.