DIY Crochet Rose Hair Clip: A Beautiful and Easy Project
Add a Touch of Romance: Crochet Your Own Rose Hair Clip
Add a Touch of Romance: Crochet Your Own Rose Hair Clip
Find relief for arthritis or joint pain with the Better Living ToolKit!
Check out these other great Crochet Projects!
Amber EdwardsI have a quirky obsession with BBC comedy and classics, Dr. Pepper, and chocolate.
I am passionate about photography, crafting, baking, and helping families make cherished memories from everyday, ordinary moments
She is dedicated to helping you leave a legacy of moments and celebrated milestones for your family to treasure generation after generation.
Thread Headband
Designed by Kinga Erdem, these pretty Thread Headbands were crocheted with Crochet Thread Size 8 and a 2 mm crochet hook. You will also need a hair elastic. These headbands are stretchy and cozy to wear. The free pattern for these crochet hair accessories includes a photo tutorial.
This fun Holiday Barrette was designed by Marly Bird. You can use your favorite yarn and hook for this project. For the barrette pictured Marly used Worsted Weight Yarn and a 6 mm (J) crochet hook. Watch the video tutorial here.
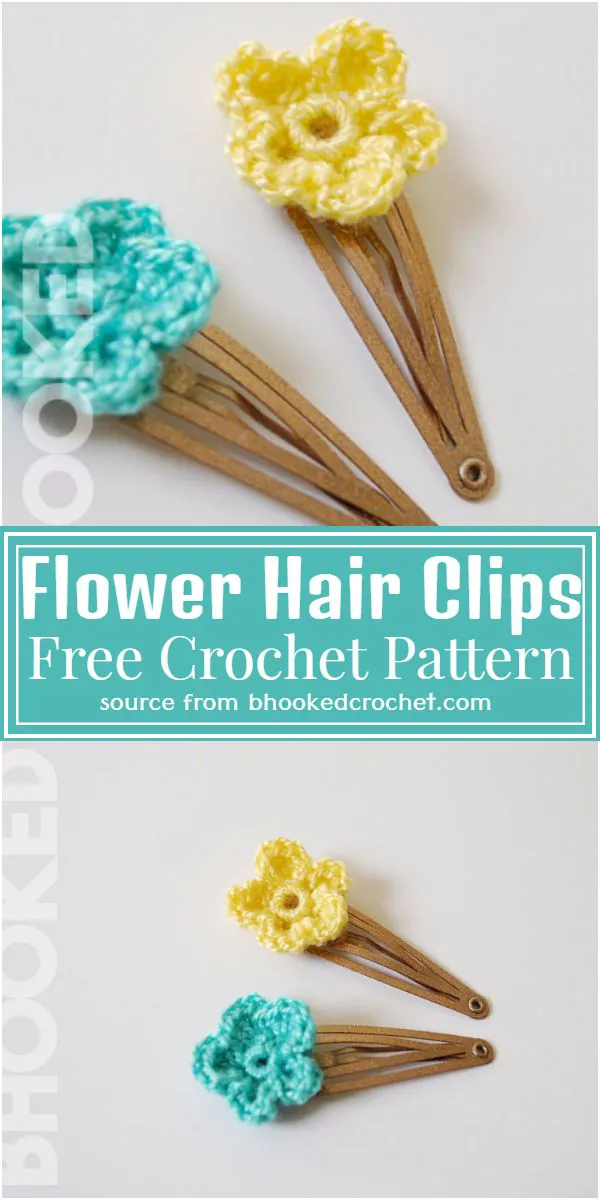
Easy Crochet Hair Clips
Hello my friends, who just like me, love crochet! How are you feeling today? I hope you’re doing great. Today we are here to learn a beautiful crochet pattern, it is very useful and beautiful! We are talking about the wonderful Crochet Hair Clips. A brilliant and wonderful idea that can be used in different seasons of the year and made in different models, according to your preference.
Crochet hair clips are decorative hair accessories made using crochet techniques. They are usually small and can be attached to the hair using a clip or bobby pin. Crochet hairpins are popular because they add a touch of charm and uniqueness to hairstyles.
Crochet hair clips can be made at any time of the year, they are very inexpensive and you can make them in less than 10 minutes. That’s great, isn’t it? Especially for those who have little girls at home, as it is a very used item and the more you have, the better, as it is a variety of hairpins that can be used in different combinations.
Continua após a publicidade..I’ve seen these bobby pins once in crafts and it’s amazing how beautiful they are. I noticed that they had some that were simply combinations of flowers layered with some pearls and also roses in several different colors. But pay attention, if they are hairpins made for children under 3 years old, we strongly recommend that you always do not use these small objects that can be swallowed, such as pearls and small roses.
The use of crochet thread gives them a delicate and elegant look that is ideal for any age! The choice of hair piece is up to you, you can use alligator clips or metal clips, however they also work great on French clips or clips sewn onto nylon headbands!
Continua após a publicidade..Here we are teaching the flower pattern, however, you can also crochet small bows and place them on your barrettes. Let your creativity guide you when making this beautiful project, you can vary the colors, leaving the piece very detailed, or doing it in a single color. The important thing is that you like it!
The complete written pattern for this beautiful piece is all available here, it’s a totally useful pattern and perfect for executing a beautiful project.
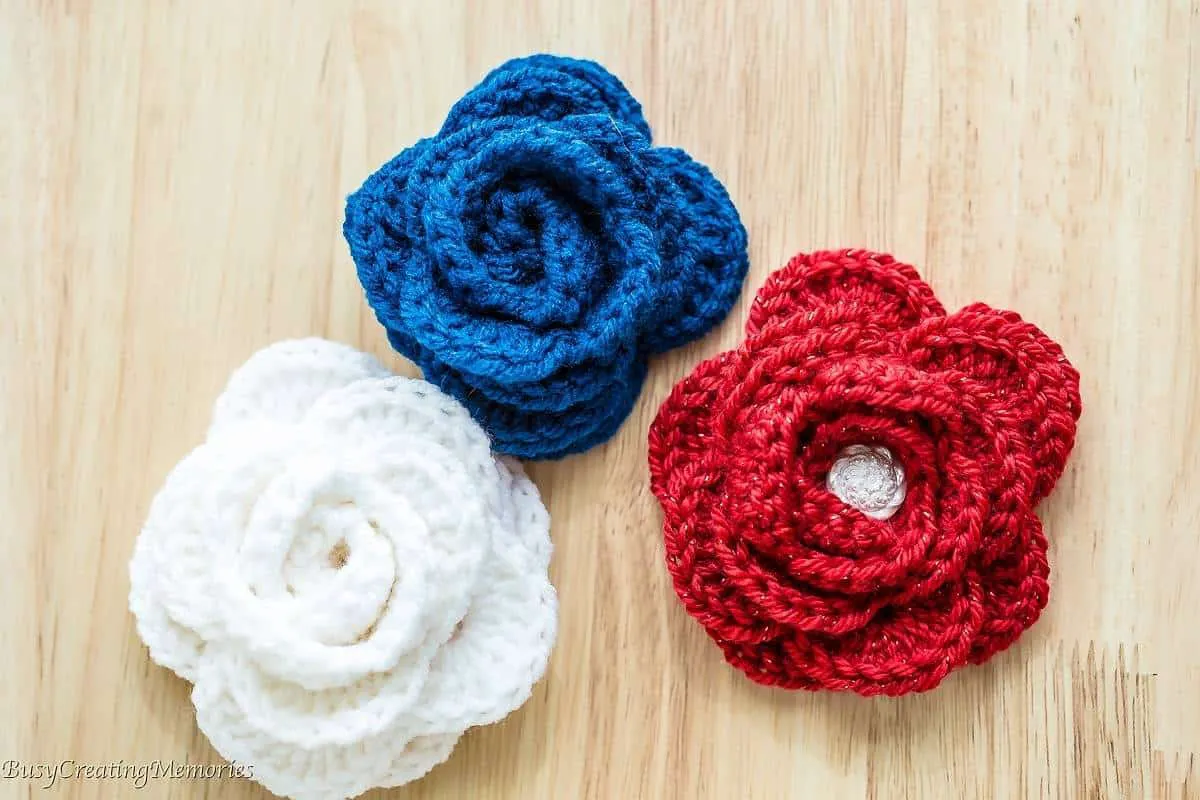
LAYERED FLOWER PATTERN
Layered Flower
Ensure you leave an elongated tail when crafting your magic circle for later attachment of the pearl bead.
Round 1: Begin by forming a magic circle with 6 single crochets (SC), then connect it to the initial SC with a slip stitch.
Round 2: Chain 1 and work the following sequence in the next stitch: 3 double crochets (DC), chain 1, and a slip stitch into the same stitch. In the subsequent stitch, execute a slip stitch, chain 1, 3 DC, chain 1, slip stitch, and repeat this pattern throughout the round. You’ll conclude with 6 petals.
Round 3: Chain 3 and slip stitch into the back post of the 3rd DC on your first petal. Repeat this action for each petal, and when you reach the 6th petal, slip stitch into the first ch 3.
Round 4: Chain 1 and work the following sequence in the next chain: 4 DC, chain 1, and a slip stitch into the chain. In the following chain, execute a slip stitch, chain 1, 3 DC, chain 1, slip stitch, and repeat this pattern around. You’ll end up with 6 petals.
Round 5: Chain 4 and slip stitch into the back post of the 4th DC on your first petal. Repeat this step for each petal, and when you reach the 6th petal, slip stitch into the first chain 4.
Round 6: Chain 1 and work the following sequence in the same chain: 5 DC, chain 1, and a slip stitch into the same chain. In the following chain, execute a slip stitch, chain 1, 3 DC, chain 1, slip stitch, and repeat this pattern around. You’ll complete the round with 6 petals.
Fasten off and securely weave in any loose ends.
Using the long tail you left, sew the pearl bead to the center of your crochet piece.
Finally, use a hot glue gun to attach the crochet piece to a hair clip.
There you have it—two charming and straightforward crochet hair clips!
To access the PDF of this adorable pattern just click on the link that we leave available below. It’s very simple and easy to follow, you won’t have any major problems with this pattern and you’ll have a lot of fun and enjoy it. Remember, this is just a basic guide, and you can get creative with different stitch patterns, embellishments, and designs to make unique crochet hair clips. Have fun experimenting and customizing your creations!

Tegs:
Search
Recent Posts
-
Zara Cream Crochet Dress: Embrace the Beauty of Crochet with this Stunning Dress
Apr 13 2025
-
Cozy Up Your Car: Crochet a Steering Wheel Cover with this Easy Pattern
Apr 13 2025
-
Make a Cozy Pot Holder with This Free Crochet Pattern
Apr 13 2025
-
Crochet a Cozy Scarf in a Day: Easy Pattern for Beginners, Perfect for Gift-Giving
Apr 13 2025
Subscribe to Updates
Get the latest posts and fashion insights directly in your inbox.