Comic Book Decoupage: Transform Your Projects with Superheroes
Unleash Your Creativity: Comic Book Decoupage Ideas & Techniques
Unleash Your Creativity: Comic Book Decoupage Ideas & Techniques
Did you make this project?
Please leave a comment on the blog or share a photo on Instagram
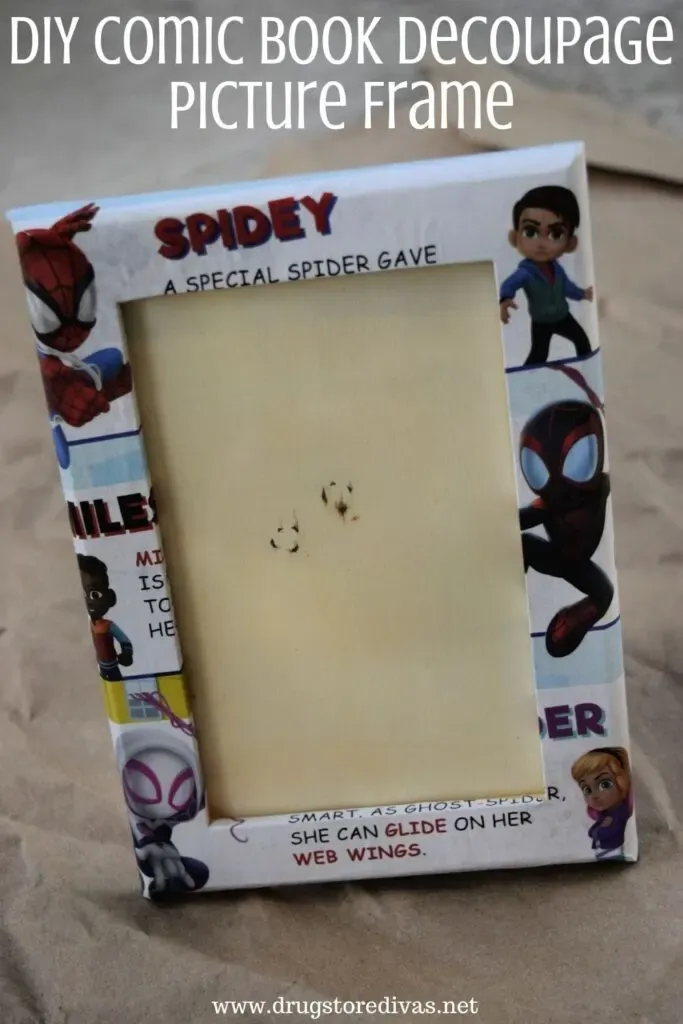
Project Type: Paper Craft / Category: diyHave you tried to make this DIY Comic Book Decoupage Picture Frame? Let us know how it went in the comics.
For this project you will need the following supplies:
- Comic books
- Wood frame
- Mod Podge or other decoupage medium
- Paintbrush
- Scissors
- Pen or pencil
You can find wood frames at both Joann’s and Michaels as well as at WalMart.
- Trace the frame onto the section of comic book that you want to use.
- Cut out those sections, trimming to fit the frame.
- Apply a thin layer of decoupage to the back of the comic book pieces and to the frame to prep them.
- Allow them to dry for 5 minutes.
- Position the comic book section onto the frame.
- Once it’s in place, carefully lift one side and apply some Mod Podge to the center.
- Working your way from the center outward help eliminate the possibility of air bubbles under the paper.
- Press the comic book into the Mod Podge.
- Continue working outward, attaching the comic book to the frame with the Mod Podge.
- Allow to dry for 20 minutes.
- Apply a generous, but not dripping, layer of Mod Podge over the top of the comic book pieces as a sealer.
- Let dry for at least one hour before adding a photo to the frame.
Hope you enjoyed this project! Here are more projects you might like. Have fun!
Instructions
- Trace the frame on paper, making sure to trace both the outside and the inside.
- Cut the frame out of the paper, leaving a little bit of extra room around the edges. Cut out the center, again, leaving a little extra room around the edges.
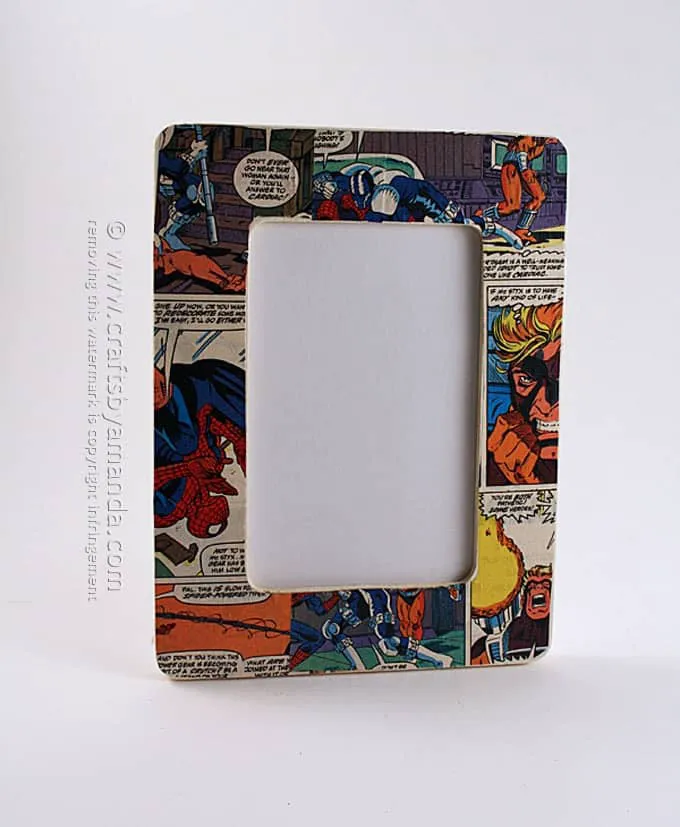
- Place the template over the comic book’s pages. Once you find a page that lines up well, trace the template onto the page. Cut out just the outer edge.
- Paint a thin layer of Mod Podge onto the frame’s face, sides, and inside.
- Put the comic book page, with the backside against the frame, onto the Mod Podge. Press down gently to affix the comic book to the frame’s front and sides.
- Flip the frame over. Very carefully, cut out the excess comic book from the center of the frame, leaving a little bit of extra to fold over.
- Add a little bit of Mod Podge around the edges of the frame (including the edges of the center) and affix the extra comic book page to the back of the frame. Let it dry for about an hour.
- Spray the comic book page on the front of the frame with a very thin layer of triple clear glaze.
Het resultaat
Onze comic book schatkist vind ik best wel stoer en mooi gelukt. Hij staat inmiddels al te pronken vol kleine schatten (zoals stickies en knikkers) op de kast in de kinderkamer.
Ik ben benieuwd, wat hebben jullie al gemaakt met decoupage? Gebruiken jullie dan altijd het ‘juiste’ papier of zoeken jullie soms ook eens een creatieve oplossing?
Deel gerust ook jullie eigen creatie binnen het thema “boeken” op sociale media met de hashtag #creaKrea. Je kan ook met de linkparty meedoen door je instagram foto of je blog artikel te delen via de link hieronder.
Vergeet natuurlijk ook niet om eens een kijkje te nemen bij de CreaKrea collega’s voor nog meer leuke creaties: Kreanimo, Mama duizendpoot, Mel DIY, Knutseljuf van Ede en Crea met kids
Op zoek naar meer creatieve inspiratie? Bekijk dan zeker mijn DIY rubriekje.

Tegs:
Search
Recent Posts
-
Left-Handed Embroidery: Mastering the Art of Embroidery as a Left-Handed Stitcher
Apr 25 2025
-
Discover Modern Macrame: A Guide to Contemporary Techniques and Designs
Apr 26 2025
-
Knit Amigurumi Book: Find Your Next Creative Project
Apr 26 2025
-
Discover the Beauty of Danish Cord Weaving: A Guide to Books and Techniques
May 2 2025
Subscribe to Updates
Get the latest posts and fashion insights directly in your inbox.