Chicken Scratch Embroidery Pattern Books: A Beginner's Guide to Needlework
Embroider Like a Pro: Mastering the Art of Chicken Scratch Embroidery
Embroider Like a Pro: Mastering the Art of Chicken Scratch Embroidery
Threads
In selecting threads to use for chicken scratch embroidery, you need to keep in mind the size of the checks on the fabric, and choose your threads accordingly. Very fine threads don’t work so well on large checks. Very heavy threads don’t work at all on tiny checks. It might take a little trial and error to figure out which threads will work best for the fabric you’re using.
In the sample directly above and in the chicken scratch embroidery we looked at the other day, I used the following:
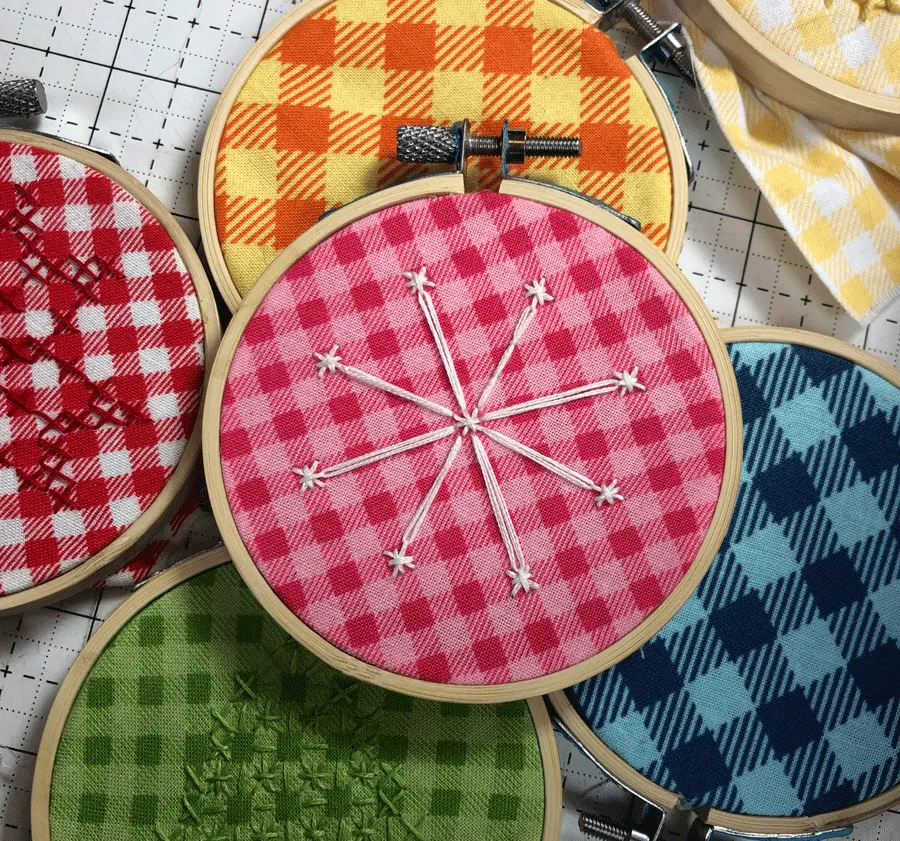
White foundation stitches (double cross stitches): coton a broder #20 or #25 (I used 20, but both work).
Yellow & Purple (flowers): coton a broder 25: I used one strand in yellow for the double cross stitch for the center of the flowers. In the sample directly above, I used two strands for the petals. In the previous sample (which matches the pattern in the PDF below), I used two strands of purple for the long petals on the flower and one strand for the short petals in between.
Leaves – one strand of floche in bright green.
Foundation Stitches
I find that the foundation stitches or holding stitches (the double cross stitches, cross stitches, upright cross stitches and straight stitches behind which other threads pass to create designs) are better off when worked in a non-strandable thread, like coton a broder in the various sizes, or perle cotton. If you work the foundation threads with regular stranded cotton, it’s very easy to catch parts of them while passing underneath them.
Materials & Tools for Chicken Scratch Embroidery
Gingham Fabric: For adults or older youth who have their motor skills under control, any size of gingham will work, from 1/2″ down to 1/16″ micro check fabric. For younger children, 3/16″ and 1/4″ or larger gingham would be easier to handle.
Many proficient chicken-scratchers like to use homespun gingham, which has a slightly coarser appearance to it, usually has no discernible front or back, and has more equally “square” checks to it. (Most gingham cotton features slightly rectangular checks.) Homespun is nice for casual table cloths – I always associate it with picnics!
Threads: Gauge the threads to the size of the check. On 1/8″ gingham, I use coton a broder #20 in white for the foundation stitches, coton a broder #25 and cotton floche for colored lacing stitches (sometimes using two strands of either, for elements I want to accent), and coton a broder #16 for the white lacing stitches. You can substitute regular cotton floss, too – just try different weights and combinations, to see what works best. Higher numbered (finer) perle cottons (8 and 12) will work well for foundation stitches on 1/8″ gingham.
With larger checks, heavier perle cottons (3 and 5) are a good choice for foundation stitches.
Tools: You’ll need a hoop, since tensioning the stitches correctly is very important. If your stitches are too loose, they can look floppy (especially on larger checks). If your stitches are too tight, the fabric will pucker.
For needles, you’ll want crewel embroidery needles in whatever size works well with the thread you choose, and you’ll also want a tapestry needle that will fit any of the threads you’ll use for the lacing stitches.
With the threads I’ve been using on the designs I’ve been showing you, I find a #7 or #8 crewel needle works well for the foundation stitches, and a #26 tapestry needle works fine for the lacing stitches.
A pair of scissors is always a good thing to have on hand when doing any kind of embroidery, and for chicken scratch, you’ll also want a pattern, unless you’re just fiddling about for the fun of it.
Working the Lacing Stitches
And now it’s time to do the lacy parts.
At this point, switch to a tapestry needle. The blunt tip of the tapestry needle works better with the lacing stitches, because it won’t catch on the foundation stitches.
I used two strands of coton a broder 25 in purple for the flowers.
Bring the needle to the front just to the side of the corner of the yellow foundation stitch where the inside tip of the petal should be.
Pass underneath the corners of the foundation stitches that hold the petal in shape. In the pattern, you can see where these corners are, because the petal element just touches them in the pattern.
Don’t pick up any fabric as you lace under these corners. The corners of the foundation stitches will hold the shape of the petals in place.
Once you’ve passed under both corners, going up under one and down under the corner across from it (as shown above), you’ll take your needle down into the fabric on the other side of the yellow corner stitch, right next to where you first emerged to make the petal (shown by the green dot in the photo above).
The green leaves are made in the same way – coming up on one side of the corner stitch where the leaf originates (the pointed part of it), passing under the corner stitch indicated in the pattern to hold the leaf shape in place, and going right back down on the other side of the corner stitch where you first emerged.
Once all the flower and leaf stitches are finished, move on to the white lacing stitches in the adjacent sections.
The white lacing stitches are made in the same way as the flowers, following the path to each anchor stitch, as indicated in the pattern.
Bring your needle up slightly under and next to one corner of the foundation stitch on any corner of the white square.
Instructions
- Start by hooping your fabric. I prefer to hoop my work for most of my embroidery projects. This keeps your fabric taut and makes it easier to have even stitches.
Thread your needle with your selected thread.
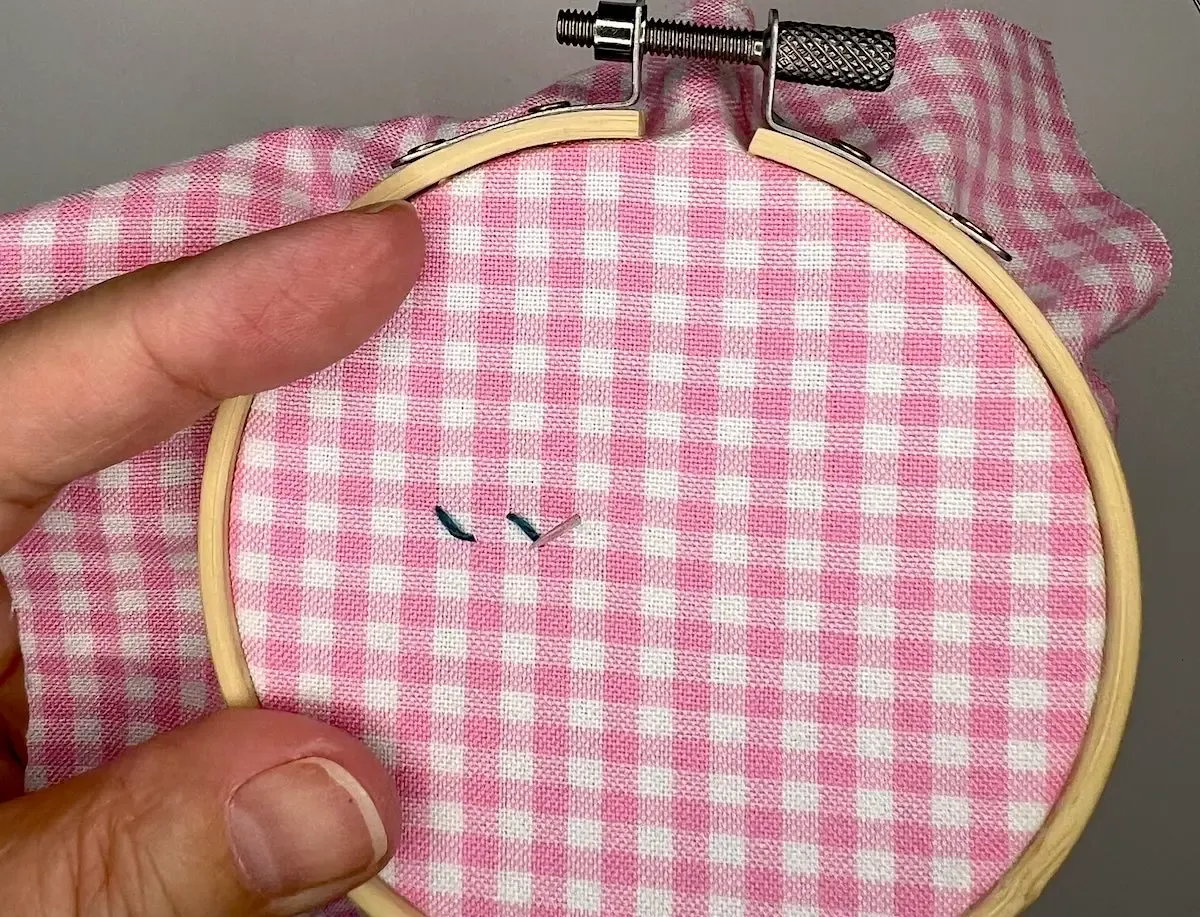
With chicken scratch embroidery, you are using the woven squares on the fabric as your guide for your stitches. No marking on your fabric is required!
You can make the stitches in the solid color squares, in the white squares or in the blended squares. It's your preference. Each makes the final design look a little different.
Start by brining your needle up at the upper left corner of where you'd like your first cross stitch.

Tegs:
Search
Recent Posts
-
Cluckin' Cute: Crochet a Chicken Hot Pad to Add Charm to Your Kitchen
Apr 22 2025
-
How to Crochet a Chicken Coaster: Step-by-Step Instructions
Apr 24 2025
-
Explore the History and Origins of Chicken Scratch Embroidery
May 1 2025
-
Make Your Kitchen Cheerful with Crochet Chicken Pot Holders: Fun Patterns and Easy Instructions
May 30 2025
Subscribe to Updates
Get the latest posts and fashion insights directly in your inbox.