Brother SE625 Review: The Ultimate Sewing and Embroidery Machine
Brother SE625: A Comprehensive Review of This Versatile Machine
Brother SE625: A Comprehensive Review of This Versatile Machine
Quick Comparison Chart
Now it’s time to go into a little more depth on some of the similar features between these two nearly identical computerized embroidery machines.
Sewing Features: Stitches, Presser Feet, and More
Both machines contain 103 built-in stitches. The complete breakdown can be seen in my more thorough Brother SE600 review post.
The same seven sewing accessory feet are included with both machines: a spring action zigzag foot, buttonhole foot, button sewing foot, overcasting foot, monogramming foot, zipper foot, and blind stitch foot. These allow you to accomplish most sewing tasks.
Additional sewing feet can be purchased, such as a spring-action quilting foot, walking foot, side cutter overlock foot, or 1/4″ piecing foot.
The maximum sewing speed is 710 stitches per minute, which is a little slower than many of Brother’s computerized sewing and quilting combination machines.
Both the Brother SE600 and Brother SE625 are free-arm sewing machines, meaning when the flat-bed compartment at the front is removed, a small cylindrical arm remains.
This facilitates sewing tubular items such as jean hems and shirt sleeves. Or sewing doll clothes, which is the case for this mom of daughters! You also have to remove the free arm to insert the embroidery arm.
Embroidery Features: Hoop Size, Touch Screen, and More
The maximum embroidery field area is 4″x4″ on both the Brother SE600 and SE625. One 4″x4″ hoop is included with your purchase.
While this is much smaller than the 5″x7″ hoop size of the Brother PE800 embroidery machine or SE1900 combo machine, you’ll be able to monogram and embroider most small items.
For your reference, below is the 5″x7″ hoop that came with my Brother SE1900 with the 4″x4″ hoop of the Brother SE625 and Brother SE600. (If you’re worried about the small 4″x4″ size, you might enjoy reading: What can you embroider with a 4×4 hoop?)
Set-up
How easy is it to set up the machine? Well, if you are looking to sew, it is pretty easy to set up the machine. However, you will need to do a might more work if you are thinking about monogramming or embroidery.
Nevertheless, with the right instructions, you can get it done in a short time. To install the embroidery area, you must attach the foot and the unit of embroidery to the machine. The fabric is then passed through the hoop, which in turn is attached to the unit.
You should already know the type of thread to use as well as the size of your needle.
Buttonhole Styles
The Brother SE625 offers you up to eight buttonhole stitches. The advantage of this is that you can make a relatively wide variety of buttonholes when sewing.
One issue that many have with machines is that they sometimes don’t create good-sized buttonholes. However, you don’t have to worry about that when it comes to the Brother SE625. When you place the button in the back of the buttonhole presser foot, the result is buttonholes that are just the right size that you need.
Display
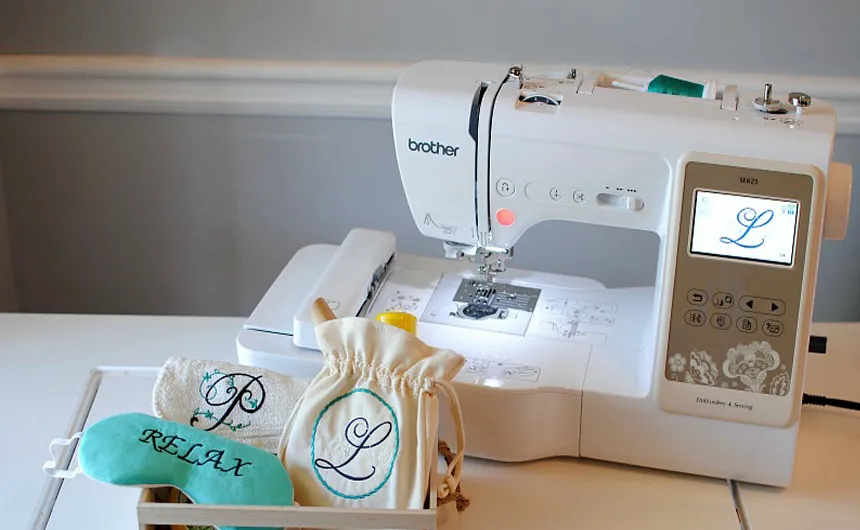
The LCD screen of this machine is yet another thing that makes it one of the best of its kind on the market. The 3.2″ LCD screen found here might be small compared to most screens, but you will find that it increases the overall versatility of the machine. It is a colored screen, which is important because it allows you to see the color of the threads that you want to use. This model comes with a rich display that we found to be well-detailed, comfortable to use, and highly responsive.
If you are concerned with embroidery, then this screen is a must-use for you. Why? Because the screen is where the embroidery design selection takes place.
If you want to embroider your material, you will select the type of stitch that you want. To that end, it is great that the machine will show you a preview of what the stitch will look like when done. Apart from showing you what the final product will look like, the Brother SE625 also will suggest the best presser foot for your stitching so that you can get the best results.
Are you stuck thinking about how you can apply certain functions of the machine? Then do not fret because the Brother SE625 is built to help you. It can display up to eight tutorials on how to use certain functions of the machine. These tutorials can be viewed by pressing the HELP key that lies under the LCD screen. It is clear to see and easy to follow.
The screen also makes it easy for you to change settings like sounds, thread cutting, reverse stitching, and more.
When it comes to embroidery, this screen comes in very useful. With the screen, you can choose the pattern that you want. There are several patterns already built into the machine, and you can also import your designs via the USB port.
After you have selected the pattern you want, the screen allows you to change the pattern style with just the touch of a finger. Some of the things that you can adjust here include the size, thread colors, the shape, and more.
With this excellent screen, you will find it easier to complete your tasks and make great designs.


Tegs:
Search
Recent Posts
-
Brother PE Design Next V9: Take Your Embroidery to the Next Level
Apr 14 2025
-
Troubleshooting Your Brother PE770 Embroidery Machine: A Comprehensive Guide
Apr 16 2025
-
Brother CE5500PRW: A Review of the Features and Capabilities
Apr 16 2025
-
Bordar coches con máquinas de coser Brother: Encuentra la máquina ideal para tu pasión
Apr 16 2025
Subscribe to Updates
Get the latest posts and fashion insights directly in your inbox.