Amigurumi Male Doll Pattern: Create Adorable Crochet Dolls for Boys
Amigurumi Male Doll Pattern: Detailed Instructions for Creating Unique and Charming Dolls
Amigurumi Male Doll Pattern: Detailed Instructions for Creating Unique and Charming Dolls
Ears
Skin Colour
Rnd 1. MR 5sc
**Ears same height with the eyes
Light yellow
**ch1, turn after each row
Rnd 1. ch16, (2nd ch from the hook) 7*(sc, inc), sc [22]
Rnd 2-3. 22sc (2 rows)
Rnd 4. 5sc, inc, 10sc, inc, 5sc [24]
Rnd 5-6. 24sc (2 rows)
Rnd 7. 5sc, inc, 12sc, inc, 5sc [26]
Rnd 8-9. 26sc (2 rows)
Rnd 10. 6sc, inc, 12sc, inc, 6sc [28]
Rnd 11-13. 28sc (3 rows)
Adding Freckles To Our Crochet Dolls
To add the freckles to our dolls, we’ll be creating a series of simple knots that will lay on top of the fabric. For Advent Adam, I used a brown embroidery thread that was similar to the hair colour I had chosen but for Advent Addy, I didn’t have an embroidery thread to match so I used the yarn that I used for her hair cap to embroider her freckles.
To use yarn instead of embroidery thread, I split the plies of my yarn apart and used two plies of the yarn held together in lieu of embroidery thread. For smaller freckles, use one ply of yarn but just be careful not to pull too tightly on the strand as it will be much weaker and could likely break when pulled tightly.
For my little boy doll, I did three freckles on each cheek and for my little girl doll, I did freckles that span from one side of her face to the other. How many freckles you do is totally up to you.
Adding Freckles
- Using brown embroidery thread held double (or whatever colour you’ve chosen for your freckles), insert needle through back or side of head and out through the stitch located in the cheek.
2. Tie a knot in the thread as close to the fabric as you can.
3. Insert the needle back into the doll in the next closest stitch possible. The freckle should sit on top of the post of the stitch.
4. Bring the needle out in another spot on the cheek, where you’d like to place your next freckle.
5. Repeat Steps 2 – 4 until you have reached your desired number of freckles on that cheek.
6. Repeat Steps 1 – 5 on second cheek. (see image of completed embroidery below)
Feel free to experiment with your placement of your freckles. As you see on Advent Addy, I have added freckles across her nose and both cheeks where Advent Adam has 3 freckles per cheek.
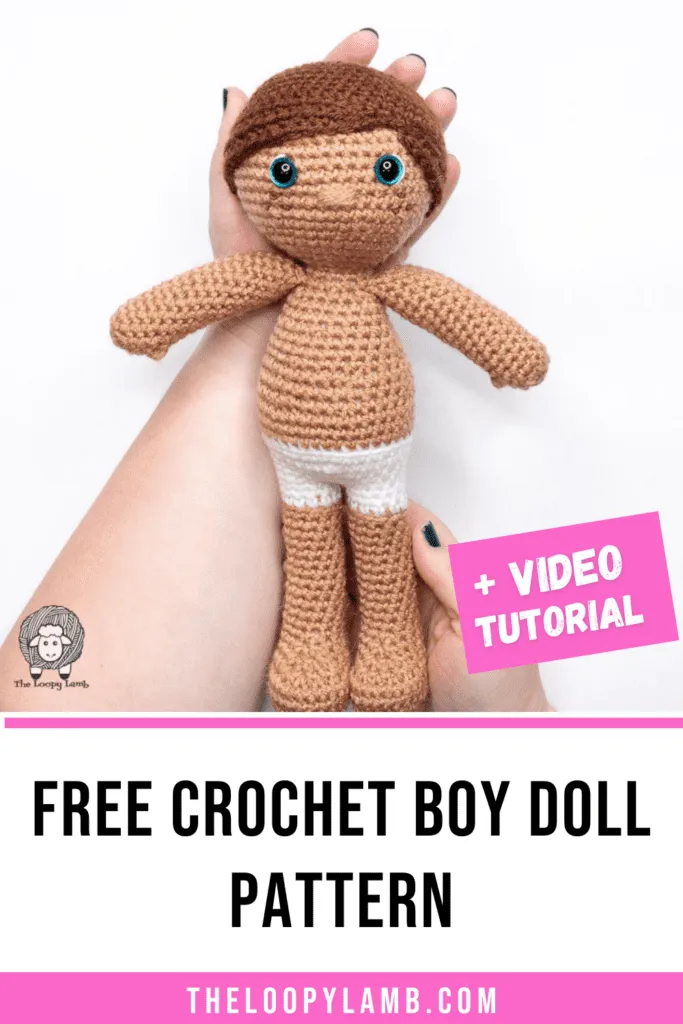
Week 2 Video Tutorial – Doll Head & Hair Cap
Week 2
It’s Week 2 of the 2023 Amigurumi Advent Calendar Crochet Along and this week we will be continuing to add to the body of this free crochet doll pattern. Last week we made the first and second leg and torso of our dolls. This week we will be crocheting the head and then the hair cap of our dolls.
I’ve shared tips below for troubleshooting the fit of your haircap for your doll as well.
Doll Body Continued:
Round 22: (SC, SCINC) X 6. (18)
Round 23: SC, SCINC, (SC 2, SCINC) X 5, SC. (24)
Round 24: (SC 3, SCINC) x 6. (30)
Round 25: SC 2, SCINC, (SC 4, SCINC) x 5, SC 2. (36)
Round 26: SC around. (36)
Round 27: (SC 5, SCINC) x 6. (42)
Round 28: SC 3, SCINC, (SC 6, SCINC) x 5, SC 3. (48)
Rounds 29 – 35: SC around. (48) – Place safety eyes in Round 32 with 7 sts in between them.
Round 36: SC 3, SCDEC, (SC 6, SCDEC) x 5, SC 3. (42)
Round 37: (SC 5, SCDEC) x 6. (36)
Round 38: SC around. (36)
Round 39: SC 2, SCDEC, (SC 4, SCDEC) x 5, SC 2. (30)
Round 40: (SC 3, SCDEC) x 6. (24)
Round 41: SC, SCDEC, (SC 2, SCDEC) x 5, SC. (18)
Round 42: (SC, SCDEC) x 6. (12)
Round 43: (SCDEC) x 6. (6)
FO leaving a long tail. Thread the tail onto a tapestry needle and weave through the FLO of the last round and cinch the top closed (See this done in my Ultimate Finish Tutorial ). Weave in ends.
Detective Sherlock – Amigurumi Male Doll
To begin with, here is a Sherlock reminiscent of Benedict Cumberbatch in the BBC version of the stories. Long-smocked, be-scarved, he is indisputably ready to solve crimes.
The full article about this pattern is here:
more info about upper photo project here.

Tegs:
Search
Recent Posts
Subscribe to Updates
Get the latest posts and fashion insights directly in your inbox.